


Manual: tarm Series
page 11 / 54
8.1.2. Static IP mode
Depending on the number of laser systems that shall be used, there are two options for
connecting the computer to the laser. If only one laser system shall be used, a normal direct
network cable between the laser system and the computer is sufficient. This can of course be
extended with a normal switch. This option is discussed in chapter 8.1.2.1.
The other option is that there are more than two laser systems, that shall be connected to the
computer at the same time. To find more details on this kind of setup, please head to chapter
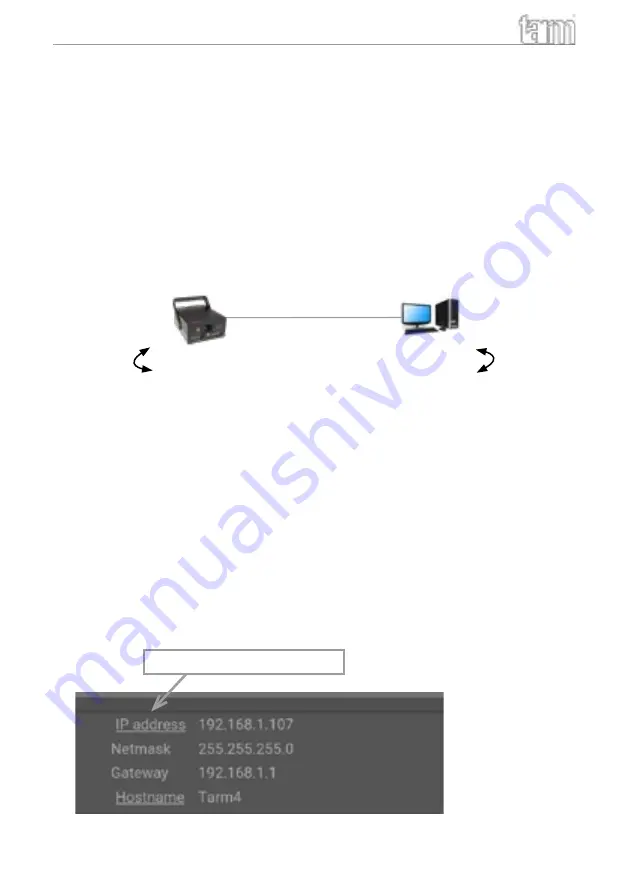
8.1.2.1. Direct connection
Tarm laser
Computer
192.168.1.107
192.168.1.123
Ethernet cable
192.168.1.10
192.168.1.35
or
or
Laser devices have their own default IP adress 192.168.1.107. In order to establish the connec-
tion, connect the laser device through the ethernet cable directly with the laptop or PC.
The computer must be set to a static IP address in the same address space than the tarm laser ,
but it MUST NOT be the same IP address, for example 192.168.1.10 or 192.168.1.35 are OK. See
chapter 8.1.3 on how to set IP address for the PC properly.
a. After setting the unique IP at your computer, use previously set IP address to access the
laser configuration panel by typing it to the browser address bar of the computer or any
other (mobile) device that is properly connected to the same local area network as the
tarm laser system. The factory default is: 192.168.1.107
b. In order to change the default IP address of the laser device, connect to the user panel as
described above. Click on the word „IP address“ in the user panel in order to change the
static IP address. This IP address has NO EFFECT if the laser is connected through DHCP
(as described in chapter 8.1.1)
To change IP address, click here.


