background image

Targus 5-button Rechargeable Wireless Mouse

Your

computer’s

operating

system

automatically

detects the new hardware and begins installing the
appropriate drivers.

4 If applicable, follow any on-screen instructions to

complete the driver installation.

F

OR BEST RESULTS

,

YOU SHOULD CHARGE THE MOUSE VIA THE SUPPLIED

USB

CHARGE CABLE FOR AT LEAST

8

HOURS BEFORE USING IT

. S

EE

“C

HARGING THE

M

OUSE

ON PAGE

7.

Installing the Batteries

1 Remove the battery cover from the bottom of the

mouse by pressing the tab located on the bottom and
lifting it off.

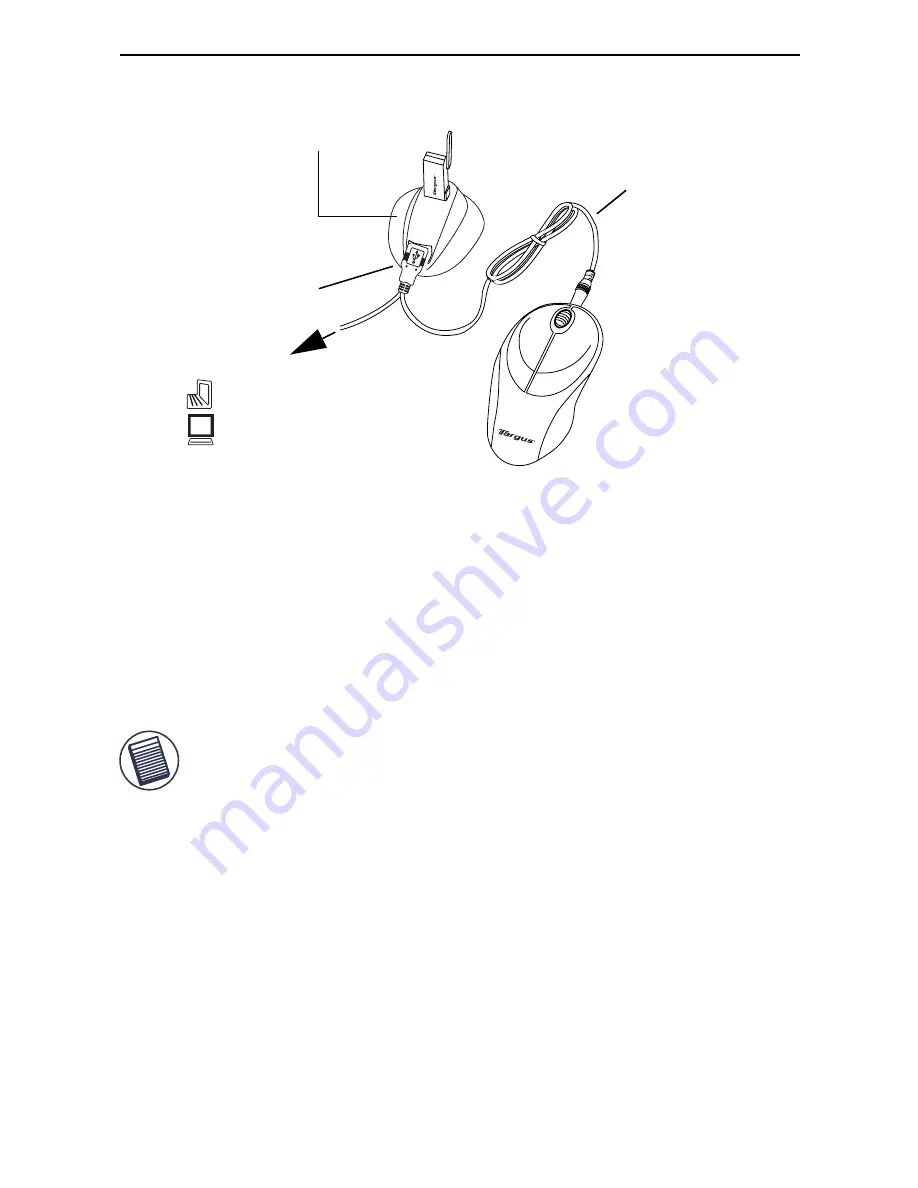
Charge port

computer

Extension seat

To

Charge
cable

Notebook

Desktop

3

Содержание Rechargeable Wireless Notebook Mouse

Страница 1: ...Website at www targus com Features and specifications subject to change without notice 2007 Targus Group International Inc and Targus Inc AMW10US 410 0085 001B USER GUIDE rechargeable wireless desktop...

Страница 2: ...IRELESS MOUSE Congratulations on your purchase of the Targus 5 button Rechargeable Wireless Mouse This mouse offers a charge cable to ensure continuous use without power interruption and an extension...

Страница 3: ...nterference from other wireless devices This extension seat allows you to place the receiver closer to your mouse while in use 1 Connect the extension seat to an available USB port on your Desktop PC...

Страница 4: ...ctions to complete the driver installation FOR BEST RESULTS YOU SHOULD CHARGE THE MOUSE VIA THE SUPPLIED USB CHARGE CABLE FOR AT LEAST 8 HOURS BEFORE USING IT SEE CHARGING THE MOUSE ON PAGE 7 Installi...

Страница 5: ...f each battery match the polarity indicators inside the battery housing WARNINGS USE ONLY HEAVY DUTY NIMH BATTERIES NEVER USE ALKALINE IF YOU INTEND TO USE THE RECHARGING FEATURE AVOID MIXING NEW AND...

Страница 6: ...of the charge cable to the mouse as shown 5 Alternatively you can connect the supplied charge cable s USB connector directly into an available USB port on your computer NOTE TO CONTINUOUSLY CHARGE THE...

Страница 7: ...rnate a Click Start b Click Control Panel c Click Performance and Maintenance Skip in Classic View d Click Power Options e Make sure System Standby and System Hibernates under Plugged in are set to Ne...

Страница 8: ...se the connect button located on the bottom of the mouse The receiver s status light flashes while it scans the identification codes When synchronized the status light stops flashing This process must...

Страница 9: ...id using the mouse on a metal surface Metals such as iron aluminum or copper shield the radio fre quency transmission and may slow down the mouse s response time or cause the mouse to fail temporarily...

Страница 10: ...les may be related to repeti tive motion an improperly set up work area incorrect body posture and poor work habits To reduce the risk of injury follow these precautions Stand stretch and move around...

Страница 11: ...the USB port on your computer or to the extension seat and that the extension seat s cable is connected to your PC Make sure you have established a communication link between the mouse and its receive...

Страница 12: ...at if necessary Increase the distance between the mouse s receiver and the base units of other wireless devices Turn off any wireless devices and their base units that are near the mouse s receiver If...

Страница 13: ...and workmanship for one year If your Targus accessory is found to be defective within that time we will promptly repair or replace it This warranty does not cover accidental damage wear and tear or co...

Страница 14: ...ntenna Increase the separation between the equipment and receiver Connect the equipment into an outlet on a circuit different from that to which the receiver is connected Consult the dealer or an expe...

Отзывы: