background image

8

Targus Wireless Multimedia Presenter

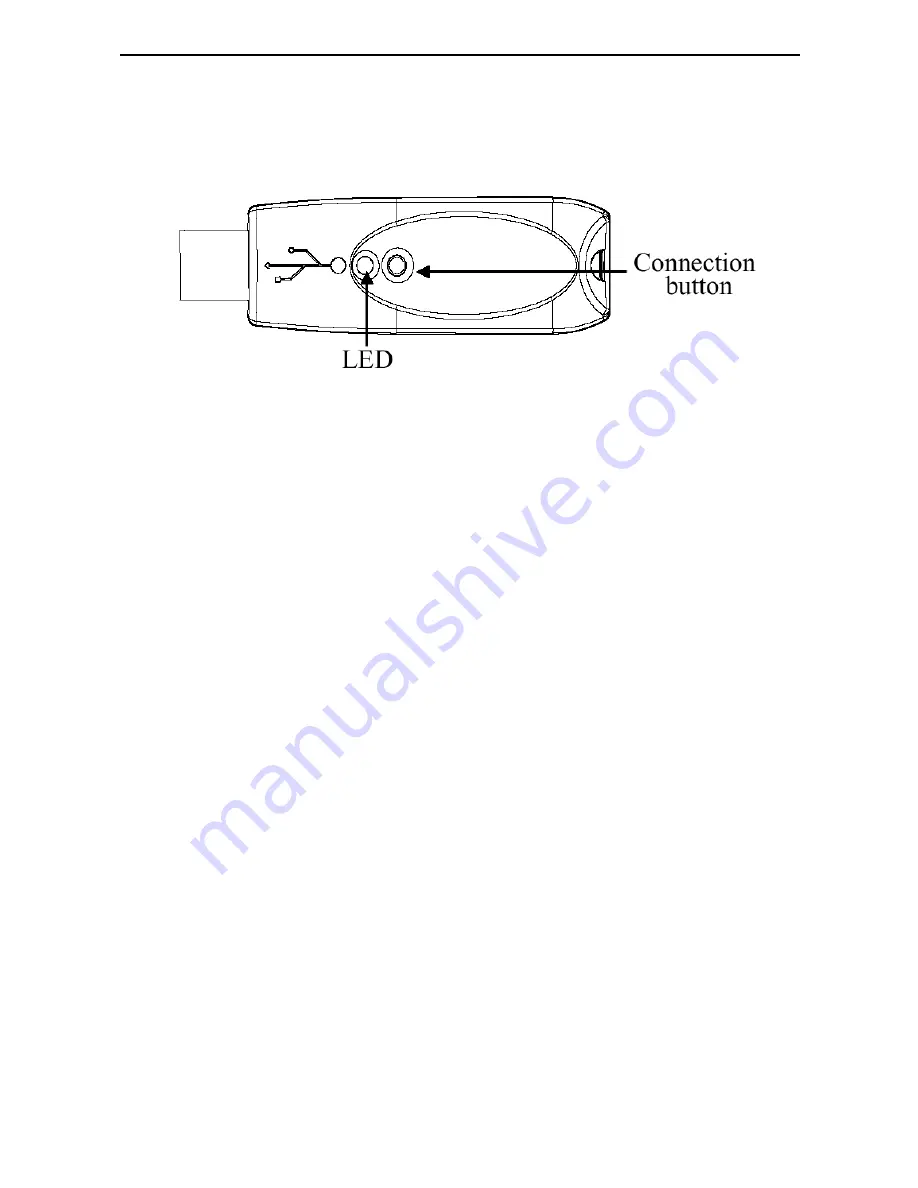
1 Press and release the Connection button on the 

receiver.

The receiver’s LED turns off.

2 Press and release the Connection button, located on the 

bottom of the presenter.

The receiver’s LED resumes glowing when the set up 
has been completed.

You are now ready to use the presenter.

Using the Presenter

The presenter’s default setting is Mouse mode. To change 
modes, press the Mode select button. The mode indicator 
LED illuminates to indicate the mode you are currently in:

› Green LED - Mouse mode

› Red LED - Presentation mode

› Yellow LED - Multimedia mode

Содержание 400-0170-001A

Страница 1: ...RONTO HONG KONG SYDNEY Targus Wireless Multimedia Presenter USER S GUIDE Making Your Mobile Life Easier Making Your Mobile Life Easier Visit our Web site at www targus com Features and specifications are subject to change without notice 2004 Targus Group International and Targus Inc 400 0170 001A ...

Страница 2: ...s 6 Windows 2000 XP Operating Systems 7 Establishing a Communications Link 7 Using the Presenter 8 Functionality 9 Mouse Mode 9 Presenter Mode 10 Multimedia Mode 11 Laser Pointer 12 Operating Hints 12 Maintaining the Trackball 13 Safety Measures 13 Specifications 14 Troubleshooting 15 Technical Support 16 Warranty 17 ...

Страница 3: ...RECTLY AS PROLONGED EXPOSURE CAN BE HAZARDOUS TO THE EYES MOMENTARY EXPOSURE FROM A LASER POINTER SUCH AS AN INADVERTENT SWEEP OF THE LIGHT ACROSS A PERSON S EYES MAY CAUSE TEMPORARY FLASH BLINDNESS SIMILAR TO THE EFFECT OF A CAMERA FLASH BULB ALTHOUGH THIS CONDITION IS TEMPORARY IT CAN BECOME MORE DANGEROUS IF THE EXPOSED PERSON IS ENGAGED IN A VISION CRITICAL ACTIVITY SUCH AS DRIVING ...

Страница 4: ...f its receiver and project a red laser pointer beam NOTE The actual effective distance may increase or decrease depending on the surrounding environment The Targus Wireless Multimedia Presenter also features primary and secondary buttons left and right mouse click buttons that emulate the page up down keys when in Presenter Mode and volume up volume down keys when in Multimedia Mode System Require...

Страница 5: ...he positive and negative ends of each battery match the polarity indicators inside the battery housing WARNINGS When replacing the batteries you may use alkaline or other heavy duty NiMH batteries Never combine an alkaline with a NiMH battery in a device Avoid mixing new and used batteries in a device 3 Slide the battery cover back into position until it clicks firmly into place ...

Страница 6: ...and Installing the Default Device Drivers 1 Plug the USB receiver into an available USB port on your computer Windows 98SE Me Operating Systems The Add New Hardware Wizard appears If it does not the operating system has installed the default driver automatically No other steps are necessary 1 Click Next The locate driver screen appears OFF ON ...

Страница 7: ...o other steps are necessary 1 Click Next The wizard searches for the appropriate device driver 2 Click Next then Finish to complete the driver installation Establishing a Communications Link After your computer detects the USB receiver and the driver software is installed you must establish a communications link between the presenter and its receiver BEFORE you can use the presenter Make sure that...

Страница 8: ...m of the presenter The receiver s LED resumes glowing when the set up has been completed You are now ready to use the presenter Using the Presenter The presenter s default setting is Mouse mode To change modes press the Mode select button The mode indicator LED illuminates to indicate the mode you are currently in Green LED Mouse mode Red LED Presentation mode Yellow LED Multimedia mode ...

Страница 9: ...y The presenter provides 3 working modes Mouse Mode In Mouse Mode the device will work as a Trackball Mouse and provide functionalities as follows NOTE The following keys do not work under the Windows 98 operating system Internet hot key E mail hot key ...

Страница 10: ...esenter Presenter Mode In Presenter Mode the device will work as a Wireless Presenter and provide the functionalities as follows NOTE The following keys do not work under the Windows 98 operating system Internet hot key E mail hot key ...

Страница 11: ...ltimedia Mode In Multimedia Mode the device will provide functionalities as follows NOTE The following keys do not work under the Windows 98 operating system Internet hot key Multimedia functions play pause volume up volume down E mail hot key ...

Страница 12: ...on Place the receiver at least 6 inches 15 cm away from all electrical devices such as your monitor speakers or external storage devices The presenter will enter a suspend mode at the same time your computer does To activate roll the trackball If your computer has a metal case that contains alumi num or magnesium use the presenter to the side The display panel may interfere with the radio frequenc...

Страница 13: ...place the trackball and the retainer Turn the retainer clockwise until it is secure Things to Remember Batteries General You must establish a communications link every time you change the batteries To extend the life of your batteries turn off the pre senter when not in use The LED will flash to indicate the batteries need to be changed Safety Measures Never point the presenter at people especiall...

Страница 14: ...r light or other safety hazards This is a Class II Laser Product Specifications Presenter Interface Wireless Radio Frequency Trackball Resolution Up to 300 DPI RF Channels 8 Security IDs 4096 Power supply Two AAA batteries Alkaline RF output power 0 dBm Frequency 2 4GHz Effective distance 66 feet 20 m Power consumption Working mode 45mA Standby mode 700 uA Sleep mode 300 uA Weight without batterie...

Страница 15: ...are installed Make sure you have established a communications link between the presenter and its receiver See Establish ing a Communications Link on page 7 What do I do if the response time of the presenter is slow or the presenter intermittently stops working Turn off any wireless devices and their base units that are near the presenter s receiver Increase the distance between the presenter s rec...

Страница 16: ...terference from other radio frequency devices The presenter and its receiver must be set to the same identification code to function properly To reestablish a communications link See Establishing a Communica tions Link on page 7 Technical Support US Internet www targus com support asp Australia Internet www targus com au Email infoaust targus com Monday through Friday 8 30 a m 08 30 to 5 30 p m 17...

Страница 17: ... records or data nor any consequential or incidental damages even if Targus has been informed of their possibility This warranty does not affect your statutory rights Warranty Registration at http www targus com registration asp Regulatory Compliance This device complies with Part 15 of the FCC Rules Operation is subject to the following two conditions 1 This device may not cause harmful interfere...

Страница 18: ...to correct the interference by one or more of the following measures Reorient or relocate the receiving antenna Increase the separation between the equipment and receiver Move the computer away from the receiver Connect the equipment into an outlet on a circuit different from that to which the receiver is connected Intel and Pentium are registered trademarks of Intel Corporation Windows is a regis...

Отзывы: