background image

Note!

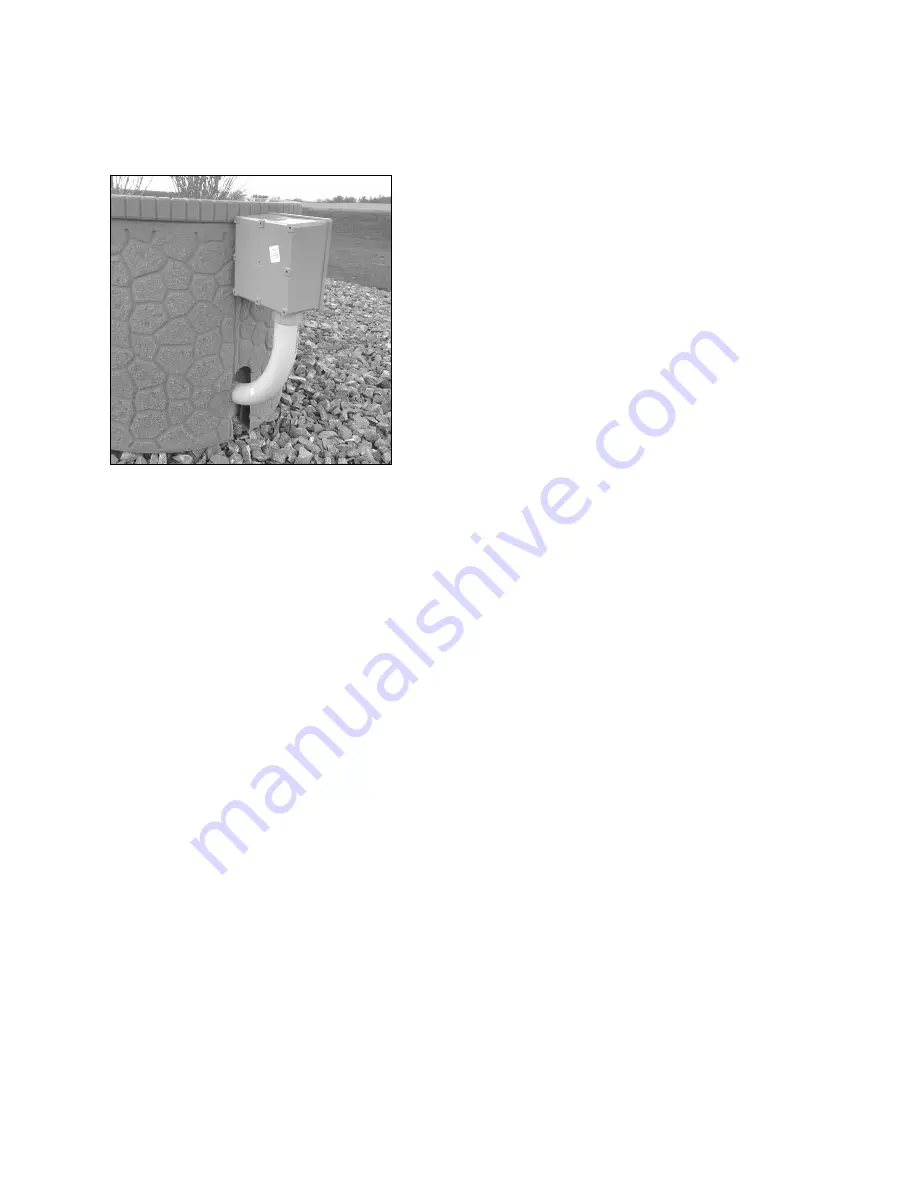
 If the septic cover has an electrical conduit protruding from the side, there are some 

additional steps to take. If it doesn’t, these steps can be skipped. 


Septic tank with an electrical conduit. 

1.


Set the well base over the cover and rotate the base until the pockets in the top that 
hold the uprights are facing the desired position. 

2.


Mark the spot on the base where it meets the electrical conduit.  

3.


Place the well base next to the septic cover upright on the ground. 

4.


Measure from the ground to the top of the electrical conduit and add ½ inch. 

The added 

½ inch gives you some allowance for readjustment. 

5.


Make a mark on the well base directly above the mark you made earlier that marks the 
conduit. Make sure to add a ½” in height. 

6.


Cut out the template provided.  Place template on the top mark straight down centered 
over the bottom. Outline the template with the inker. 

7.


If you have a 2 ¾ hole saw, cut out the hole you marked using the template provided 
and the inker. If a hole saw is not accessible, cut a rectangular hole with a hand saw. 
Starting at the bottom of the base, cut along the marks you made with the template.  

8.


Test fit the well base over the septic cover for proper fit. 


Содержание Wishing Well

Страница 1: ...rovides guidelines on how to set up the wishing well It covers prepping your area as well as the steps needed to secure the well in the way in which the product is intended to be used Steps may change according your unique situation Basic Assembly Manual ...

Страница 2: ...8 inch circle in the area you chose Place the basin in on the circle and make sure it doesn t wobble Secure TankTop Cover products against tipping over Two 2x4 inch boards not included can be cut to 33 inches in length and laid across the bottom of the base Next several bricks rocks or sandbags can be placed on top of the 2x4 inch boards to add weight If your yard is likely to have high winds cons...

Страница 3: ...saw recommended a regular hand saw will work too 7 16 open end wrench BIK Inker marker The following items are included Template Flat washers Wing nuts Stainless steel hoop with three assembly straps Hex head bolts Carriage bolts Additional ideas to secure TankTop Cover products against tipping over If you chose not to secure the product with the securement straps the base can be secured in other ...

Страница 4: ...e over the septic cover for proper fit Note If the septic cover has a vent pipe it may have to be shortened to clear the planter inserts Septic tank with a vent pipe that may need to be shortened 1 Remove the vent cap 2 Cut the vent pipe off leaving about 2 5 inches above the lid using a saw 3 Replace the vent cap 4 Drill 6 holes with the inch drill it into the well base just below the upper ring ...

Страница 5: ...e ground to the top of the electrical conduit and add inch The added inch gives you some allowance for readjustment 5 Make a mark on the well base directly above the mark you made earlier that marks the conduit Make sure to add a in height 6 Cut out the template provided Place template on the top mark straight down centered over the bottom Outline the template with the inker 7 If you have a 2 hole...

Страница 6: ...d a flat washer included and wing nut included to secure the ends of the strap together 3 Take the remaining three straps already fastened each 1 foot in length and stand them straight upward Septic lid with the hoop installed properly 4 Place the well base over the septic cover that you just installed straps onto Bend the foot long straps outward toward the well base 5 Mark a spot to drill a hole...

Страница 7: ...the well base these will be used to secure the base to the straps 8 Locate three 1 carriage bolts that match and are painted included and wing nuts included Insert the carriage bolts through the well base inwards bend the straps until they line up with the carriage bolts Put on wing nut and tighten firmly Repeat for all three straps Removing for maintenance Remove the planters and set aside Reach ...

Страница 8: ...s may have to be adjusted with a inch drill bit Upright with 1 1 4 inch bolt and a 1 inch bolt near their locations 2 Using the 1 inch hex head bolt included and a flat washer bolt the upright post to the base but do not tighten 3 Repeat steps 1 2 for the other upright post 4 Place the roof section on top of the two upright posts using the 1 inch hex head bolt and a flat washer The roof section ma...

Страница 9: ...e upright poles and the roof section evenly 6 Locate the planter inserts If inserts are going to be used as flower planters drill a few inch holes into the bottom of the inserts to allow excess water to drain Fill with one cubic foot of potting soil and plant your desired flowers ...

Отзывы: