Tandberg Data
StorageLoader
StorageLoader Quick Installation Guide
13
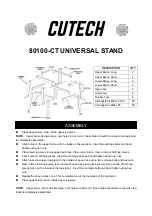
▲
Exit
Loader SCSI ID
▼
Select
▲
Exit
Drive SCSI ID
▼
Select
To set the SCSI addresses for the StorageLoader and the built in tape drive, refer to
the User and Installation Manual for more information. You may also wish to
reserve a magazine slot for a cleaning cartridge, set the auto clean option and set a
security password at this time. Once some settings are changed, the StorageLoader
and the drive may, if required, automatically reboot.
After the media is loaded, the proper loader and drive SCSI ID’s are selected, and
the proper SCSI cabling and termination Setup installation of the tape application
software can commence. Before installing the application software the system
should be started in the following sequence.
•
Turn on the Tandberg StorageLoader
•
Turn on the host Computer
During the operating system boot process the SCSI host adapter driver should detect
the StorageLoader and DLT VS160 Tape drive via the standard SCSI bus scan that
occurs during system start up. It may be necessary to set some options in the SCSI
host adapter set up program. To see this process occurring, please consult your SCSI
host adapter documentation for more information related to detecting target devices.
The system is now ready to have the tape application software installed, please
follow the directions supplied with your application software