


H T T P : / / G L O B A L . T A L K S W I T C H . C O M
5
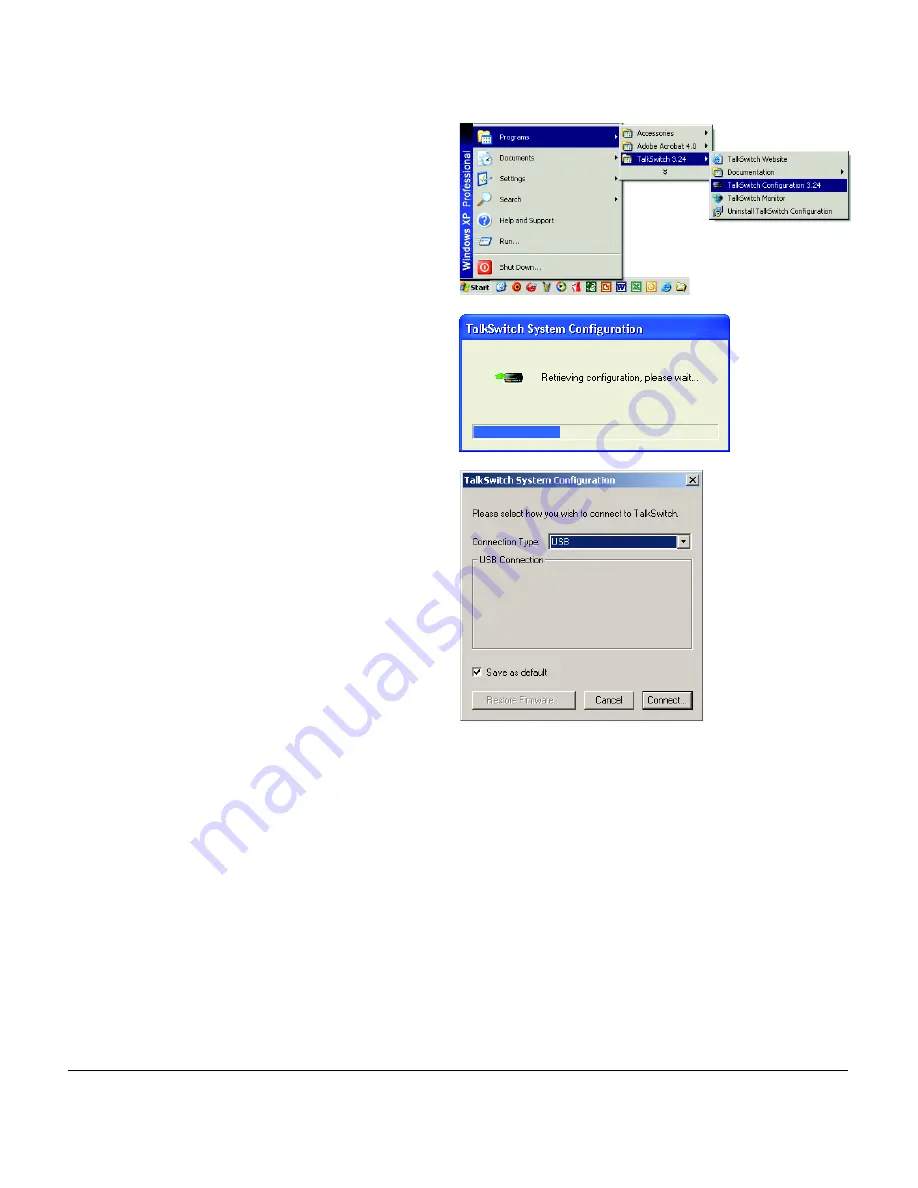
STEP 3 — OPEN THE TALKSWITCH CONFIGURATION SOFTWARE
Double-click the
TalkSwitch
icon on your
Desktop (this icon was created during the
software installation), or from the
Start
menu,
select
Programs
, select the
TalkSwitch 3.24
folder, and click
TalkSwitch Configuration 3.24
.
TalkSwitch Software will now attempt to detect
your unit, displaying progress on a “Detecting
TalkSwitch Units” window.
When software succeeds in detecting your
TalkSwitch, a progress bar appears on the screen
showing the connection to TalkSwitch in
progress. When the bar disappears, the
TalkSwitch System Configuration
window
will appear.
If software was unable to detect your TalkSwitch
automatically, a dialog box opens requesting you
to select the connection type.
LAN connection:
From the
Connection Type
menu,
select
Ethernet
and click
Connect
.
USB connection:
From the
Connection Type
menu,
select
USB
and click
Connect
.
Once connection has been established, the
TalkSwitch System Configuration window will appear.
NOTE: If you encounter difficulties opening the TalkSwitch configuration software,
check that all your wires and plugs are securely connected.
Localization Setting
Before configuring your system, you will need to select the location where the system
is currently installed:
1.
In the
TalkSwitch System Configuration
window, select
System Information
and
then
Administration
from the menu at the left of the window.
2.
In the
Localization Settings
section, click the dropdown list box to select where the
system is currently installed. The default International location is UK.
Users in Ireland should set the localization setting to Ireland.


