5
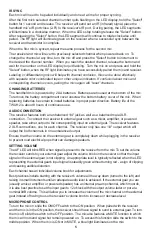
IR SYNC
Each mic will need to be paired individually and one at a time for proper syncing.
A
IWHUWKH¿UVWPLFVVHOHFWHGFKDQQHOQXPEHUTXLWVÀDVKLQJRQWKH/('GLVSOD\KROGWKH6HOHFW
button for 1 second and release. The receiver will send out an IR (infrared) signal, place the
handheld mic’s IR port close (2-8") to the receiver's IR port. During pairing, the LED segments
will illuminate in a clockwise manner. When the LEDs stop rotating release the "Select" button.
After releasing the "Select" button, the LED segments will continue to rotate clockwise until
paired. The RF light will illuminate green on the receiver when a successful sync between the
receiver and transmitter is complete.
W
KHQWKH¿UVWPLFLVV\QFHGUHSHDWWKHVDPHSURFHVVIRUWKHVHFRQGPLF
The receiver and mic will revert to previously selected channel when powered back on. To
change the channel at any time, turn the mic off and press the "Select" button to increment to
the desired the channel number. When you reach the desired channel, release the button and
ZDLWIRUWKHQXPEHURQWKH/('GLVSOD\WRTXLWÀDVKLQJ7XUQWKHPLFRQDQGSUHVVDQGKROGWKH
"Select" button, when the RF light illuminates you have successfully paired the mic and receiver.
Labeling or differentiating mics will help with channel confusion, this can be done effectively
with separate color coordinated tape or other unique indicators. If confusion about mics and
corresponding channels occurs, pairing the mics again will "reset" channels.
CHANGING BATTERIES
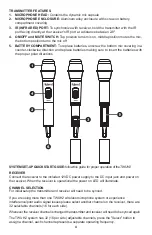
The handheld mic is powered by 2 AA batteries. Batteries are housed at the bottom of the mic.
To remove the battery compartment cover unscrew the bottom battery cover of the mic. When
replacing batteries be certain to install batteries in proper polar direction. Battery life of the
TWUH2 is about 8 hours of continuous use.
AUDIO CONNECTION
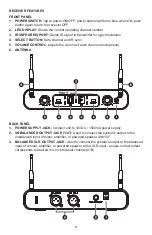
7KHUHFHLYHUIHDWXUHVERWKDQXQEDODQFHGMDFNDVZHOODVDEDODQFHGPDOH;/5
FRQQHFWLRQ7RFRQQHFWWKHUHFHLYHUWRH[WHUQDOJHDUVXFKDVDPL[HUDPSOL¿HURUSRZHUHG
speaker, take either output to the corresponding input on external gear. The receiver features
;/5FRQQHFWLRQVRQHIRUHDFKFKDQQHO7KHUHFHLYHURQO\KDVRQHRXWSXWZKLFKZLOO
output the both channels in one unbalanced output.
Ensure that the volume on the external gear is completely down while plugging in the receiver
to prevent loud electrical pops that can damage speakers.
SETTING VOLUME
The AF LED will blink RED when signal is present to the receiver from the mic. To set the volume
the receiver sends to your external gear adjust the volume knob on the receiver so that the input
VLJQDORQWKHH[WHUQDOJHDULVQRWFOLSSLQJ$QDSSURSULDWHOHYHOLVW\SLFDOO\UHÀHFWHGZKHQWKH/('
representing the external gear's input signal is steadily green without turning red - a sign of clipping
and causing audible distortion.
Each channel has an individual volume knob for adjustments.
Best practices include starting with the receiver's volume all the way down (turned to the left) and
raising in small increments until an adequate audio level is achieved. If the external gear you are
XVXDOO\DPL[HUDPSOL¿HURUSRZHUHGVSHDNHUKDVDQLQWHUQDOSUHDPSFKDQQHOZKLFKPRVWGR
it is also best practice to set the input gain to 12 o'clock with the output volume fader or pot at a
nominal 0dB volume. This will allow you to increase the volume of the mic channel on the external
gear instead of having to use the receiver's volume knob to increase or decrease level.
MICROPHONE CONTROL
To turn the mic on, slide the ON/OFF switch to the ON position. When paired with the receiver
and the mic is in the ON position, the receiver should have signal to send to external gear. To turn
the mic off, slide the switch to the OFF position. The mic also features a MUTE function in which
the mic will not send signal but remain powered on. To access this function slide the switch to the
middle position. When the mic is ON or in MUTE, a blue light illuminates on the mic.
Содержание TWUH2
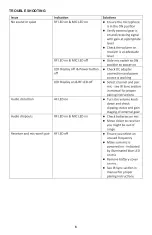
Страница 6: ...6 TROUBLE SHOOTING...
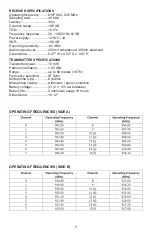
Страница 8: ...www talentaudio com 5 Year Warranty See talentaudio com for details...


