STEP 12
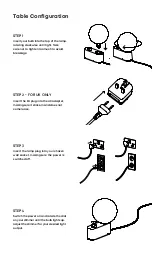
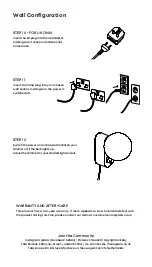
Switch the power on and rotate the dial on your
dimmer until the bulb lights up.
Adjust the dimmer for your desired light output.
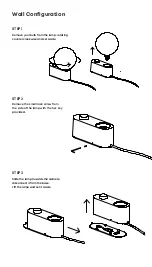
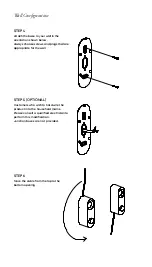
Wall Configuration
WARRANTY AND AFTER-CARE
This product has a two-year warranty. If there appears to be a functional defect with
the product during this time, please contact our team at [email protected].
STEP 11
Insert the lamp plug into your chosen
wall socket, making sure the power is
switched off.
STEP 10 - FOR UK ONLY
Insert the EU plug into the UK Adapter,
making sure it clicks-in and does not
come loose.
Join the Community
Instagram: @tala | Facebook: talaHQ | Pinterest: TalaLED | Tag: lighttoliveby
Tala Studios, 25B Vyner Street, London E2 9DG | +44 20 3026 3246 | [email protected]
Tala Europe B.V, Bertus Aafjeshove 40, Nieuwegein 3437JN, Netherlands


