background image


5. User 

setting 


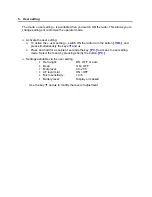
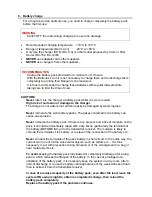
The mode « user setting » is available when you switch ON the radio. This allows you to 
change settings or customize the operator mode. 


¾

  Activate the user setting: 

o  To active the « user setting », switch ON the radio (turn the button 

[ VOL ]

, and 

press simultaneously the keys 


and 


o  Press and hold for a couple of seconds the key 

[ P0 ]

 to access to user setting 

mode. Select the menu by pressing shortly the button 

[ P0 ]


¾

  Settings available via the user setting. 

ƒ

  Retro-light:               

ON, OFF, or auto 

ƒ

  Beep :                                ON / OFF 

ƒ

  Mute level:        


0 to 255 

ƒ

  AF level mini:              

ON / OFF 

ƒ

  Micro sensitivity :             1 to 5 

ƒ

  Battery level:       


Display or masked 


    Use the key 


and 

 to modify the level of adjustment 


Содержание HL 680

Страница 1: ...HL 680 Radio Data Voice User Manual Version 01 2009 ...

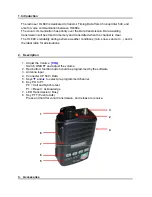
Страница 2: ...ility during extreme weather conditions rain snow sand etc and is the ideal radio for all situations 2 Description 1 Adjust the Volume VOL Switch ON OFF and adjust the volume 2 Red button function button could be programmed by the software 3 Antenna input 4 Connecter CP 540 Data 5 Keys and to select pre programmed channel 6 Key PO to P1 P0 Call and Synchro test P1 Reset Acknowledge 7 LED Transmiss...

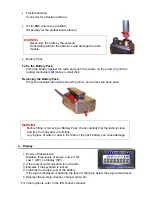
Страница 3: ...ow the arrow and remove the back pack 4 Display 1 Power of transmission Displays three levels of power Low 2 1W Low 1 2W no display 5W 2 If the level of communication is not muted 3 Indicates if the keyboard is locked 4 Indicates the charge level of the battery If the logo is displayed or flashing the level of charge is below the programmed level 5 Displays the working channel channel name etc For...

Страница 4: ...o turn the button VOL and press simultaneously the keys and o Press and hold for a couple of seconds the key P0 to access to user setting mode Select the menu by pressing shortly the button P0 Settings available via the user setting Retro light ON OFF or auto Beep ON OFF Mute level 0 to 255 AF level mini ON OFF Micro sensitivity 1 to 5 Battery level Display or masked Use the key and to modify the ...

Страница 5: ...rminals of the pack battery in short circuit In the same way the current can run out via the close metal objects such as collars etc It is thus necessary to act with precaution during transport or of the arrangement in a bag or near metal objects etc To avoid keeping the battery pack fully loaded or completely discharged for a long period which reduces the lifespan of the battery In the case of pr...

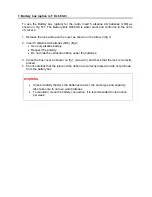
Страница 6: ... fig 2 Use only alkaline battery Respect the polarity Do not hide the extraction ribbon under the batteries 3 Close the box cover as shown on fig 1 arrow 2 and check that the lock is correctly placed 4 Check carefully that the joint and the ribbon are correctly placed and do not protrude from the battery box WARNING Check carefully that ALL the batteries are ALL the same type and capacity Also tak...

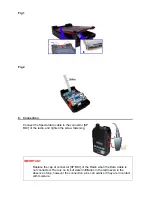
Страница 7: ...dio and tighten the screw fastening IMPORTANT Replace the cap of connector SP MIC of the Radio when the Data Cable is not connected There is no risk of water infiltration in the radio even in the absence of cap however the connection pins can oxidize if they are in contact with moisture 2 3 ...

Страница 8: ...CP 540 Press the key P0 to test the connection between systems The message CONNECT is displayed if the radios are able to connect together If the message FAILED is showing ensure that all systems are set to the same frequency and the distance is not too big or other interference In case of no communication during a race you can re initialised the system by pressing the key P1 RESET All times not y...

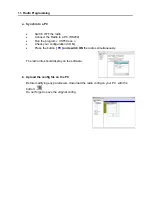
Страница 9: ...m CSF50 exe Check your configuration COM Press the button P0 and switch ON the radios simultaneously The radio info should display on the software b Upload the config file on the PC Before modifying any parameters download the radio config on your PC with the button Do not forget to save the original config ...

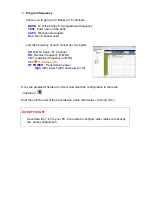
Страница 10: ... X X N bank N Channel RX Receiver frequency in MHz TX Transmitter frequency in MHz Tx Å if similar as Rx RF POWER Transmission power High 5W Low 1 2W and Low 2 1W Once the parameter fields are correct download the configuration to the radio download Wait the until the end of the transmission radio will display Cloning OK DO NOT FORGET Save data file icf to your PC to be able to configure other rad...

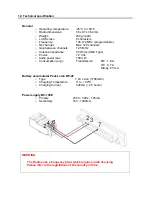
Страница 11: ...a impedance 50 Ohms SMA Type o Power 7 2 Vdc o Audio power max 700 mW o Consumption avg Transmission 5W 1 8 A 1W 0 7 A Std by 85 mA Battery accumulator Pack Li Ion BP 22 o Type 7 2V Li Ion 1700mAh o Charging Temperature 0 to 40 C o Charging Current 500mA 2 5 hours Power supply BC 145E o Primary 230V 50Hz 125mA o Secondary 16V 1000mA WARNING The Radios use a frequency band which requires radio lice...

Страница 12: ...TAG Heuer PROFESSIONAL TIMING 6A Louis Joseph Chevrolet 2300 la Chaux de Fonds Switzerland Tel 032 919 8000 Fax 032 919 9026 E mail info tagheuer timing com Http www tagheuer timing com ...

Отзывы: