digicard-AUT User Instructions
Page - 4
Device Configuration using digiConnect
Connecting and configuring the digicard-AUT
1.
Connect the digicard-AUT to a free USB port on your PC.
2.
Wait for Windows to locate and install the appropriate drivers and
confirm that the hardware is ready to use.
3.
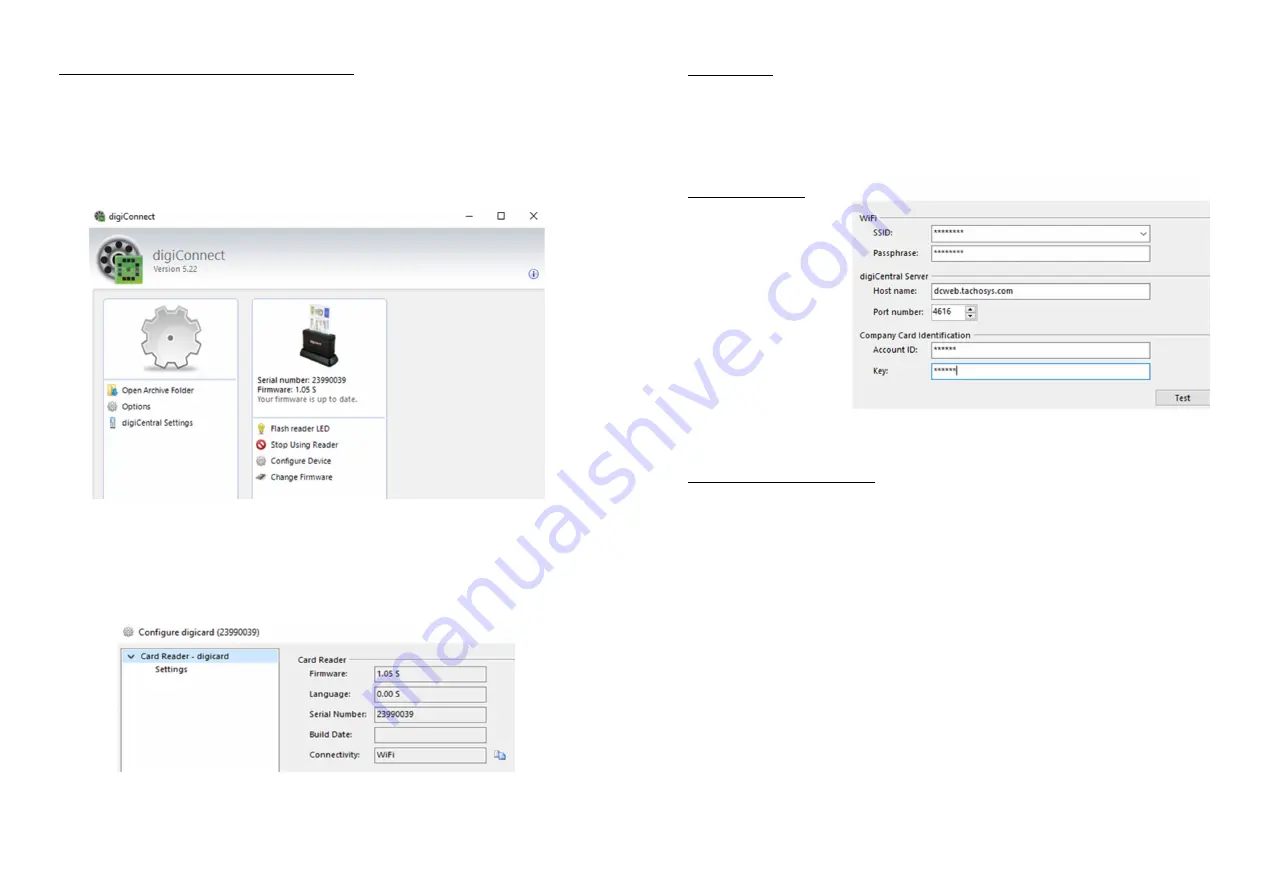
Open the digiConnect software. Your digicard-AUT will appear in the main
digiConnect window (Fig 1).
4.
If you are using a digicard or digicard-AUT device, you can use the “Flash
reader LED” function to identify the device. This feature will not work with
other card reading devices.
5.
Click the “Configure Device” option to enable digiConnect to configure the
digicard-AUT settings.
6.
On the initial screen, you can see the digicard-AUT’s information.
7.
Select “Settings” from the left hand menu to configure the device.
Fig 1
Fig 2
digicard-AUT User Instructions
Page - 5
Device Configuration using digiConnect
WiFi Settings
To connect to a WiFi network, click the drop down arrow in the “SSID” box. This
should display all available WiFi networks. Select the relevant network and
then enter the network password into the “Passphrase” box.
digiCentral Server
Enter the Host name of
your digiCentral server.
This will either be
provided by your
analysis provider or will
match your own
digiCentral server
settings. The Port
Number should be left
as 4616 unless you are
hosting your own
digiCentral server.
Company Card Identification
To link the digicard-AUT with digiCentral in order to authenticate a specific
company card, you need to enter the digiCentral Account ID and associated
Key.
The Account ID can be found in the top right hand corner of your digiCentral
web platform (e.g. TACHOSYS00).
Fig 3
Содержание Digicard AUT
Страница 1: ......


