T+A Elektroakustik K 6 Скачать руководство пользователя страница 13

13

Operation

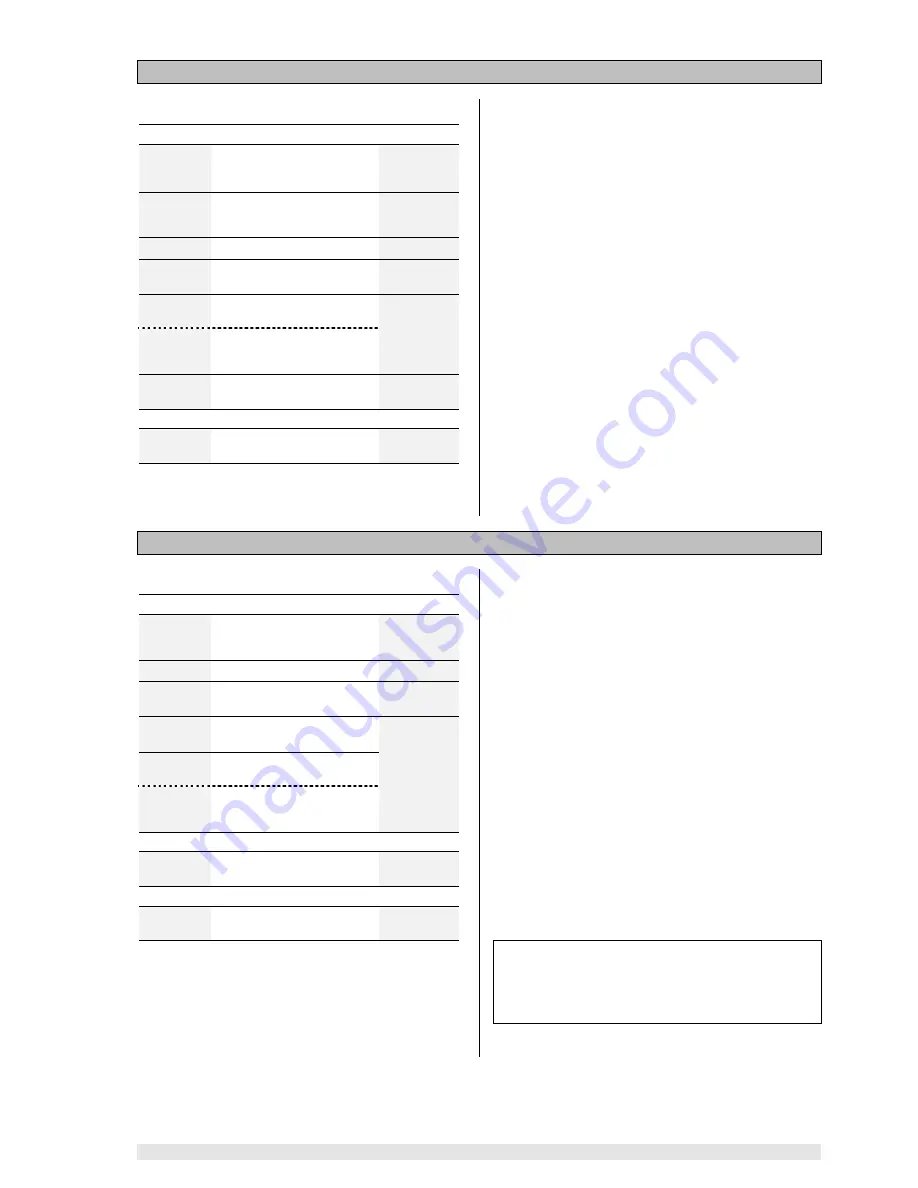
Manual storing of radio programs

Operation:

With Tuner selected . . .

 / 

press

for 2 sec

Starts 

program 

search

downwards  or  upwards
within the frequency band

e.g.

--+--   98-00

--+--   98-00

--+--   98-00

--+--   98-00

press

briefly

Call up 

Tuner Menu *)

e.g.

MODE  NORM

MODE  NORM

MODE  NORM

MODE  NORM

Call up 

Program Menu *)

PROGRAM

PROGRAM

PROGRAM

PROGRAM

Confirm selection

e.g.

P01  98-00

P01  98-00

P01  98-00

P01  98-00

 / 

Change  Program  Number
if necessary

to

Optional:

  enter  Program

Number directly

e.g.

P02  98-00

P02  98-00

P02  98-00

P02  98-00

Store  Program  and  close
Tuner Menu

e.g.

NDR 1

NDR 1

NDR 1

NDR 1

or

Leave 

Tuner  Menu

  with-

out storing Program

*)

The 

Tuner  Menu

  and  the 

Program  Menu

  are  also

displayed  on  the  screen  of  a  TV  set  connected  to  the
system (see illustrations on next page).

Explanation:

If you wish to operate the  Tuner  as  described  under 

'Lis-

tening to radio programs'

, you must first tune in all your

preferred  radio  stations  accurately  and  store  them  under
Program Numbers. You can store up to 

60 radio stations

in this way.

In addition to the frequency the 

K6

 also stores the recep-

tion  mode  (see 

'Setting  the  reception  mode'

)  and  the

RDS  station  name,  provided  that  the  name  had  been  re-
ceived in its complete form when the program was stored.

The Tuner Menu offers two facilities for storing programs:

1. 

Manual storing

2. 

Automatic storing   (Autostore)

When 

storing  programs  manually

  you  use  the  station

search function initially to locate the desired radio station; if
necessary  waiting  until  the  RDS  station  name  appears  in
full on the screen.

The radio program can then be stored using the Program
Menu; you can select any Program Number.

Automatic storing of radio programs (Autostore)

Operation:

With Tuner selected . . .

press

briefly

Call up 

Tuner Menu *)

e.g.

MODE  NORM

MODE  NORM

MODE  NORM

MODE  NORM

Call up 

Program Menu *)

PROGRAM

PROGRAM

PROGRAM

PROGRAM

Confirm selection

e.g.

P01   90-60

P01   90-60

P01   90-60

P01   90-60

Call  up 

Autostore  menu

point

e.g.

P01   AUTO

P01   AUTO

P01   AUTO

P01   AUTO

 / 

Change 

initial 

Program

Number if necessary

to

Optional:

  enter  Program

Number directly

e.g.

P01  90-60

P01  90-60

P01  90-60

P01  90-60

then

Start  Autostore  and  close

Tuner Menu

e.g.

--+--   90-60

--+--   90-60

--+--   90-60

--+--   90-60

or

Leave 

Tuner  Menu

  with-

out storing Program

*)

The 

Tuner  Menu

  and  the 

Program  Menu

  are  also

displayed  on  the  screen  of  a  TV  set  connected  to  the
system (see illustrations on next page).

Explanation:

When  you  select 

Autostore

  function  in  the  Tuner  Menu

the  tuner  automatically  searches  the  entire  VHF  band  for
stations which can be received well in STEREO mode, and
automatically stores the located stations. It carries out the
process twice using different search thresholds.


The next step is to select a Program Number as starting
point,  i.e.  the  number  from  which  the  located  programs
are  to  be  stored.  If  you  wish  to  fill  the  program  memory
from the start, select the number 01.


At  this  point  the 

Autostore

  function  can  still  be  inter-

rupted by pressing the 

 button.


Pressing  the 

  button  activates  the 

Autostore

function.  The  frequency  display  starts  to  increment  (run
upward).


This process may take a considerable time, as the tuner
attempts  to  pick  up  the  complete  RDS  station  name  for
each  transmitter  it  locates,  and  store  the  name  at  the
same time. If necessary you can interrupt the 

Autostore

process by pressing the 

- or


 button.

When the 

Autostore

 function is finished, the screen again

displays the Program you last selected.

Note

The 

K6

 stores the radio stations in the order in which they

are  located  by  the 

Autostore

  function.  You  can  subse-

quently  re-arrange  the  sequence  to  suit  your  preference
using the 

'Exchanging Two Programs'

 function.

Содержание K 6

Страница 1: ...V 6 0 Order No 9103 0264 USER MANUAL K 6...

Страница 2: ...ugh these operating instructions It is especially important to ob serve the instructions regarding setting up and operating the equipment and the safety notes We are grateful to you for placing your f...

Страница 3: ...earch Slow motion 28 Camera angle Switching audio channels 29 Sub title language Playback variants Repeat Chapter Repeat Title Repeat Disc and Shuffle 30 Disc Menu Function 31 Player Setup Menu Audio...

Страница 4: ...e material set top box video recorder to the TV set are not available if the unit is turned off at the primary switch Emergency buttons To the right of the primary switch on the underside of the K6 yo...

Страница 5: ...on again a Main display The main display provides context sensitive infor mation regarding the program source or the cur rently active process b Tuner reception mode FM VHF c Tone control settings The...

Страница 6: ...elf on automatically at the programmed alarm time press for 2 sec Activates screen angle adjustment The angle is adjusted using the and buttons press again for 2 sec Activates screen brightness adjust...

Страница 7: ...ng Press the button briefly to open the Main Menu All changes take effect immediately If the TV set connected to the system is switched on the menu appears on the TV screen At the same time the integr...

Страница 8: ...ubwoofer is switched off in the Loudspeaker Menu this menu point in the Main Menu is also set to Off and the subwoofer level cannot be adjusted Note It is essential to set the balance between the othe...

Страница 9: ...stereo mode and sound fields The surround receiver remembers the setting for each input and reverts to the mode of operation which was last used when you switch from one input to another Multi channe...

Страница 10: ...loudspeakers selected in the Loudspeaker Menu SOUND FIELD SIMULATION The surround processes already described require pro gramme material which is encoded using the appropriate system but the K6 also...

Страница 11: ...o grams Calling up additional tuner information Operation With the tuner selected press briefly Brief display of program number and reception fre quency e g P01 98 00 P01 98 00 P01 98 00 P01 98 00 Swi...

Страница 12: ...ill be received at opti mum quality when the cross symbol is in the center After carrying out fine tuning the program must be stored again manually see Manual storing of radio pro grams Setting the re...

Страница 13: ...s briefly Call up Tuner Menu e g MODE NORM MODE NORM MODE NORM MODE NORM Call up Program Menu PROGRAM PROGRAM PROGRAM PROGRAM Confirm selection e g P01 90 60 P01 90 60 P01 90 60 P01 90 60 Call up Auto...

Страница 14: ...he buttons or enter the number directly using the numeric buttons Press the button to clear the Program Press the button to close the Tuner menu Notes If you attempt to clear an invalid Program Number...

Страница 15: ...out exchanging pro grams if desired The Tuner Menu and the Program Menu are also displayed on the screen of a TV set connected to the system see illustrations on previous page Explanation All the Tune...

Страница 16: ...the station name and in such cases the integral screen displays the tuning indi cator and the reception frequency instead of the station name Other transmitters broadcast the station name as a moving...

Страница 17: ...the time of day manually in the Clock menu point by RDS The time of day is read automatically from the RDS signal and accepted by the K6 this only works if a high quality RDS signal is present If you...

Страница 18: ...itle language plus dif ferent viewing angles also depending on DVD type are available You will soon discover that the disc player is amazingly simple to operate thanks to the On Screen Display func ti...

Страница 19: ...of tracks track times etc then the CD starts playing Notes The drawer can also be opened and closed by moving your hand close to the sensor under the front panel Calling up additional CD player inform...

Страница 20: ...a track During playback you can jump from one track to another using the or buttons However you can also enter the number of the desired track directly using the numeric buttons Search To search forwa...

Страница 21: ...emble the track select program with the help of the on screen menu Ensure that the TV set is switched on first Selecting tracks Operation with CD inserted but stopped press for 2 sec Switch to program...

Страница 22: ...assage press briefly Set start marker e g A A A A 1 1 1 1 or If necessary search for the end of desired passage press briefly Set end marker e g A A A A B 1 B 1 B 1 B 1 press briefly Interrupt play A...

Страница 23: ...23 Operation...

Страница 24: ...but ton The K6 initially gathers information about the inserted DVD then the DVD starts playing Notes The drawer can also be opened and closed by moving your hand close to the sensor under the front p...

Страница 25: ...een shows which passage of the inserted DVD is currently being played The information can be displayed in two different ways 1 Title and Chapter number 2 Title time display of minutes and seconds of t...

Страница 26: ...al picture To resume normal playback press the button Ending playback To end playback press the button at any time A select list appears when you stop playback with the last played title rack highligh...

Страница 27: ...n is displayed on the screen for 2 seconds every time you press the or button To end the search press one of the buttons or as desired Slow motion Operation With DVD playing press for 2 sec Switch on...

Страница 28: ...an be brought up on the screen at any time by a long press approx 2 seconds on the button It stays on the screen for about five sec onds allowing you to select the camera angle Switching audio channel...

Страница 29: ...must use the Disc Menu Function to select a different sub title lan guage Playback variants Repeat Chapter Repeat Title Repeat Disc and Shuffle Operation With DVD playing press repeatedly if required...

Страница 30: ...playback so that you can change settings Pressing the button to close the Disc Menu Function takes you back to the film Alternative operation press for 2 sec Call up manual menu control system NAV NAV...

Страница 31: ...n language provided that it is available on the DVD in the disc drawer If not the sub title display switches to the first available language on the DVD Aspect ratio Default setting 16 9 wide screen If...

Страница 32: ...numeric buttons Return to album The picture is displayed Picture mirror Picture rotation Return to chapter page Playing MP3 CDs An MP3 CD can hold up to 32 album directories To select an album directo...

Страница 33: ...sections Adjust ments at the TV Set Video Norm Menu and Trou ble Shooting OK OK OK OK OK STOP OK 00 00 00 00 00 00 00 00 00 00 STOP OK 2 40 m 1 80 m 2 10 m 2 40 m 2 40 m 1 80 m STOP OK 00 dB 00 dB 00...

Страница 34: ...tant menu point represents an alterna tive to the manual Loudspeaker Menu see below Calling up the Assistant invokes an automated routine for correctly setting up the individual loudspeaker channels o...

Страница 35: ...line on the screen you will see the currently set volume following by a flashing indicator informing you which button to press VOL means that the volume is too low VOL means that it is too high The ca...

Страница 36: ...ttings satellite for small speakers whose bass re sponse is necessarily limited The low frequency bass signals below 80 Hz of the main channels are mixed onto the subwoofer if present full range for l...

Страница 37: ...ow 80 Hz are mixed onto the main loud speakers Note If you switch on the subwoofer in the Loudspeaker Menu you can adjust its level in the Main Menu within the range 10 dB and 10 dB so that its volume...

Страница 38: ...ect buttons access the input positions in the following fixed sequence Output channels which are not in use see Loud speaker Menu cannot be edited Main loudspeaker front left FL Center loudspeaker fro...

Страница 39: ...output channels which are not in use see Loudspeaker Menu The menu indicates the corresponding input when the hiss sounds from each channel in turn The value can be adjusted using the change buttons...

Страница 40: ...06 to 06 Any change you make is immediately audible Use the select buttons to choose the input position you wish to adjust As can be seen in the diagram the select buttons access the input positions...

Страница 41: ...tandard Video CVBS This configuration provides the highest quality of all but does require a TV set with automatic RGB CVBS switching RGB priority switching TV sets include this facility RGB capable s...

Страница 42: ...tput level of the source device The K6 features an automatic calibration function to carry out this process This is the calibration procedure 1 Select the desired analogue audio or AV source device an...

Страница 43: ...y notes This section describes all those matters which are of fundamental importance when setting up and first using the equipment This information is not relevant in daily use but you should neverthe...

Страница 44: ...arm up to room temperature so that any condensation evaporates com pletely Before placing the unit on a sensitive surface please check the compatibility of the lacquer and the unit s feet at a non vis...

Страница 45: ...de the case Mains voltage is present inside the unit and there is a risk of lethal electric shock Do not exert undue force on the mains connectors Protect the unit from drips and splashes of water nev...

Страница 46: ...DIGITAL INPUT OPTISCH and COAXIAL Inputs for digital source devices Both inputs can be assigned to the AV inputs VCR TV B SET TOP BOX TV or AUX AV see Inputs Menu TAPE 2 DIGITAL CINCH Input output soc...

Страница 47: ...loudspeakers 2 B Terminals for loudspeakers in adjacent room 2 PRE OUT CONTROL Connection for active loudspeakers to be used as front speakers in the main listening room Note This socket also supplie...

Страница 48: ...Setting up 48 Typical wiring diagram Standard arrangement main room Use of banana plugs see the section entitled Rear panel connections...

Страница 49: ...49 Setting up Typical wiring diagram Connecting active loudspeakers...

Страница 50: ...source devices If you have a source device which generates different video norms but a TV set which is not multi norm ca pable you may have to select the standard video norm for all devices as all eq...

Страница 51: ...nection Connecting a digital recorder Connecting an analogue recorder Phono module type PHE MM or MC optional acces sory required Connecting a turn table If a digital output is present Use a Cinch dig...

Страница 52: ...his makes it possible to alter the volume in the adjacent room only in the main room you can only alter the volume in that room A TV set in the adjacent room can also be connected to the K6 not in S V...

Страница 53: ...and that you have not disturbed any connec tions Switching the remote control address Switching the K6 If the K6 responds to the remote control commands in tended for another piece of equipment TV or...

Страница 54: ...oblem No output signal at the loudspeak ers the speaker indicators A B on the integral screen flash Cause 1 The unit is overheating and the protec tion circuit has tripped Remedy Reduce volume and wai...

Страница 55: ...Cause Source devices not supplying the switching signal which the TV set re quires to switch over to AV mode Remedy Set television to constant AV opera tion mode Problem Neither on screen menu nor oth...

Страница 56: ...up the Inputs Menu and carry out the correct assignment Cause 3 The loudspeakers are switched off Remedy Switch on the speakers using the button Problems in DVD CD mode Problem The disc does not play...

Страница 57: ...inks in the cable If necessary fit a new aerial cable Problem After a house move the integral screen still displays the old program names but the stations can no longer be picked up Cause Programs wit...

Страница 58: ...tch voltage 9 Gnd Gnd Green In Gnd Gnd Green Out Gnd Gnd 10 Control signal Control signal Control signal Control signal Control signal Control signal 11 Green In Green Out 12 13 Gnd Chroma In Gnd Red...

Страница 59: ...for adjacent room Nominal output channel 4 8 80 W 45 W 15 W 10 W Peak output 4 8 90 W 50 W 20 W 15 W Frequency response 0 3dB 2 Hz 150 kHz Slew rate 30 V s Damping factor 300 Total harmonic distortion...

Страница 60: ...elektroakustik GmbH Co KG Herford Deutschland Germany Allemagne...

Отзывы: