


pag.
4
Order Code 2E00xxxx
December 2020 - Rev. 1.0
.
-
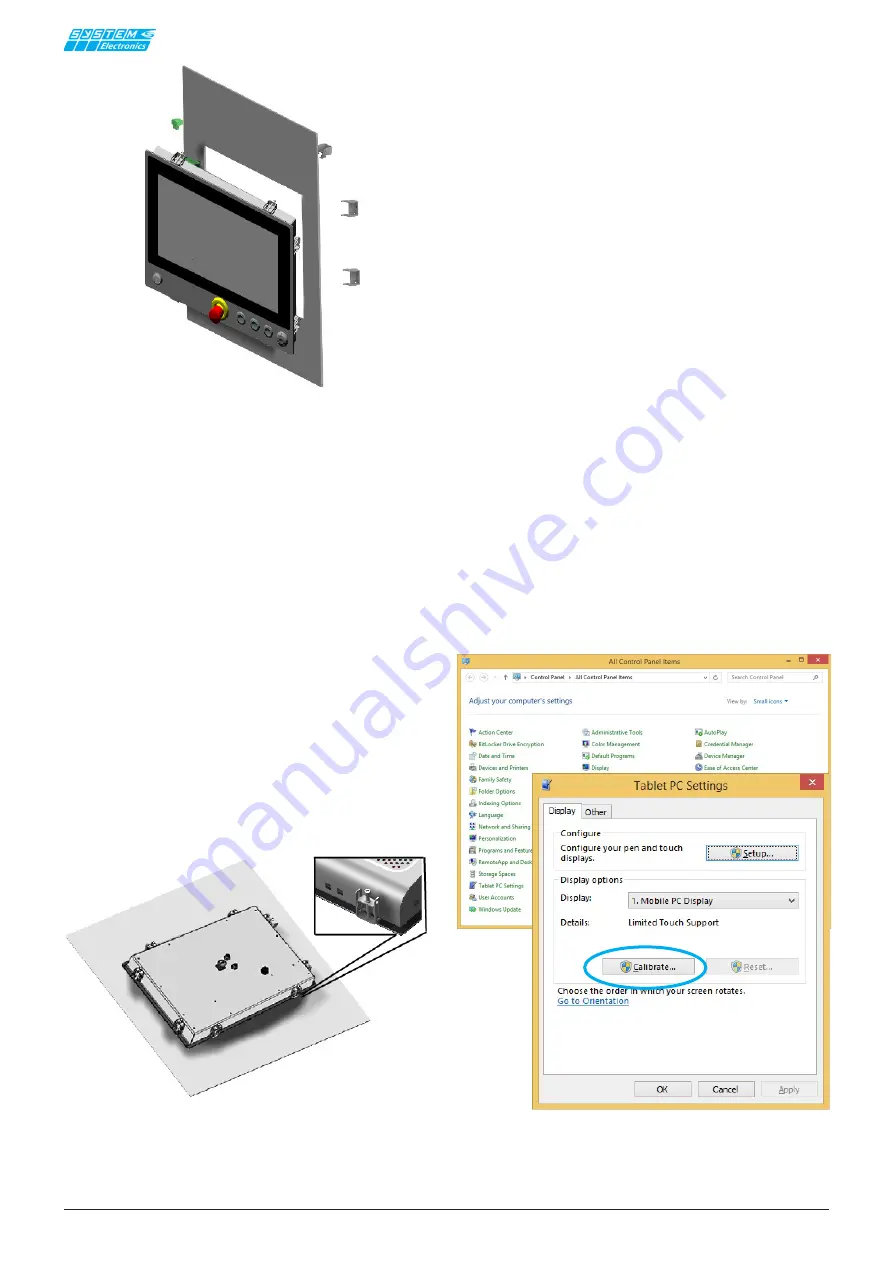
Remove the
Copilot 15.6''
from the packaging
and place it on a flat surface free of objects, placing a soft
cloth on the table to avoid scratching the glass during
installation. Place the Copilot 15.6'' with the glass side
facing the table. Avoid placing the device in an upright
position, even momentarily, or leaning slightly against
the machine to avoid damage due to its unstable posi-
tion.
-
Remove the 6 M5 screws that secure the top
and bottom sides.
-
Place the body of the
Copilot 15.6''
PB into the
hole in the panel, wedging it from the bottom side. If the
thickness of the panel is more than 1mm, remove the
bottom corner as well and reattach it after the Copilot
15.6'' PB has been placed in its slot.
-
Place the
Copilot 15.6'' PB
body into the panel
hole, inserting the TOP side first.
-
Secure the Copilot using the adjustable side
locks without excessive torque.
-
Wire the connecting cables
Figure 3.1.3: Rear Copilot 15.6" PB in the
panel mount version
4. Touch-screen:
Operation and
calibration
Copilot 15.6 "PB
features an innovative back-projected
capacitive touch screen (PCAP) with 10 touches possible
simultaneously.
System Electronics can provide different settings to cover
the different needs of the operator interface: from the
operation with gloves or in dirty environments to the
optimization of touch accuracy, up to the naturalness
of Windows gestures (rotation, movement and zoom
with the hand).
Copilot 15.6 "PB
comes already calibrated and equip-
ped with a setting that typically covers all needs without
penalizing any of them: however, there are commands
to customize the behavior according to the specific
application.
4.1 Touch Calibration
The
Copilot 15.6 "PB
does not normally require ca-
libration procedures as it is already optimized during
production.
If there is a need to optimize the calibration of the tou-
ch-screen follow the procedure below.
In the Tablet PC Settings section, press the "CALIBRATE"
button:
Figure 3.1.2: Front Copilot 21.5" PB in the
panel mount
version.
Industrial PC - COPILOT 21.5" PB
Panel Mount


