


6
Hardware Installation
Before installation, please make sure all of peripherals and computers have been turned
off. This installation example is based on 8-port Rack Mount KVM Switch and the 4-port
Rack Mount KVM Switch and 16-port Rack Mount KVM Switch will follow the same
installation procedure
Step 1
Find a convenient place to put your KVM Switch. The 19” rack mount form factor makes it
ideal for a 19” rack. When mounting to a rack, attach the included brackets to the sides of
the KVM Switch.
Step 2
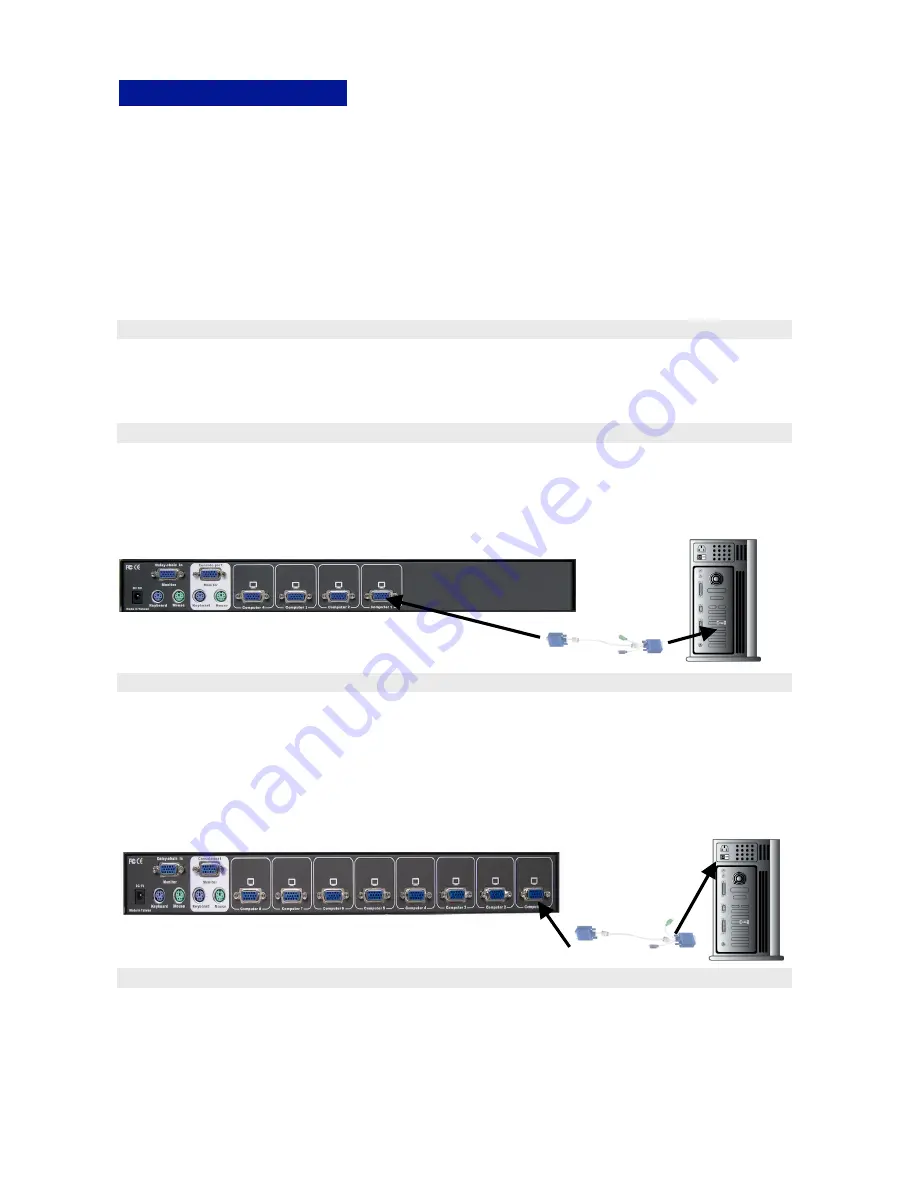
The PC connections will be made through the monitor (VGA) connections first. Connect a
VGA cable (15-pin HDDB Male / Male) with the Male side to both of the PC and the rear
panel of the KVM switch to the connector labeled VGA. Repeat this for all PCs.
Step 3
Connect the first computer’s mouse cable to the KVM Switch. If using a PS/2 cable,
connect one end to the PS/2 mouse port on the computer, and the other end to the PC1
PS/2 mouse port on the back of KVM Switch. If using a serial mouse cable (optional),
connect one end to a DB-9 serial port on the computer, and the other end to the PC1 DB-9
serial mouse port on the back of the KVM Switch. If you need Serial DB-9 to PS2 Mini Din
6 pin adapter, please contact your supplier.
Step 4
Connect the first computer’s keyboard cable to the KVM Switch. Using another PS/2 cable
connect one end to PS/2 keyboard port on the computer, and the other end to the PC1
keyboard port on the back of KVM unit. If your computer has an AT type keyboard port,
you will need a PS/2 to AT keyboard adapter.
The Rear Side of PC
The Rear Side of PC
The rear side of PC
Содержание Rack-KVM9000
Страница 15: ...14 MANMCS4 8 16GA ...


