Sylvania SRCD2732BT Скачать руководство пользователя страница 2


SAFETY WARNINGS  
 

Follow the instructions below to ensure the product is used safety and correctly.  
1.  Do not disassemble the product.  
2.  To reduce the risk of electric shock, do not remove screws. The unit does not contain 

any user-serviceable parts. Please leave all maintenance work to qualified personnel.  

3.  Avoid  extreme degrees of  temperature,  either hot  or cold.  Place the unit well away 

from heat sources such as radiators or gas/electric fires.  

4.  To  prevent  the  risk  of  electric  shock  or  fire  hazard  due  to  overheating,  ensure  that 

curtains and other materials do not obstruct the ventilation vents.  

5.  Do not install or place this unit in a bookcase, built-in cabinet or in another confined 

space. Ensure the unit is well ventilated.  

6.  Never place any type of candle or naked flame on the top of or near the unit.  
7.  To reduce the risk of fire, electric shock or product damage, do not expose this unit to 

rain,  moisture,  dripping  or  splashing.  No  objects  filled  with  liquids,  such  as  vases, 
should be placed on the unit.  

8.  Do not use the product if you see any battery liquid leakage.  
9.  The battery (not included) used in this device may present a risk of  fire or chemical 

burn if mistreated. 

 
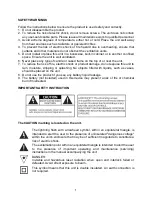
IMPORTANT SAFETY INSTRUCTION  


The CAUTION marking is located on the unit.  
 

The  lightning  flash  with  arrowhead  symbol,  within  an  equilateral  triangle,  is 
intended to alert the user to the presence of uninsulated "dangerous voltage" 
within the unit's enclosure that may be of sufficient magnitude to constitute a 
risk of electric shock.  


The exclamation point within an equilateral triangle is intended to alert the user 
to  the  presence  of  important  operating  and  maintenance  (servicing) 
instructions in the manual accompanying the unit. 


DANGER:  
Invisible  and  hazardous  laser  radiation  when  open  and  interlock  failed  or 
defeated. Avoid direct exposure to beam.  


This symbol means that this unit is double insulated. An earth connection is 
not required.  
 

Содержание SRCD2732BT

Страница 1: ...DIO MICRO SYSTEM MODEL NO SRCD2732BT BLACK INSTRUCTION MANUAL Please read these instructions thoroughly before use and retain for future reference SYLVANIA is a registered trademark of OSRAM Sylvania...

Страница 2: ...product damage do not expose this unit to rain moisture dripping or splashing No objects filled with liquids such as vases should be placed on the unit 8 Do not use the product if you see any battery...

Страница 3: ...ing it to other power sources may damage it Ensure that the supply corresponds to the information on the rating label on the unit Getting Started Remove the product from the box Remove any packaging f...

Страница 4: ...na AUX IN port STANDBY button SOURCE button TIME SET button SLEEP button EQ button PROG MEMORY button LCD Screen Volume button CD disc compartment door MODE button TUNE CH NEXT button PLAY PAUSE FM AU...

Страница 5: ...he SPEAKER terminal L and R respectively Ensure that the speaker wires polarity are correctly inserted MODE button STAND BY button SLEEP button EQ button TUNE CH PREVIOUS button FM ST button VOLUME bu...

Страница 6: ...25 battery is already installed in the remote control unit Before using it pull out the battery insulation sheet as shown below Replacing the Remote Control Battery Remove the remote control battery c...

Страница 7: ...DBY button to turn on the unit To turn off the unit press the STANDBY button again CD FM BT AUX IN Press the SOURCE button to select from the different modes Volume Control Turn the VOLUME control or...

Страница 8: ...the unit to preset number that you want to store Then press and hold the PROG MEMORY button to save Recall FM Presets Press the PROG MEMORY button once to recall the preset channel press it repeatedl...

Страница 9: ...searching 2 If the unit has never been paired with a Bluetooth device before or cannot find the last 3 paired device the display and the Bluetooth status indicator will keep on flashing 4 Turn on the...

Страница 10: ...tton to access the setup menu 3 Press the TUNE or TUNE button to adjust the hour Press the TIME SET button to confirm and it will go to the next menu 4 Press the TUNE or TUNE button to adjust the minu...

Страница 11: ...er edge of the lens Cleaning the Unit To prevent fire or electric shock hazard disconnect your unit from the AC power source when cleaning Wipe off any dust and stains with a soft cloth moistened with...

Страница 12: ...hts You may have other legal rights that vary depending on where you live Some states or provinces do not allow limitations on implied warranties or special incidental or consequential damages so the...

Отзывы: