background image

– 53 –

ES

0C28

30.

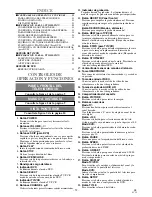
Botón CLEAR

Para cancelar ajustes.

31.

Botón MODE

Activa el modo de reproducción programada o el modo de
reproducción aleatoria.

32.

Botón SEARCH MODE 

Presione este botón para localizar un punto deseado.

33.

Botón AUDIO

Presione este botón para seleccionar un idioma de
audio o el modo de sonido deseado.

34.

Botón SUBTITLE

Presione este botón para seleccionar el idioma de subtí-
tulos deseado.

35.

Botón REPEAT

Repite la reproducción del disco, título, capítulo, grupo
o pista actual.

36.

Botón ANGLE (modo DVD)

Presione este botón para cambiar el ángulo de la cámara
y ver la secuencia que se está reproduciendo desde un
ángulo diferente.

37.

Botón A-B REPEAT

Repite la reproducción de una sección seleccionada.

38.

Botón RETURN

Permite volver a la operación anterior en el modo de
configuración de DVD.

39.

Botón ENTER

Presione este botón para establecer un ajuste.

40.

Botones de flechas
Modo TV/VCR:

Presione estos botones para seleccionar un modo de
ajuste en el menú que aparece en la pantalla del televisor.
Presiónelos también para seleccionar opciones o
establecer ajustes en un menú en particular.

Modo DVD:

Use estos botones para hacer ajustes mientras observa
la imagen en la pantalla del televisor.

41.

Botón DISC MENU

Muestra los menús contenidos en el DVD.

42.

Botón V.SURR

Activar/desactivar el envolvente virtal.

43.

Botón MUTE

Suprime la salida de sonido. Presiónelo de nuevo para
restablecer el sonido.

44.

Botón SLEEP

Utilice este botón para ajustar el temporizador de dormir.

45.

Botón SELECT

Presione este botón para cambiar entre los modos
TV/VCR y DVD. El modo seleccionado (TV/VCR o
DVD) se visualiza en el indicador del panel delantero.

46.

Toma de entrada ANT.

Conéctela a una antena, sistema de televisión por cable
o sistema de satélite.

47.

Cable de alimentación

Conéctelo a una toma de CA estándar (120 V, /60 Hz).

NOTA:

Antes de conectar el cable de alimentación a

una toma de CA estándar, retírelo del gancho
para evitar dañarlo.

48.

Toma de salida de audio digital COAXIAL

Conéctela solamente a la entrada digital de un amplifi-
cador externo o decodificador de audio de DVD.

PREPARACIÓN PARA LA

UTILIZACIÓN

CONEXIONES DE ANTENA/CABLE

ANTENAS SEPARADAS DE VHF/UHF

En algunas zonas será necesario utilizar una antena
exterior.

TELEVISIÓN POR CABLE SIN CAJA DE

CONVERTIDOR/DECODIFICADOR

Utilice esta conexión si su sistema de televisión por
cable se conecta directamente a su televisor/
videograbadora/DVD, sin una caja de convertidor.
Con esta conexión podrá:
1) Utilizar el mando a distancia del televisor/

videograbadora/DVD para seleccionar canales.

2) Programar uno o más canales decodificados para

grabación automática controlada por temporizador.

NOTA:

Este televisor/videograbadora/DVD SÓLO

puede grabar el canal que se está viendo.

TELEVISIÓN POR CABLE CON CAJA

DE CONVERTIDOR/DECODIFICADOR

O CAJA DE SATÉLITE

Si su compañía de televisión por cable le suministra
una caja de convertidor o si utiliza un sistema de
satélite, podrá utilizar la conexión básica que se
muestra en la ilustración.
Al utilizar esta conexión, también podrá grabar canales
codificados. Sin embargo, la selección de los canales
deberá hacerse con la caja de convertidor o con la caja
de satélite. Esto significa que no es posible cambiar de
canal utilizando el mando a distancia del televisor/
videograbadora/DVD. La grabación en ausencia (contro-
lada por temporizador) está limitada a un canal a la vez.

PARA GRABAR UN CANAL
CODIFICADO/DECODIFICADO

1. Ajuste el selector de canales del

televisor/videograbadora/DVD al canal de salida de
la caja de convertidor de televisión por cable o caja
de satélite. (Ej., CH3)

2. Seleccione el canal que desea grabar en la caja de

convertidor de televisión por cable o caja de satélite.

Nota para el instalador de sistemas CATV

Esta nota tiene la finalidad de llamar la atención
del instalador de sistemas CATV para que tenga
en cuenta el Artículo 820-40 de la NEC, que pro-
porciona recomendaciones para hacer una conex-
ión a tierra apropiada y, en particular, especifica
que la tierra del cable debe conectarse al sistema
de puesta a tierra del edificio, tan cerca del punto
de entrada del cable como sea posible.

Consulte la figura 4 de la página 11

CONEXIÓN A TOMAS DE ENTRADA

EXTERNA

Cuando vea un programa grabado en otra fuente (videograbado-
ra o videocámara), utilice las tomas de entrada de audio/vídeo
de la parte delantera del televisor/videograbadora/DVD.
Conecte las tomas de salida de audio/vídeo de otra fuente a
las tomas AUDIO L/R y VIDEO de este televisor/
videograbadora/DVD. Luego, presione los 

botones

CHAN-

NEL

K

/

L

hasta que aparezca "AUX" en la pantalla.

NOTA:

• Cuando conecte una videograbadora monofónica (otra

fuente) a este televisor/videograbadora/DVD, conecte la
toma de salida de audio de la videograbadora monofónica
(otra fuente) a la toma AUDIO L de este
televisor/videograbadora/DVD. El audio saldrá igual-
mente por los canales izquierdo y derecho.

Consulte la figura 5 de la página 12

Содержание 6727FDE

Страница 1: ...egistered mark If you need additional operating assistance after reading this owner s manual or to order replacement accessories please call TOLL FREE 1 800 968 3429 Or visit our WEB SITE at http www...

Страница 2: ...and the back or bottom are provided for ventilation and to ensure reliable operation of the TV VCR DVD and to protect it from over heating and these openings must not be blocked or cov ered The openin...

Страница 3: ...may expose you to dangerous voltage or other hazards Refer all servicing to qualified service personnel 19 Damage Requiring Service Unplug this TV VCR DVD from the wall outlet and refer servicing to q...

Страница 4: ...ld lose the authority to oper ate this equipment if an unauthorized change or modification is made IMPORTANT COPYRIGHT INFORMATION Unauthorized copying broadcasting public perfor mance and lending of...

Страница 5: ...ing a cold room or under conditions of high humidity If a DVD is played in a TV VCR DVD which has moisture it may damage the DVD and TV VCR DVD Therefore when the condensation occurs inside the unit t...

Страница 6: ...RE SEARCH 28 TIME SEARCH 28 INDEX SEARCH 29 C SPECIAL FEATURES 29 REAL TIME TAPE COUNTER 29 AUTO REWIND EJECT 29 C RECORDING 30 NORMAL RECORDING 30 SKIPPING UNWANTED SCENES DURING RECORDING 30 OTR One...

Страница 7: ...iew a video program at a high speed or super high speed in either a forward or reverse direction in LP and SLP mode For SP mode only high speed Three different playback tape speeds SP LP SLP Two diffe...

Страница 8: ...for audio language and sound mode You can select the desired audio language and sound mode if different languages and modes are available on a disc Parental lock You can set the control level to limi...

Страница 9: ...view the picture rapidly in forward during playback mode Forward Search 16 STOP EJECT Button TV VCR P 28 Press to stop the tape motion Press in the Stop mode to remove tape from the TV VCR DVD 17 Remo...

Страница 10: ...e menu 30 CLEAR Button Resets a setting 31 MODE Button DVD P 41 Activates program playback or random playback mode 32 SEARCH MODE Button DVD P 39 Press to locate a desired point 33 AUDIO Button DVD P...

Страница 11: ...more unscrambled channels for Automatic Timer Recording NOTE This TV VCR DVD will ONLY record and view the same channel VHF UHF SEPARATE ANTENNAS In some areas it will be necessary to use an outdoor...

Страница 12: ...inder is provided to call the CATV sys tem installer s attention to Article 820 40 of the NEC that provides guidelines for proper ground ing and in particular specifies that the cable ground shall be...

Страница 13: ...be recorded as digital sound by an MD or DAT deck Be sure to turn off the power to all components in the system before connecting another component Refer to the Owner s Manuals for the components to b...

Страница 14: ...gh quality surround sound as enjoyed in movie theaters Use audio coaxial digital cables available at retail for the audio connections NOTES Be sure to turn off the power to all components in the syste...

Страница 15: ...e set correctly before VCR timer recording is possible It is suggested that the clock be set manually when first setting up the TV VCR DVD then set to ON the auto clock set ting which will periodicall...

Страница 16: ...er box or satellite box the local PBS station must be selected on the cable box itself and the TV VCR DVD must be set to the output chan nel of the cable converter box or satellite box usu ally channe...

Страница 17: ...OFF using the ENTER button M E N U TIMER PROGRAMMING PICTURE CONTROL B SETTING CLOCK CHANNEL SET UP USER S SET UP V CHIP SET UP LANGUAGE ENGLISH CAPTION OFF ZERO RETURN TIME SEARCH SETTING CLOCK AUTO...

Страница 18: ...ADD DELETE CH Press the ENTER button 3 Enter the desired channel number Press the Arrow button K or L until your desired channel number appears You can also use the number buttons or the CHANNEL butto...

Страница 19: ...ton K or Lin the DVD mode you can change the TV channels Even if you turn off the TV VCR DVD in the DVD mode when you turn it on again it will go into the TV VCR mode TV VCR PICTURE CONTROL The TV VCR...

Страница 20: ...lays a black box on the TV screen this means that the TV VCR DVD is set to the TEXT mode To clear screen select CAPTION1 CAP TION2 or OFF Make sure TV VCR DVD s power must be turned on TV VCR 1 Select...

Страница 21: ...e for children under 14 TV MA Mature audience only V CHIP SET UP SUB RATINGS When you select the ratings of TV Y7 TV PG TV 14 or TV MA you will have the option of selecting sub rating categories 1 Sel...

Страница 22: ...under 17 requires accompa nying parent or adult guardian NC 17 No one under 17 admitted X Mature audience only V CHIP SET UP TV RATING B MPAA RATING CHANGE CODE G VIEW PG VIEW PG 13 VIEW B R BLOCK NC...

Страница 23: ...While the TV VCR DVD is set in monaural MONO mode HIFI disappears from the TV screen NOTE If you play non HIFI tapes while the TV VCR DVD is set in HIFI HIFI will disappear from the TV screen and the...

Страница 24: ...must select the recording mode either TV AUDIO STEREO or SAP when you record a broadcast Refer to MTS RECORDING MONITOR MODE If you select second audio when second audio is not available the TV VCR DV...

Страница 25: ...e has warmed to room temperature and the moisture has evaporated Avoid extreme heat high humidity and magnetic fields Do not tamper with the cassette mechanism Do not touch the tape with your fingers...

Страница 26: ...ape once and start playback again You can reduce the noise lines by pressing the CHANNEL button K or L in slow mode too Tracking adjustment in Slow mode will not be set automatically TV VCR STILL PICT...

Страница 27: ...h is blank for more than 10 seconds 1 Select USER S SET UP Press the SETUP button on the remote control Press the Arrow button K or L to point to USER S SET UP Then press the ENTER button 2 Select ALL...

Страница 28: ...r your desired time Press the Arrow button K or L until your desired time appears Example 2 50 stands for 2 hours 50 minutes If you wish to cancel the Time Search at this point press the SETUP button...

Страница 29: ...ginning of desired program NOTE Every time an index signal is skipped the number in the program indicator decreases by one 4 After Index Search When the preset program is reached the TV VCR DVD will s...

Страница 30: ...ed to a cable box or satel lite box the TV VCR DVD must be on CH3 or CH4 then the channel to be recorded must be selected on the cable box or satellite box 2 Select the tape speed Press the SPEED butt...

Страница 31: ...ord over into the TV VCR DVD s cassette compartment 3 Press the SPEED button on remote control for the TV VCR DVD to select the desired recording speed SP SLP 4 Press the CHANNEL button K or L on the...

Страница 32: ...ROGRAMMING Press the SETUP button on the remote control Confirm TIMER PROGRAM MING is pointed by pressing the Arrow button K then press the ENTER button If you have not yet set the clock MANUAL CLOCK...

Страница 33: ...the SETUP button on the remote control to return to TV mode While recording is in progress 1 Press the POWER button 2 Press the STOP EJECT button on the TV VCR DVD TV VCR 5 Set beginning hour Press t...

Страница 34: ...he Arrow button K or L to point to USER S SET UP Then press the ENTER button 2 Set AUTO RETURN to ON Press the Arrow button K or L to point to AUTO RETURN Press the ENTER button until ON appears TV VC...

Страница 35: ...number combinations Please check with your local cable company The following is a chart of common cable channel designations TV Display TV Display TV Display TV Display TV Display TV Display TV Displa...

Страница 36: ...s TV VCR DVD DVD with region codes other than 1 or ALL DVD ROM DVD RAM Never play back otherwise malfunc tion may result CD ROM VSD CDV Only plays back the audio part CD G Only plays back the sound CD...

Страница 37: ...a moment This happens when the 1st layer switches to the 2nd layer This is not a mal function GENERAL FEATURES DVD may contain menus to navigate the disc and access special features Press the appropr...

Страница 38: ...een For DVDs fast forward reverse search speed is dif ferent depending on the disc Approximate speed is 1 2 2 8 3 50 and 4 100 For audio CDs approximate speed is 16 For MP3 approximate speed is 8 When...

Страница 39: ...ress the CLEAR button to erase the incorrect input For single digits press 0 first if the total track of the disc is more than 10 tracks DVD V _ 2 TIME SEARCH 1 During playback press the SEARCH MODE b...

Страница 40: ...may determine the order in which tracks will play 1 In stop mode press the MODE button The PROGRAM screen will appear 2 Press the Arrow button or to select a track then press the ENTER button Press th...

Страница 41: ...he PLAY button to start random play back MP3 This feature allows you to program an MP3 disc to play in a desired sequence 1 In stop mode press the MODE button The PROGRAM screen will appear 2 Select a...

Страница 42: ...shown after pressing the SUBTITLE button several times the disc does not have subtitles in that language If you choose a Language that has a 3 letter language code the code will be displayed every ti...

Страница 43: ...the current Track The elapsed and remaining playing time of the cur rent track will be displayed 2 Press the DISPLAY button again to show current Total Track The elapsed and remaining playing time of...

Страница 44: ...ans 4752 Albanian 6563 Amharic 4759 Arabic 4764 Armenian 5471 Assamese 4765 Aymara 4771 Azerbaijani 4772 Bashkir 4847 Basque 5167 Bengali Bangla 4860 Bhutani 5072 Bihari 4854 Bislama 4855 Breton 4864...

Страница 45: ...OP mode so that the DVD SETUP menu appears If the menu does not appear press the PLAY button the STOP button then the SETUP button twice 2 Press the Arrow button L to select CUS TOM then press the ENT...

Страница 46: ...ss the ENTER button 6 Press the Arrow button K L to select the desired level then press the ENTER button 7 Press the SETUP button to exit NOTES When doing this for the first time enter any 4 digits ex...

Страница 47: ...is being used check for broken wire Adjust COLOR control Poor Reception on Some Channels Try a new channel if OK then possible station trouble Ghosts in Picture Is antenna connected to terminal on th...

Страница 48: ...illegal copy or the tape duplicating show any captions The tape box company accidentally left out the captioning signals during the mentions it being closed captioned copying process My TV screen show...

Страница 49: ...CR DVD does not support DTS audio This is not a mal function Distorted picture There are some cases where pictures may be slightly distorted which are not a sign of a malfunction Although pictures may...

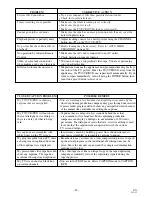
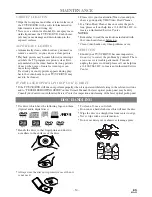
Страница 50: ...structions included with the video head cleaner before use Clean video heads only when problems occur SERVICING Should your TV VCR DVD become inoperative do not try to correct the problem by yourself...

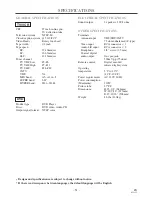
Страница 51: ...otice If there is a discrepancy between languages the default language will be English TV VCR DVD GENERAL SPECIFICATIONS ELECTRICAL SPECIFICATIONS Sound output 2 speakers 1W 8 ohm OTHER SPECIFICATIONS...

Страница 52: ...amente para empezar la grabaci n instant nea OTR Bot n RECORD Mando a distancia Presione para empezar la grabaci n manual 14 Bot n REW para TV VCR Presione este bot n para rebobinar la cinta o para ve...

Страница 53: ...conecta directamente a su televisor videograbadora DVD sin una caja de convertidor Con esta conexi n podr 1 Utilizar el mando a distancia del televisor videograbadora DVD para seleccionar canales 2 P...

Страница 54: ...a en el sentido de la flecha 2 Inserte 2 pilas AA en el compartimiento de las pilas en el sentido indicado por las marcas de polaridad 3 Vuelva a poner la cubierta PARA INSERTAR LAS PILAS CONEXI N A U...

Страница 55: ...no se visualizan stos empiezan a contar desde 00 cuando se pulsa SETUP en el mando a distancia Utilice esta fun ci n para sincronizar el reloj con la hora correcta AJUSTE DE CANAL Aseg rese de que Pul...

Страница 56: ...commercial use such as hotel rental or office use of this product or damage which results from fire flood lightning or other acts of God THIS WARRANTY DOES NOT COVER PACKING MATERIALS ANY ACCESSORIES...

Отзывы: