background image

Printed in Malaysia

0EMN01906

T4305CF * * * * *

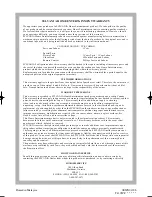
SYLVANIA HOME ENTERTAINMENT WARRANTY

We appreciate your purchase of a SYLVANIA Home Entertainment product.  We take pride in the quality 
of our products and have manufactured your new Home Entertainment unit to exacting quality standards.  
We feel confident that in normal use, it will provide you with satisfactory performance.  However, should 
you experience difficulty, you are protected under the provisions of this warranty.
SYLVANIA Home Entertainment products are warranted against manufacturing defects in materials and 
workmanship in normal use for the following periods from the date of purchase by the original user, and is 
conditional upon the unit being installed and used as directed in the instruction manual.

COLOUR MONITOR / VCR COMBO

Parts and Labour

1 Year

Special Parts:
Picture Tube

3 Years Parts / 1 Year Labour

Video Head

6 Months Parts and Labour

Remote Control 

90 Days Parts and Labour

SYLVANIA S obligation under this warranty shall be limited to the repair, including all necessary parts and 
the cost of the labour connected therewith, or at our option the exchange of any Home Entertainment 
product which shows evidence of a manufacturing defect within the warranty period.
Replacement parts, furnished in connection with this warranty shall be warranted for a period equal to the 
unexpired portion of the original equipment warranty.

CUSTOMER OBLIGATIONS

This warranty applies to the product from the original date of purchase at retail.  Therefore, the owner must 
provide a copy of the original, dated bill of sale.  No warranty service will be performed without a bill of 
sale.  Transportation to and from the service depot is the responsibility of the owner.

WARRANTY EXCLUSIONS

This warranty is extended to SYLVANIA Home Entertainment products purchased and used in Canada.  
This warranty shall not apply to appearance or accessory items including but not limited to: cabinet, cabinet 
parts, batteries,  connecting cables, tapes.  This warranty shall, in addition, not apply to cleaning 
video/audio heads, pinch rollers, tape transport system damages due to handling, transportation, 
unpacking, set-up, installation, customer adjustments that are covered in the instruction book, repair or 
replacement of parts supplied by other than the SYLVANIA authorized service depot, any malfunction or 
failure caused by or resulting from abnormal environmental conditions, improper unauthorized service, 
improper maintenance, modifications or repair by the consumer, abuse, misuse, neglect, accident, fire, 
flood, or other Acts of God, and incorrect line voltage.
This Home Entertainment product is only warranted to the original retail purchaser.  This warranty 
becomes void in the event of commercial or rental use.  This warranty becomes void in the event serial 
numbers are altered, defaced or removed.
SYLVANIA reserves the right to make changes in design or to make additions to or improvements upon 
this product without incurring any obligation to install the same on products previously manufactured.  
The foregoing is in lieu of all other warranties expressed or implied and SYLVANIA neither assumes nor 
authorizes any person to assume for it any other obligation or liability in connection with the sale or service 
of this product.  In no event shall SYLVANIA or its SYLVANIA dealers be liable for special or consequential 
damage arising from the use of this product, or for any delay in the performance of this warranty due to 
cause beyond our control.
The purchaser may have other rights under existing provincial or federal laws, and where any terms of this 
warranty are prohibited by such laws, they are deemed null and void, but the remainder of the warranty 
shall remain in effect.

HOW TO OBTAIN SERVICE

Should this product require service, you may obtain specific information on how to obtain service by 
contacting the SYLVANIA Dealer from whom this product was purchased, or by contacting us directly:

SONIGEM SERVICE

300 Alden Road

Markham, Ontario

L3R 4C1

PHONE:  (905) 940-5089    FAX: (905) 940-2303

1-800-287-4871

Содержание 6309CCC

Страница 1: ...oduct meets the ENERGY STAR guidelines for energy efficiency ENERGY STAR is a U S registered mark If you need additional assistance for set up or operating after reading owner s manual please call TOL...

Страница 2: ...m overheat ing and these openings must not be blocked or covered The openings should never be blocked by placing the TV VCR on a bed sofa rug or other similar surface This TV VCR should never be place...

Страница 3: ...overs may expose you to danger ous voltage or other hazards Refer all servicing to quali fied service personnel 19 Damage Requiring Service Unplug this TV VCR from the wall outlet and refer servicing...

Страница 4: ...the TV VCR cassette holder Do not place anything directly on top of the unit WARNING Moisture condensation may occur inside the unit when it is moved from a cold place to a warm place or after heating...

Страница 5: ...ANNEL SET UP AGAIN 14 SELECTING THE LANGUAGE 14 DAYLIGHT SAVING TIME 14 CLOCK SET UP AUTO MANUAL 15 C ON SCREEN DISPLAY 17 C SPECIAL FEATURES 17 DEGAUSSING 17 REAL TIME TAPE COUNTER 17 AUTO REWIND EJE...

Страница 6: ...t the playing of a tape indefinitely without pressing the PLAY button Time search Let you set the TV VCR to advance the tape by entering the desired playback time you want to skip OTR One Touch Record...

Страница 7: ...midity and magnetic fields Do not tamper with the cassette mechanism Do not touch the tape with your fingers INSERTING A CASSETTE Insert the cassette in the direction as shown Push in gently but conti...

Страница 8: ...e tape from TV VCR L button Press to select setting modes from the on screen menu Press to enter digits when setting program for example setting clock or timer program 7 REW button Press to rewind the...

Страница 9: ...and then 1 to 9 100 button When selecting cable channels which are higher than 99 press this button first then press the last two digits To select channel 125 first press the 100 button then press 2...

Страница 10: ...ld be discon nected CABLE WITHOUT CONVERTER DESCRAMBLER BOX Use this connection if your cable system connects directly to your TV VCR without a converter box By using this connection you can 1 Use the...

Страница 11: ...nna 2 Attach the car battery cord to the DC13 2V con nector on the back of the TV VCR Then connect the other end to your vehicle s cigarette lighter socket NOTES Be sure your vehicle has a 13 2 volt n...

Страница 12: ...ht batteries into the battery compartment in the direction indicated by the polarity markings 3 Replace the cover EXTERNAL INPUT MODE When using an external input signal another VCR or video camera co...

Страница 13: ...auto preset again in the fine receiving conditions 5 After scanning The tuner stops on the lowest memorized channel If you want to recall the selected channels you can select the desired channel direc...

Страница 14: ...automati cally will advance one hour in April then reverse one hour in October When Daylight Saving Time is ON the clock will change automatically as follows First Sunday of April At 2 AM the clock i...

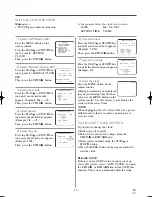
Страница 15: ...functions 1 Select SETTING CLOCK Press the MENU button on the remote control Press the PLAY K or STOP L but ton to point to SETTING CLOCK Then press the F FWD B button 2 Set AUTO CLOCK to ON Press th...

Страница 16: ...e control Although seconds are not displayed they begin counting from 00 when you press the MENU button on the remote control Use this feature to synchronize the clock with the correct time NOTE When...

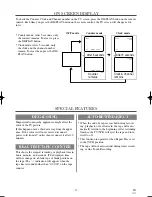
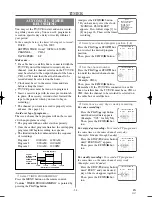
Страница 17: ...outlet then reconnect it after 30 minutes REAL TIME TAPE COUNTER This shows the elapsed recording or playback time in hours minutes and seconds The displayed time will not change on a blank tape or b...

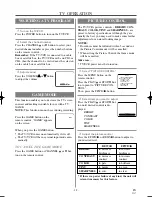
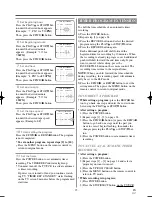
Страница 18: ...auto matically TO CANCEL THE GAME MODE Press the GAME button or CHANNEL K or L but ton on the remote control PICTURE CONTROL The TV VCR s picture controls BRIGHT CON TRAST COLOR TINT and SHARPNESS ar...

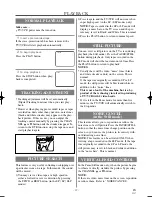
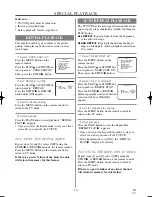
Страница 19: ...on to return to normal speed STILL PICTURE You can view a still picture on the TV screen during playback the Still mode Press the PAUSE STILL button during playback Only tapes recorded in the SLP mode...

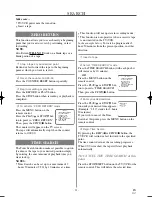
Страница 20: ...pe BLANK REPEAT Repeat playback from the begin ning to a blank part which is blank for more than 10 seconds 1 Select USER S SET UP Press the MENU button on the remote control Press the PLAY K or STOP...

Страница 21: ...will not operate in recording mode This function is not operative when a cassette tape is not inserted in the TV VCR In the example below To watch a program after 2 hour 50 minutes from the present po...

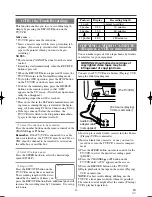
Страница 22: ...VCR is con nected to a cable box or satellite box the TV VCR must be on CH3 or CH4 then the channel to be recorded must be selected on the cable box or satellite box 2 Select the tape speed Press the...

Страница 23: ...t the tape speed Press the SPEED button to select the desired tape speed SP SLP 3 Begin OTR Press the REC OTR button on the TV VCR as many times as needed The recording length will be deter mined by t...

Страница 24: ...ram 1 10 00AM 11 00AM Program 2 9 00AM 10 00AM Program 3 9 30AM 12 00PM 11 00AM Recording Sequence Recording period is SHADED And press the F FWD B button If you have not yet set the clock MANUAL CLOC...

Страница 25: ...Press the MENU button on the remote control to return to TV mode While recording is in progress 1 Press POWER button 2 Press the STOP EJECT button on the TV VCR 5 Set beginning hour Press the PLAY K...

Страница 26: ...L but ton to point to AUTO RETURN Press the F FWD B or REW s button until ON appears 3 Auto Return will begin When all the timer recordings are completed the TV VCR will rewind to the beginning of the...

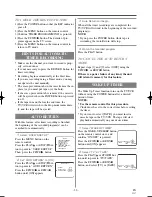
Страница 27: ...ton after a desired period of time NOTE This function does not operate during Recording mode 1 Select SLEEP TIMER Press the WAKE UP SLEEP button on the remote control until SLEEP TIMER appears 2 Set s...

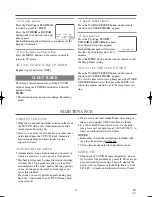
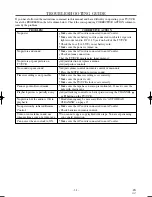
Страница 28: ...o sound or poor sound Adjust volume control on remote control or main unit Press the MUTE button to restore sound Timer recording is not possible Make sure the timer recording is set correctly Make su...

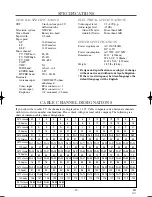
Страница 29: ...designate channels with letters or letter number combinations Please check with your local cable company The following is a chart of common cable channel designations TV Display TV Display TV Display...

Страница 30: ...to cabinet cabinet parts batteries connecting cables tapes This warranty shall in addition not apply to cleaning video audio heads pinch rollers tape transport system damages due to handling transport...

Отзывы: