


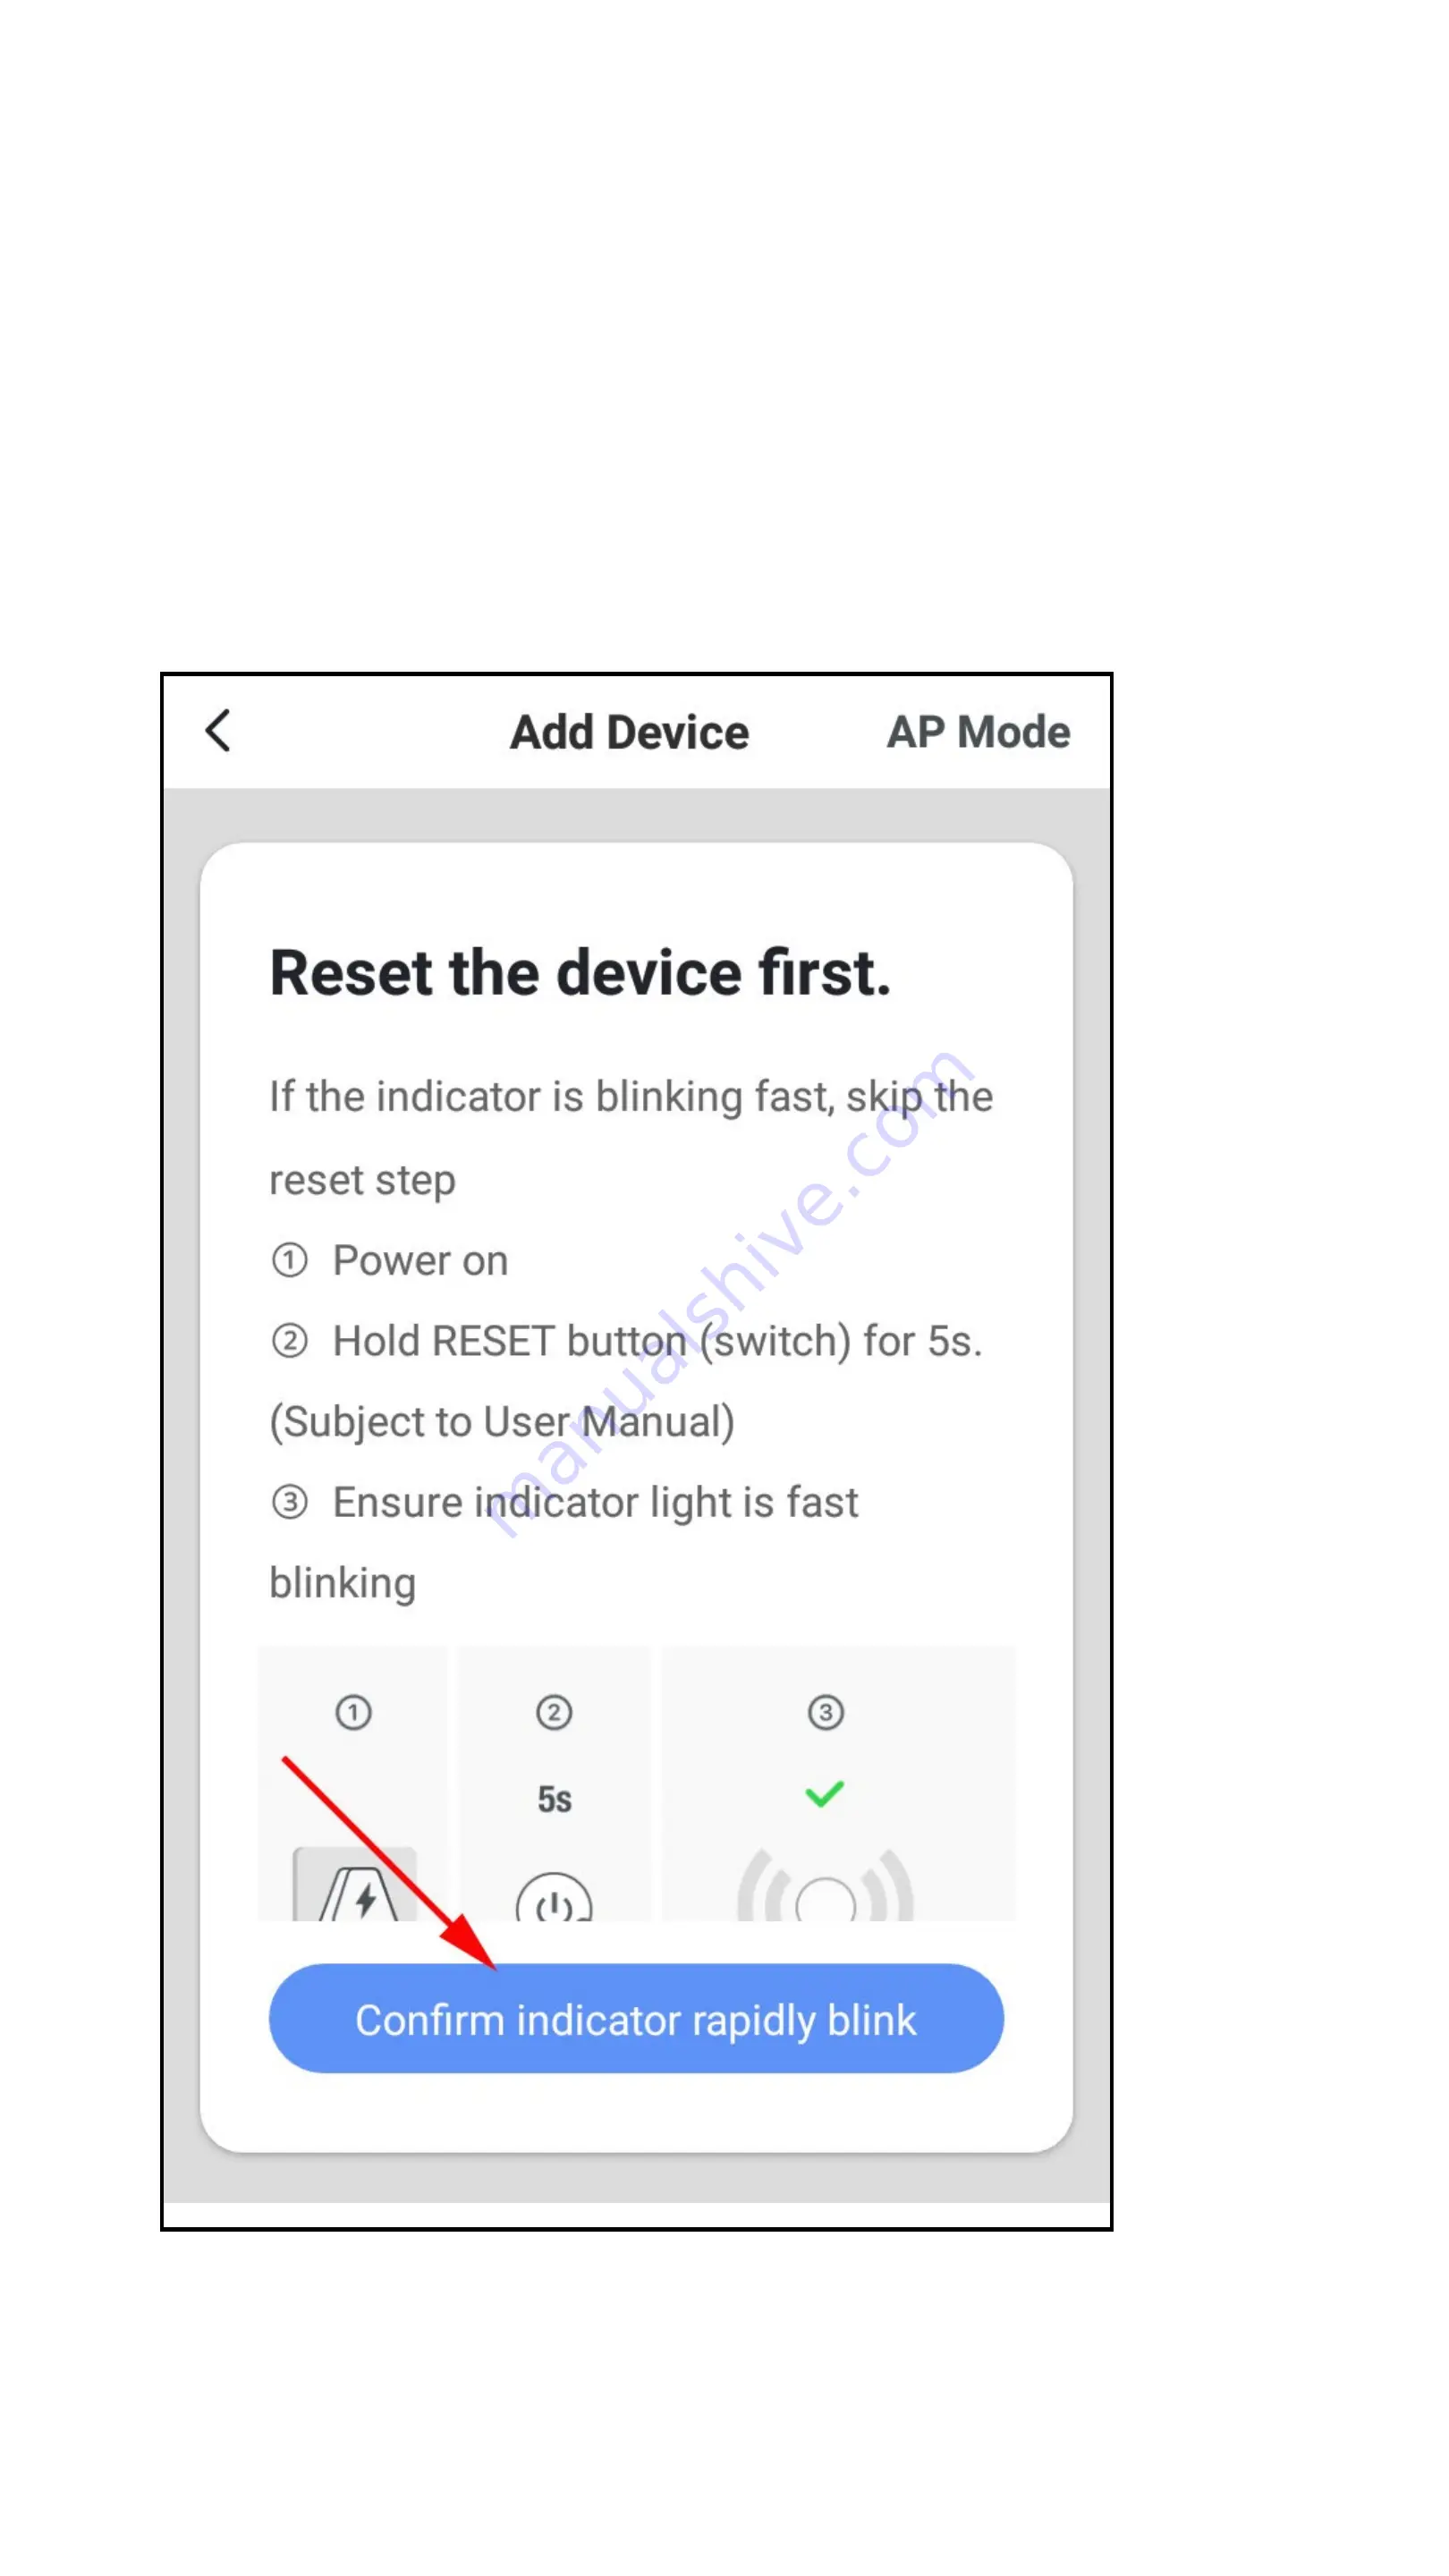
• Before you continue, connect the Wi-Fi measuring sock-
et to the power supply, if you have not already done so,
and wait until the start process is complete.
•
Now press and hold down the button on the Wi-Fi
measuring socket for approx. 5 seconds until the built-in
LED blinks rapidly.
•
Then tap the bottom blue button in the app.
Содержание 2138451
Страница 1: ...App manual Wi Fi measuring socket Item no 2138451 2138451_v2_1221_02_dm_mh_App_en ...
Страница 7: ... Tap the right button to accept the privacy policy ...
Страница 15: ...Creating a family On the home page tap the button in the lower right cor ner to create a profile ...
Страница 16: ... Select the item for family management ...
Страница 19: ... Tap the right button arrow in the figure in the following screen ...
Страница 21: ... After exiting family management you will see the main display of the app ...
Страница 28: ... The app will now search for the device and connect to it Then the Wi Fi settings will be transferred ...
Страница 31: ... On the home page you will now see the newly added device ...
Страница 35: ... To add a new timer tap the bottom button ...
Страница 37: ... Select the desired days by tapping Then tap the arrow at the top left ...
Страница 39: ... In this case select either ON or OFF and use the bottom right button to save the selection ...
Страница 41: ... To programme a countdown timer tap the correspond ing function button in the bottom row ...
Страница 44: ... To display measurement readings tap the correspond ing function button in the bottom row ...
Страница 47: ...B1 B6 B4 B2 B5 B3 B10 B9 B8 B7 B11 B12 ...
Страница 49: ...Creating a group To create a group open the devices display and then tap the pencil icon at the top right ...
Страница 50: ... In the device settings tap the button to create a group ...
Страница 52: ... Enter a name for the group and save it ...
Страница 55: ... To open the groups settings tap the pencil icon in the upper right corner ...
Страница 57: ...Creating a scene To create a scene tap the sun icon at the bottom centre in the main display of the app ...
Страница 58: ... Tap in the upper right corner or the blue button in the middle ...
Страница 59: ... Tap the background image to select another Then tap the small ...
Страница 61: ... The delay has been added to the scene To add the device tap the small again ...
Страница 62: ... Now tap the Device button Select the desired device and tap it ...
Страница 63: ... In our case it is a switching function Tap the corresponding button ...
Страница 65: ... The desired function is now displayed behind the switch Tap the top right button to continue ...
Страница 67: ... Enter a name for the scene and save again ...
Страница 69: ... A pop up will appear You can either close it or leave it open The switch will turn on after the delay ...
Страница 71: ... A pop up will appear again and the scene will be exe cuted ...


