switel WT117 Скачать руководство пользователя страница 29

- Impiego - 

29

sente un segnale acustico, non appena rilasciate il tasto 

TALK

. In tal 

modo al Vostro interlocutore viene segnalato il termine della Vostra 
frase e che siete in attesa di una risposta.

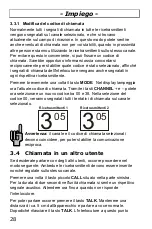
Il volume del segnale di chiamata dipende sostanzialmente dalla 
regolazione del Vostro volume. tramite i tasti 

VOL-

 e 

VOL+

  si 

possono regolare otto stadi di volume. Per la durata di 5 secondi nel 
display viene indicato il volume attualmente regolato. Dopodiché il 
display si ricommuta di nuovo alla regolazione del canale. 

Avvertenza:

 Mentre mantenete premuto il tasto 

TALK

, non 

potete sentire le chiamate in arrivo. Come accade 
generalmente nei radiotrasmettitori, può sempre parlare un 
solo interlocutore alla volta.

Perciò, dovete sempre attendere fino a sentire il segnale acustico di 
chiamata, prima di premere nuovamente il tasto 

TALK

.

Mentre mantenete premuto il tasto 

TALK

, nel display viene 

visualizzato il simbolo 

. Se ricevete una chiamata, allora nel display 

verrà visualizzato il simbolo 

.

3.5 Blocco 

canale 

Al fine di evitare una commutazione involontaria o non autorizzata del 
canale attualmente regolato, è possibile interdire la tastiera. 

A tal fine occorre mantenere premuto per 1 secondo il tasto 

. Nel 

display lampeggia il simbolo 

 e la selezione canali è interdetta. Gli 

altri tasti, quali ad esempio 

TALK, CALL

 e il tasto del volume non 

sono interdetti. Per disattivare successivamente il blocco della 

tastiera, mantenere di nuovo premuto per un secondo il tasto 

. Il 

simbolo scompare ed il blocco dei canali è disattivato. 

Avvertenza:

 ogni volta che si riaccende l'apparecchio, il blocco dei 

canali verrà sempre nuovamente disattivato. 

Содержание WT117

Страница 1: ...WT117 Bedienungsanleitung Mode d emploi Istruzioni per l uso Operating Instructions...

Страница 2: ...2 WT117 Bedienungsanleitung __________ 1 Mode d emploi ______________ 13 Istruzioni per l uso __________ 23 Operating instructions ________ 33 Declaration of Conformity_____ 43...

Страница 3: ...en 6 2 6 Headset anschliessen 6 3 Bedienung 7 3 1 Einschalten der Funkger te 7 3 2 Automatischer Energiesparmodus 7 3 3 Kanalwahl 7 3 3 1 ndern des Rufcodes 8 3 4 Anruf bei einem anderen Teilnehmer 8...

Страница 4: ...e 1 2 7 8 9 10 3 6 4 5 1 Mikro Kopfh reranschluss 2 Ein Aus Taste 3 Kanalschalter CHANNEL 4 Taste MODE 5 Kanalsperre 6 Lautst rke lauter 7 Lautst rke leiser 8 Displaybeleuchtung 9 Taste CALL 10 Taste...

Страница 5: ...ch Sollte der G rtelclip befestigt sein muss dieser zuerst entfernt werden 2 Legen Sie nun den Akkupack ein und achten Sie auf die richtige Polung Falsche Polung kann sowohl das Akkupack als auch das...

Страница 6: ...30 Stunden und eine maximale Nutzungsdauer von bis zu 20 Stunden Die aktuelle Batteriekapazit t wird im Display angezeigt Zum Laden stellen Sie die Funkger te f r ca 14 Stunden in die Ladestation Vol...

Страница 7: ...endet sobald Sie irgendeine Taste dr cken Der automatische Stromsparmodus beeintr chtigt nicht den Empfang von eingehenden bertragungen 3 3 Kanalwahl Die Funkger te verf gen ber 8 verschiedene bertrag...

Страница 8: ...05 05 3 3 Funkger t 1 Funkger t 2 Hinweis Der ausgew hlte Kanal und der Rufcode m ssen bereinstimmen damit Sie untereinander sprechen k nnen 3 4 Anruf bei einem anderen Teilnehmer Wenn Sie mit anderen...

Страница 9: ...vor Sie wieder die Taste TALK dr cken W hrend Sie die Taste TALK dr cken erscheint im Display das Symbol Wenn Sie ein Gespr ch empfangen erscheint im Display das Symbol 3 5 Kanalsperre Um zu verhinder...

Страница 10: ...schaltet werden um die Reichweite zu erh hen Halten Sie die Taste f r mehr als f nf Sekunden bis zu einem Signalton gedr ckt Die automatische Unterdr ckung ist abgeschaltet und es k nnen nun auch sehr...

Страница 11: ...z CH15 110 9Hz CH25 156 7Hz CH35 225 7Hz CH6 82 5Hz CH16 114 8Hz CH26 162 2Hz CH36 233 6Hz CH7 85 4Hz CH17 118 8Hz CH27 167 9Hz CH37 241 8Hz CH8 88 5Hz CH18 123 0Hz CH28 173 8Hz CH38 250 3Hz CH9 91 5H...

Страница 12: ...trieb ca 20 Stunden Standby 30 Stunden Ladezeit f r eine volle Aufladung 14 bis 16 Stunden Batteriespannung 6 0 V Die technischen Daten k nnen ohne vorherige Ank ndigung ge ndert werden 4 2 Pflegeanle...

Страница 13: ...er le micro casque 16 3 Utilisation 17 3 1 Mise en marche des metteurs r cepteurs 17 3 2 Mode automatique d conomie d nergie 17 3 3 S lection de canal 17 3 3 1 Modifier le code d appel 18 3 4 Appeler...

Страница 14: ...3 6 4 5 1 Raccordement micro casque 2 Touche marche arr t 3 Interrupteur de canal CHANNEL 4 Touche MODE 5 Verrouillage de canal 6 Volume plus fort 7 Volume plus faible 8 clairage de l cran 9 Touche CA...

Страница 15: ...le compartiment Vous devez d abord enlever le clip ceinture s il est d j fix 2 Mettez ensuite le bloc de batterie en place en respectant la polarit ad quate Une polarit inad quate peut d t riorer aus...

Страница 16: ...de max 30 heures et d une dur e maximale d utilisation de 20 heures La capacit de batterie actuelle est affich e l cran Pour proc der au chargement laissez les metteurs r cepteurs en place dans le ch...

Страница 17: ...est automatiquement interrompu d s que vous appuyez sur une touche quelconque Le mode automatique d conomie de courant ne g ne pas la r ception de transmissions entrantes 3 3 S lection de canal Les m...

Страница 18: ...est s lectionn toutes les tentatives d appel sont signal es sur le canal r gl 05 05 3 3 Emetteurs r cepteurs 1 Emetteurs r cepteurs 2 Remarque le canal s lectionn et le code d appel doivent concorder...

Страница 19: ...d appuyer nouveau sur la touche TALK Pendant vous appuyez sur la touche TALK l ic ne s affiche l cran Lorsque vous recevez une communication l cran affiche l ic ne 3 5 Verrouillage de canal Vous pouv...

Страница 20: ...ction AUTO SQUELCH afin d augmenter la port e Maintenez la touche enfonc e pendant plus de cinq secondes jusqu au retentissement d un signal sonore La suppression automatique est d sactiv e et vous po...

Страница 21: ...6 7Hz CH35 225 7Hz CH6 82 5Hz CH16 114 8Hz CH26 162 2Hz CH36 233 6Hz CH7 85 4Hz CH17 118 8Hz CH27 167 9Hz CH37 241 8Hz CH8 88 5Hz CH18 123 0Hz CH28 173 8Hz CH38 250 3Hz CH9 91 5Hz CH19 127 3Hz CH29 17...

Страница 22: ...v 20 heures Autonomie en veille 30 heures Temps pour charger enti rement les blocs de batterie 14 16 heures Courant de batterie total 6 0 V Les caract ristiques techniques peuvent tre modifi es sans a...

Страница 23: ...ttenti 26 2 6 Collegamento per auricolare 26 3 Impiego 27 3 1 Inserimento delle ricetrasmittenti 27 3 2 Modo di risparmio energetico automatico 27 3 3 Selezione del canale 27 3 3 1 Modifica del codice...

Страница 24: ...7 8 9 10 3 6 4 5 1 micro collegamento cuffia 2 interruttore ON OFF 3 selettore canale CHANNEL 4 tasto MODE 5 Blocco canale 6 aumento volume 7 riduzione volume 8 illuminazione del display 9 tasto CALL...

Страница 25: ...ntura sar dapprima necessario rimuoverlo 2 Introdurre a questo punto gli accumulatori e rispettare la corretta polarit Un inversione della polarit pu direttamente danneggiare sia gli accumulatori che...

Страница 26: ...ed una durata di conversazione massima di 20 ore La capacit attuale delle batterie viene indicata nel display Per il procedimento di carica occorre appoggiare le ricetrasmittenti per la durata di ca 1...

Страница 27: ...ene automaticamente terminato non appena viene premuto uno dei tasti dell apparecchio Il servizio automatico di risparmio corrente non pregiudica in alcun modo la ricezione dei segnali radio 3 3 Selez...

Страница 28: ...chiamata Tramite i tasti CHANNEL e potete ora selezionare un nuovo codice tra 00 e 38 Nella selezione del codice 00 verranno segnalati tutti i tentativi di chiamata sul canale selezionato 05 05 3 3 Ri...

Страница 29: ...ci dovete sempre attendere fino a sentire il segnale acustico di chiamata prima di premere nuovamente il tasto TALK Mentre mantenete premuto il tasto TALK nel display viene visualizzato il simbolo Se...

Страница 30: ...amente per aumentare cos la portata Mantenere premuto il tasto per oltre cinque secondi fino a sentire un segnale acustico La funzione di soppressione automatica disattivata e a questo punto si posson...

Страница 31: ...5 225 7Hz CH6 82 5Hz CH16 114 8Hz CH26 162 2Hz CH36 233 6Hz CH7 85 4Hz CH17 118 8Hz CH27 167 9Hz CH37 241 8Hz CH8 88 5Hz CH18 123 0Hz CH28 173 8Hz CH38 250 3Hz CH9 91 5Hz CH19 127 3Hz CH29 179 9Hz CH1...

Страница 32: ...ne di corrente servizio misto ca 20 ore standby 72 ore Caricamento delle ricetrasmittenti ca 14 16 ore tensione totale batterie 6 V I presenti dati tecnici possono essere modificati senza alcun preavv...

Страница 33: ...the radios 36 2 6 Connecting the headset 36 3 Operation 37 3 1 Switching on the radios 37 3 2 Automatic energy saving mode 37 3 3 Channel selection 37 3 3 1 Changing the call code 38 3 4 Calling anoth...

Страница 34: ...nal Elements 1 2 7 8 9 10 3 6 4 5 1 Microphone and headphone connection 2 On Off button 3 CHANNEL switch 4 MODE button 5 Channel lock 6 Volume louder 7 Volume softer 8 Display illumination 9 CALL butt...

Страница 35: ...ment If the belt clip has been fitted this must be removed first 2 Now insert the battery pack taking care to ensure that the polarity is correct The wrong polarity can damage both the battery pack an...

Страница 36: ...nd a maximum period of use of up to 20 hours The current battery capacity is shown in the display To charge place the radios in the charging station for ca 14 hours Full almost flat No indication Batt...

Страница 37: ...e will be ended as soon as you press any button The automatic power saving mode does not have any adverse effect on receiving incoming transmissions 3 3 Channel selection The radios have 8 different t...

Страница 38: ...ll calls will be signalled on the selected channel 05 05 3 3 Radio 1 Radio 2 Note The channel selected and the call code must correspond in order for you to be able to talk to one another 3 4 Calling...

Страница 39: ...TALK button again While you are pressing the TALK button the symbol appears in the display When you receive a call the symbol will appear in the display 3 5 Channel lock In order to prevent the selec...

Страница 40: ...to increase the range Hold the button pressed for more than five seconds until you hear a signal tone The automatic suppression will be switched off and it will now be possible for even very weak sig...

Страница 41: ...CH15 110 9Hz CH25 156 7Hz CH35 225 7Hz CH6 82 5Hz CH16 114 8Hz CH26 162 2Hz CH36 233 6Hz CH7 85 4Hz CH17 118 8Hz CH27 167 9Hz CH37 241 8Hz CH8 88 5Hz CH18 123 0Hz CH28 173 8Hz CH38 250 3Hz CH9 91 5Hz...

Страница 42: ...tter off 10 ms Power supply Mixed usage ca 20 hours Standby 30 hours Charging time for full battery packs 14 to16 hrs Total battery voltage 6 0 V Technical data are subject to change without previous...

Страница 43: ...2 EN 60065 1998 corrigendum Test report number 3586 April 25 2001 3586 r03 April 23 2001 3586 R02 April 23 2001 AUTHORISED SIGNATORY Signature ______________________ Name Simon Wong Position in the co...

Страница 44: ......

Отзывы: