


Note:
To monitor your signal, simply listen to your monitor speakers (ensure they are
connected correctly as described in section 3.5) or headphones connected to the front panel of
the USB Studio D Mk. II (as described in section 4.4).
6.3
Usage as a standard mixer (standalone)
The USB Studio D Mk. II is extremely simple to operate as a standard mixer, even without
computer connection.
Step 1
Simply connect all your input devices to the appropriate connections on the front panel.
Step 2
Adjust the gain controls on the desired input signals to your desired level.
Step 3
Monitor the results from your speakers or headphones (check section 3.5 and 4.4).
6.4
Usage with common audio applications
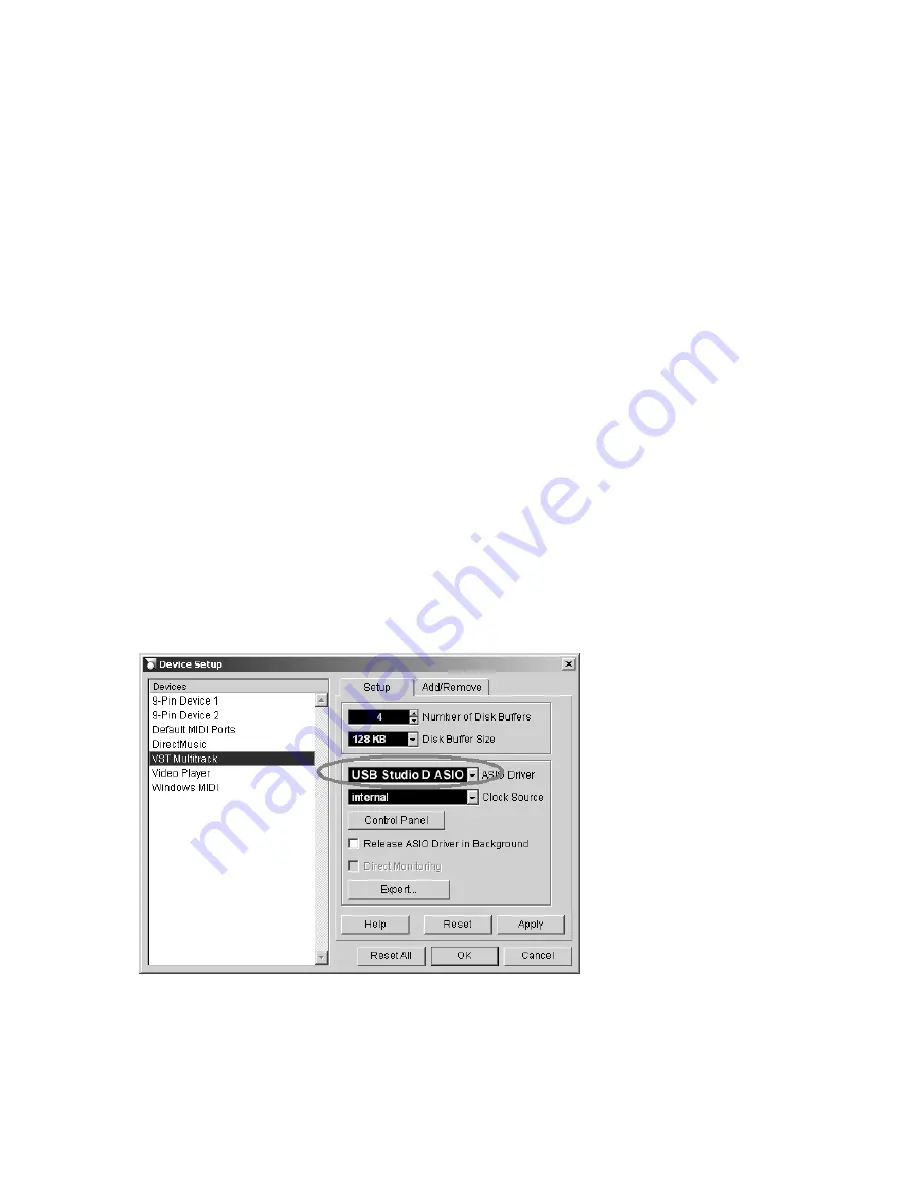
Cubase SX/SL or Nuendo
When you use the USB Studio D Mk. II in ASIO compatible applications under Windows
such as Cubase SX / SL or Nuendo from Steinberg, you need to select the ASIO driver of the
unit inside the
VST Multitrack
setup dialog. The following screen shot shows Nuendo,
although it will look similar in other ASIO compatible applications:
If you click on
Control Panel
, you can change the hardware options and the buffer size
(which equals the latency) of the ASIO driver.
The Cubase SX / SL and Nuendo setup under Mac OS X is similar although you cannot call
the Control Panel from within the application (you need to launch that separatly if required).
14
Содержание USB Studio D Mk. II
Страница 1: ...Operating Manual English page 2 Benutzerhandbuch Deutsch Seite 20...
Страница 19: ...19...


