Swatch SWISS TIMING 3454.013 Скачать руководство пользователя страница 1


3454.504.02 

Version 1.7 

Edition March 2020 


OSB 11 


Swimming Starting Block 

User’s Manual 


Содержание SWISS TIMING 3454.013

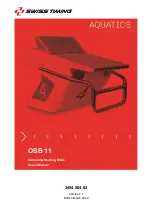
Страница 1: ...3454 504 02 Version 1 7 Edition March 2020 OSB 11 Swimming Starting Block User s Manual...

Страница 2: ...to refuse all guarantees if this condition is not fulfilled If the installation includes a horn be sure to maintain a sufficient security distance from the public Documentation Updates Swiss Timing L...

Страница 3: ...2 2 Fixation of the starting block 6 2 3 Drilling and mounting of the OSB11 6 3 TECHNICAL CHARACTERISTICS OF THE OSB11 SW WITH RELAY BREAK DETECTION RBD AND WITHOUT START CONTROL 7 4 CONTROL AND MAIN...

Страница 4: ......

Страница 5: ...ld class swimmers who have helped to specify the optimum angles of both the platform and the footrest for racing starts Design research also applied to the top surfaces very comfortable yet rough enou...

Страница 6: ...3 018 Spring loaded contact 3393 019 Contact screw 3393 020 Adjustment screw 3393 021 Isolation plate 3454 035 Isolation washer L 3 8mm 9590 4003 Washer M6 2013 and after 3393 022 Isolation washer L 5...

Страница 7: ...013 Starting block 2 3454 014 Rear door 3 3454 012 Platform with footrest 4 3454 019 Intermediate plate 5 A4 self blocking nut M8 9557 1505 A4 washer M8 9580 1614 6 3454 015 Handle 7 Fixation materia...

Страница 8: ...k 1 3454 030 Drilling gauge 2 9051 9803 Drill 5 9051 9008 Drill 10 9051 9814 Drill 16 3 9039 8582 Anchor with internal thread M8 x 90 4x 4 3454 032 Stainless steel washer M8 4x 5 3454 031 Hexagon head...

Страница 9: ...ouchpad to the front of the base The handle of the OSB11 must be aligned with the border of the touchpad for example OCP5 Are the touch plates missing or is the swimming pool too small with touchpads...

Страница 10: ...vide space for the cables the gauge has a hole of 120mm Put the drilling gauge 1 on the border of the swimming pool and mark the 4 5 holes of the gauge with a 5 drill Drill the 4 holes respectively wi...

Страница 11: ...CONTROL OSB11 RBD OSB11 Simple DIMENSIONS 780 x 570 x 650 Platform 740mm x 520mm WEIGHT KG 47 41 COLOURS Platform white RAL 9010 with non skidding surface dark blue RAL 5002 RAL 5017 since 2019 CONTA...

Страница 12: ...ound proceed as described in paragraph 4 5 4 2 Pressure sensitivity control Press with the Dynamometer 12 against the middle of the platform 3 Read on the Dynamometer 12 the pressure necessary to acti...

Страница 13: ...djustment proceed as follows Make sure that the platform and the RBD are correctly assembled there must be a visible movement Paragraph 4 8 Make sure that the 2 adjustment screws are not too far apart...

Страница 14: ...but do not tighten them push the RBD to the maximum forwards towards the handle and tighten Make sure the required distances between the base and the RBD platform are correct Do the same with the pla...

Страница 15: ...e platform by removing the 6 nuts indicated in green located under the top and inside the base Do not unscrew nuts indicated in red Instruction for dismantling the footrest Position the footrest on nu...

Страница 16: ...op to access the lateral screws Unscrew the 4 screws 2 on each side Figure 10 Dismantling of the footrest Pull to remove the footrest then remove the guides To reassemble the footrest start from this...

Страница 17: ...year depending on the degree of contamination of the stainless steel You must pay extra attention to the RBD Relay Break Detection and the handles backstroke ledge Concerning dismantling it is imperat...

Страница 18: ...se fresh water for cleaning Never use abrasive material to clean the stainless steel parts Drying the stainless steel parts must be done using a clean dry cloth Use specially dedicated stainless steel...

Страница 19: ...igure 10 Dismantling of the footrest 12 6 3 Version history Version Date Modifications since last version 1 0 01 01 10 Initial version 1 1 01 06 10 Minor modifications 1 2 14 07 11 Modifications refer...

Страница 20: ...Page 16 3454 504 02 Version 1 7 NOTES...

Страница 21: ...P O Box 138 rue de l Envers 1 Phone 41 32 488 36 11 CH 2606 Corg mont www swisstiming com Switzerland info swisstiming com SWISS TIMING LTD SWISS TIMING LTD...

Отзывы: