6
Control
What is trim (rotation)?
You may fi nd that the helicopter rotates left or right while hovering, even when you are not
using the right stick on the controller. This rotation is because the two sets of rotor blades
sometimes get out of sync requiring adjustment to the trim.
The trim knob is located in the top right of the controller and fi ne-tunes the speed of the rotor
blades to keep the helicopter fl ying straight.
Trim should be checked each time you fl y the helicopter to make sure the chopper fl ies straight.
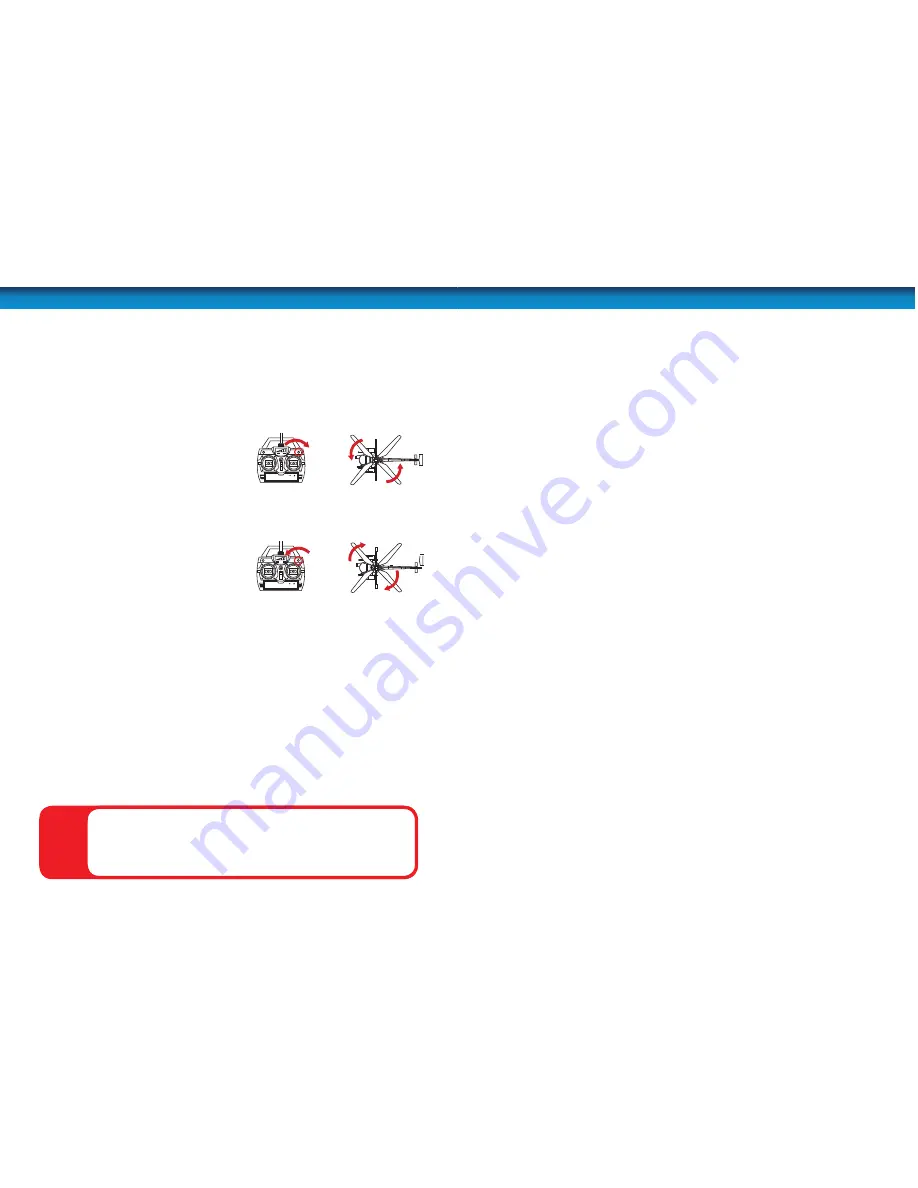
If the helicopter is rotating clockwise, gently
rotate the trim knob counter-clockwise until
the helicopter stops drifting to the right.
While hovering, if the helicopter is rotating
counter-clockwise, gently rotate the trim knob
clockwise until the helicopter stops drifting to
the left.
CAUTION
: Do not touch the running rotors. Do not
fl y above or near someone’s head. Adult supervision is
required at all times.
!
Turn TRIM knob
clockwise...
Turn TRIM knob
anti-clockwise
...if helicopter is
drifting clockwise
...if helicopter is drifting
anti-clockwise
7
Using the onboard camera
Photo and Video Recording
The SkyEye is just that, your eye in the sky. You can record photos and video of your fl ights
from its onboard camera straight to its internal storage. The camera has up to 480MB of
storage which is more than enough to capture an entire fl ight in video.
The camera is ready for action as soon as you turn on the helicopter. All you have to do is
trigger a photo or video capture from the remote control.
Memory Full
: When you turn on the chopper, if the blue ‘recording’ LED on the chopper
fl ashes constantly, the internal storage memory is full. You will need to delete or copy the
contents of the memory to a computer. See
“Viewing your photos and video on a
computer” on page 7
. The blue LED is located inside the cockpit canopy of the chopper.
Photo recording
•
To take a photo, press the PHOTO button on the remote control. The blue LED on the
helicopter will fl ash once to confi rm that a photo has been taken.
Photos are taken at 320x240 resolution in JPG format.
Video recording
•
To begin recording VIDEO, press the VIDEO button on the remote control. The blue LED on
the remote will glow while recording. Press the VIDEO button again on the remote to stop
recording. When the fi le has fi nished being saved, the blue LED will stop glowing.
Videos are taken in 640x480 resolution in AVI format.
Motion Blur
The helicopter can move fast, sometimes too fast to get good quality images free from blur.
In this case, it may be useful to fl ick the speed switch in the top left corner from “quick” to
“slow”. Slow reduces the speed of the rear tail rotor and therefore the maximum speed of the
helicopter through the air. This may help the camera to better capture the images without you
needing to focus on controlling your need for speed.
Resetting the helicopter
If you experiencing issues taking photos or video, the chopper may need to be reset. Turn off
your helicopter and remove it from the charger.
Insert a small pointed instrument like a straightened paper clip into the hole next to the USB
port which contains the RESET button and press it down for three seconds.
Viewing your photos and video on a computer
You can connect the helicopter to your PC using the included USB cable to view the photos
or video you have taken. You can also copy or move the images from your chopper to your
computer for editing or later viewing.
•
Make sure the chopper is OFF before you connect it to the PC.
•
Insert the mini-USB plug into the mini-USB socket on the front of the helicopter.
•
Attach the cable to your PC. The helicopter should be recognized as a USB storage device.
•
Photos are contained in the folder
IMAGE->RECORD
.
•
Videos are contained in the folder
VIDEO->RECORD
.


