666
77
6
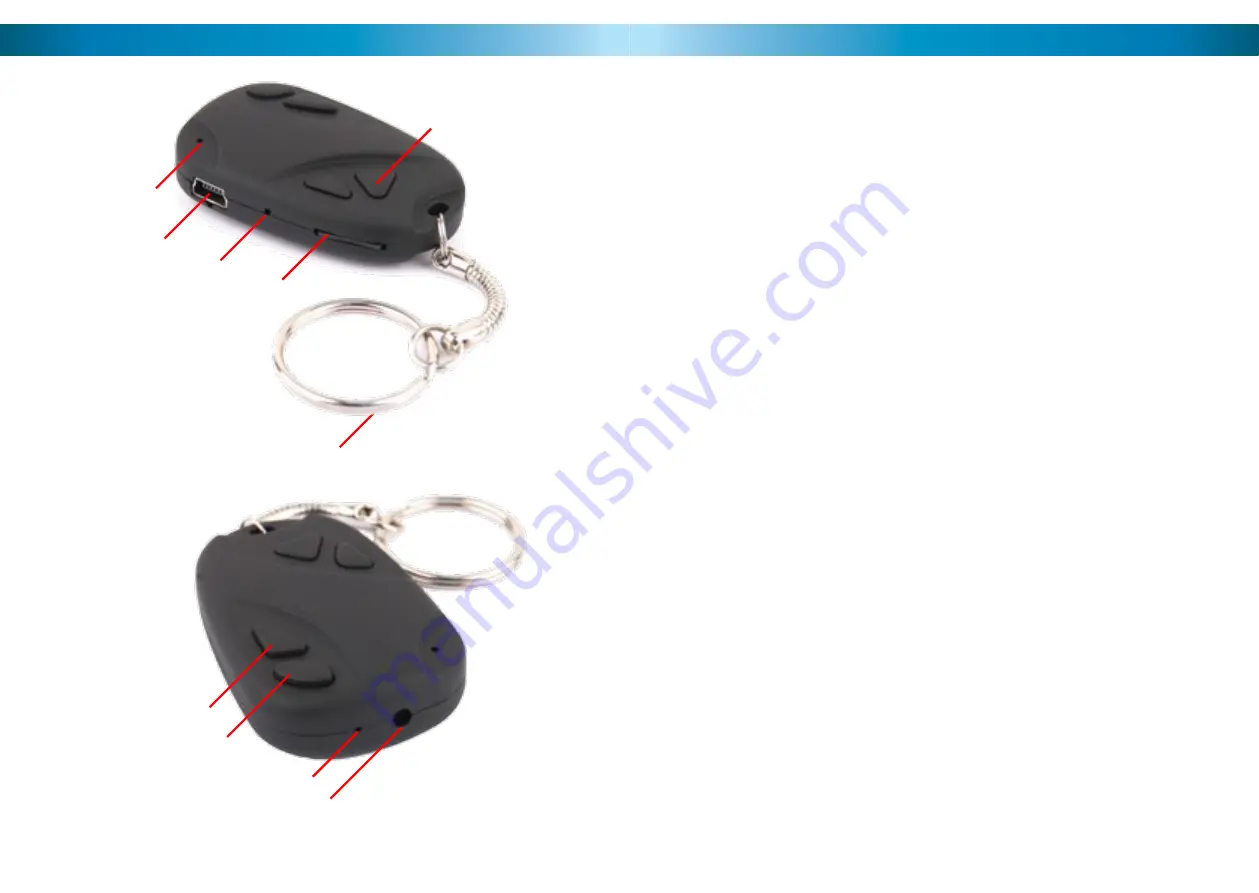
Layout
LED:
A small orange light which will indicate the current state and function of the
RemoteCam. In bright light (such as sunlight) this might be difficult to see.
Mini USB Port:
A Mini-USB-A port. Use the supplied USB cable to attach the
RemoteCam to a computer or USB charger.
Reset Button:
Used to quickly return the
RemoteCam
to it’s initial booted state.
This is typically used only if the
RemoteCam
freezes and needs to be reset.
MicroSD Card Slot:
The slot for inserting the microSD card which the
RemoteCam
records to. To insert a card, simply push it into the slot. To remove it, push it in
again, and it will ‘pop’ right out. Pictured with microSD card inserted.
Keychain:
Used to attach keys. Adds to the concealability of the camera, as
remote controls for cars or garage doors are commonplace on keychains.
Power:
Press to turn the
RemoteCam
on and off. Do not turn off the
RemoteCam
whilst recording, or immediately after recording.
Record:
Starts and stops the
RemoteCam
recording. Press quickly to take a
photograph. Press and hold to start recording video, and press again to stop.
Microphone:
The device which records sound. If this hole is blocked, then the
range and quality of the audio recording will be significantly reduced.
Lens:
The business-end of the camera, used to focus light on to the image sensor.
For best results, ensure the lens is clean and free from debris.
Additional Buttons:
The
RemoteCam
only needs two buttons to operate -
however, the majority of remote controls have more than two buttons! To keep
up the illusion, we included these two additional buttons. They’re just there for
looks, and won’t do anything at all.
Lens
Microphone
Record
Power
Keychain
MicroSD Card Slot
Reset
Mini USB Port
LED
Additional Buttons


