14
14
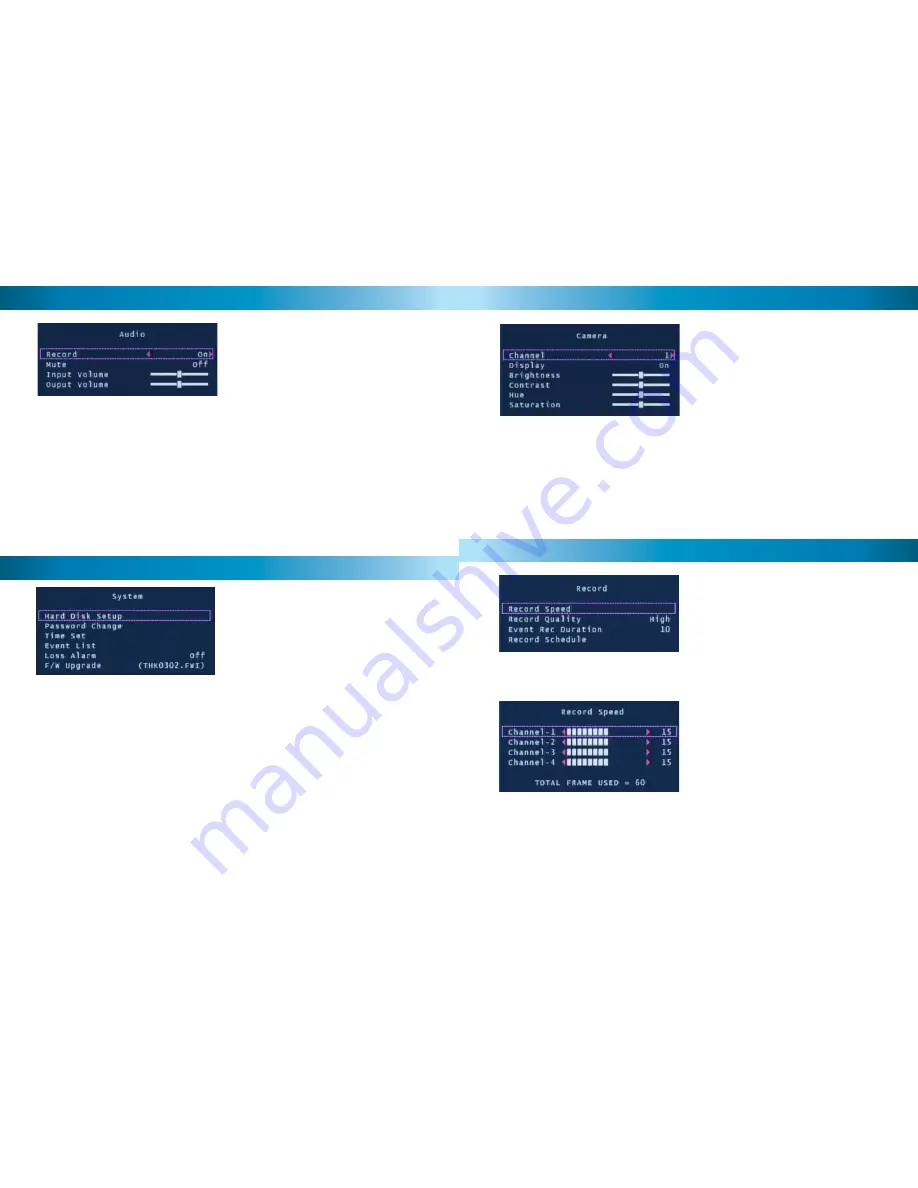
The Audio menu sets the audio
recording and volume options.
Note: You must have a camera with
audio or a powered microphone to
record or monitor audio.
Record:
Set to ON to record audio from the Audio Input on the back of the
DVR.
Mute:
Turns Audio output on or off when viewing or recording cameras.
Alternatively, press the Mute button to turn Audio on or off while viewing your
cameras.
Input Volume:
Move the slider to change the volume of the audio recorded.
Output Volume:
Move the slider to change the volume of audio playback.
Audio Menu
System Menu
The System menu provides general
setup options such as hard disk
information, time, date and fi rmware
settings.
Hard Disk Setup:
Display information about the installed hard disk including
total size and memory usage.
Overwrite Enable:
If activated, when the hard disk is full the DVR will overwrite
the oldest footage automatically. Default: Yes.
Format HDD:
This option will permanently delete all data on the hard disk. The
password must be correctly entered to format the hard disk.
Password Change:
This option will change the current password. You will be
prompted to enter the current password, the new password and then confi rm
the new password before the change is complete. Note: The default password is
“
111111
”. If you have lost or forgotten your password contact Swann
Communications Technical Support for assistance.
11
11
Camera Menu
The Camera menu allows you to
change visual attributes on each of the
camera channels.
Channel:
Display the attributes of currently selected camera 1-4.
Display:
Turn the selected camera On or Off in the main display.
Brightness, Contrast, Hue, Saturation:
Using the UP & DOWN buttons high-
light the display option you want to change. Use the FAST FOWARD button to
increase the settings and the REWIND button to decrease them.
The Record Menu adjusts recording
quality, timers and schedules.
You may individually set the Record
Speed of each camera. The total
number of frames used can not exceed
60 for NTSC systems or 50 for PAL
systems. Setting lower frame rates will
consume less hard drive space.
Record Speed:
Set the recording frame rate per camera. Note: higher frame
rates provide smoother recordings but use more hard drive space.
Record Menu


