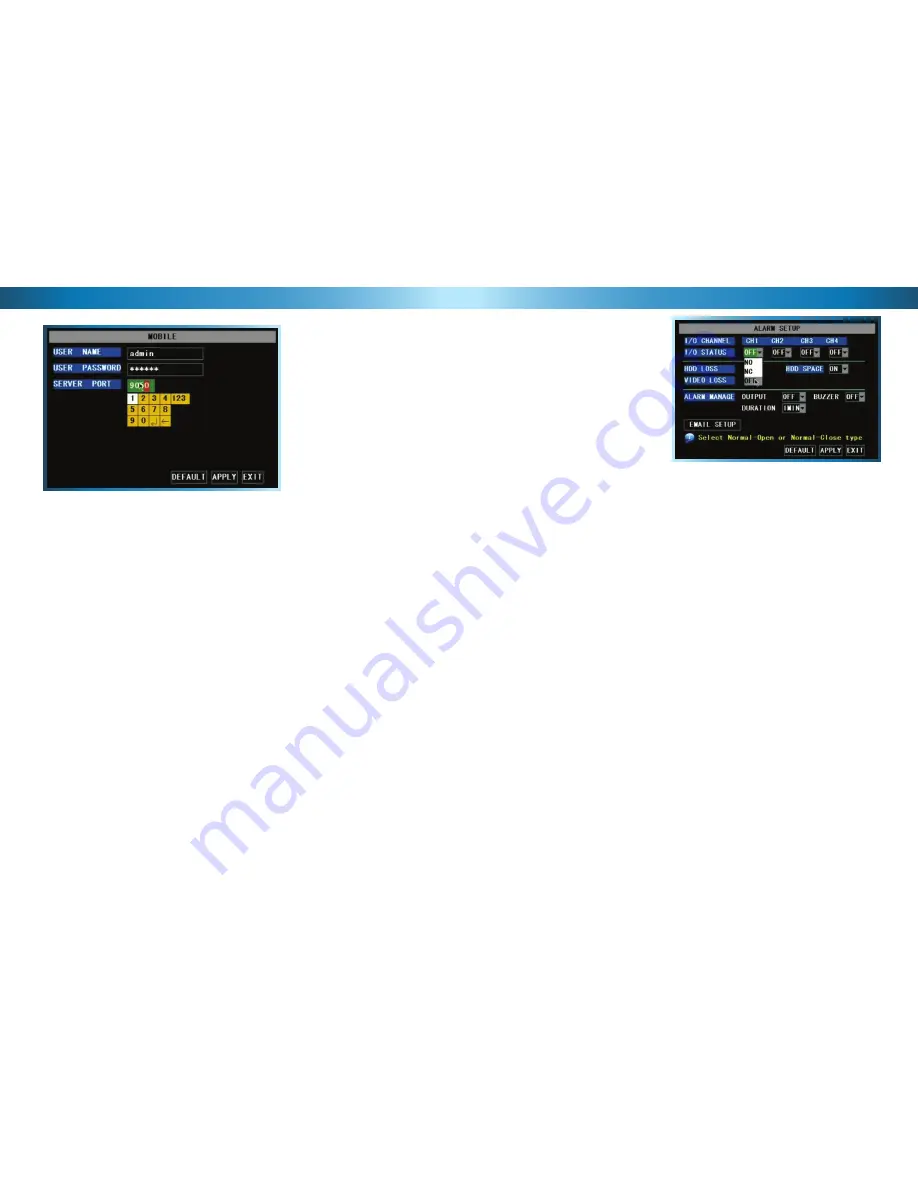
The Mobile Devices Menu
Remember: After making changes to the settings press/click the APPLY button.
36
The MOBILE confi guration menu.
In this picture, the SERVER PORT is
being edited.
USER NAME:
This is the user name that you’ll need to use when logging into the
DVR via a mobile device. The default user name is “admin” - but this can be set to
anything you desire. We suggest changing this setting to something unique, to aid
in preventing unauthorized access to the data stored on the DVR.
USER PASSWORD:
The security password associated with the above user name,
which will allow you to access the DVR. The default password is “123456”. As
above, we suggest changing this value to something unique to better safeguard
the DVR against unauthorized access.
SERVER PORT:
The port number that the DVR will use to access the Internet.
See the section on Remote Access (pages 51 - 55) for more information about
selecting and confi guring ports.
Requirements
To access the DVR via a mobile device, the following conditions must be met:
A high-speed Internet connection with an upload speed in excess of 256kbps
•
(ideally above 512kbps).
The DVR attached to this high-speed Internet connection.
•
Your home network correctly confi gured to allow the DVR’s SERVER PORT
•
unrestricted access to the Internet. Typically, this requires that you setup your
router/gateway for port forwarding.
A compatible mobile device. Currently, the DVR4-2500 supports a mobile
•
device (such as a cellphone) running
Microsoft Windows Mobile
®
and the
iPhone
.
The correct application(s) installed on your mobile device. See page 54 for
•
more details on how to use a mobile device to remotely access the DVR.
A suffi cient signal to your mobile device (areas with intermittent coverage or
•
low signal strength will adversely affect the playback).
The Alarm Menu
Remember: After making changes to the settings press/click the APPLY button.
33
This is the ALARM SETUP menu. If you
have external sensors connected to the
DVR or an alarm connected to the DVR,
this is where you set them up.
Additionally, from this menu you can
confi gure the DVR to emit an alarm tone
from it’s internal buzzer, or confi gure the
DVR to send an ‘Auto-Mail’ email alert
when motion is detected or an alarm
sensor is triggered.
Please Note: We are unable to offer any technical support for attaching
external sensors to this DVR.
This is due mainly to the huge variation between
different sensor types from different manufacturers, as well as the differences due
to environmental factors. We recommend that only advanced users or professional
installers use this feature. The DVR’s motion detection feature provides the vast
majority of the functionality of external sensors and is much easier to confi gure.
I/O Channel:
These channels correspond to the four channels to which cameras
are connected. Thus, if you are using external sensors, you should connect them
directly to the input for the video channel you want to be associated with.
I/O Status:
This needs to be set in accordance with any sensors you have
connected to the DVR. If there is no sensor attached to a channel, leave this set
to OFF. NO stands for “Normally Open” - select this if the sensors usually have an
‘open’ circuit which closes when something is detected. NC stands for “Normally
Closed”. Choose this if your sensors provide closed circuits which open when it
detects something.
HDD Loss:
Will trigger an alarm/buzzer if the hard drive stops functioning.
HDD Space:
Will trigger an alarm/buzzer when the hard drive is out of space.
Video Loss:
Will trigger an alarm/buzzer when a camera stops supplying images.
Alarm Management:
Here you can confi gure how the DVR will alert you in the
case of an internal alarm event. You can select whether the DVR attempts to
trigger an external alarm or sounds an internal buzzer, as well as how long this
alarm/buzzer will be active.
Email Setup:
See page 34.


