13
Motion Detection
Motion detection is an essential part of your security system. It’s the
main method that detects when someone is in your home when they
shouldn’t be. When motion has been detected by one or more cameras,
a signal is sent to your DVR, alerting you to a potential threat in your
home. It does this in several ways such as activating an audio warning
using its internal buzzer, sending an email and sending an alert to your
smartphone or tablet. You can also configure your DVR so it triggers the
other cameras to start recording.
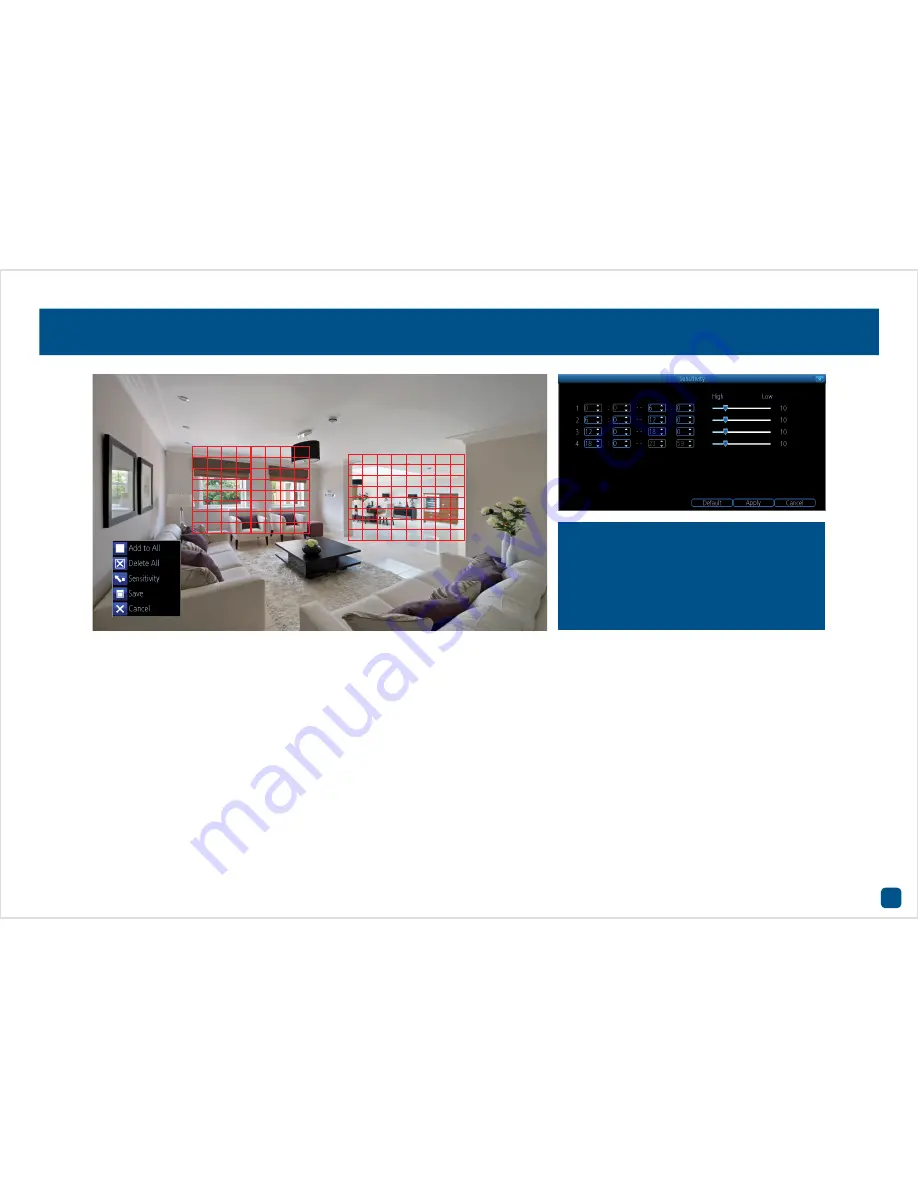
Motion detection is the default recording mode for the DVR. The entire
view of the camera is enabled to detect motion however you can select
certain areas if you wish. In the above example, a motion detection zone
has been setup for the windows and dining room entrance. Movement
outside of these zones will not be detected.
1.
Right-click the mouse to access the sub-menu then click “Delete All”.
2.
Click and drag to select the area that you want to create a zone for.
Multiple zones can be created. The same action also applies if you want
to delete a zone that has been created.
3.
You can adjust the sensitivity level (see above) if required.
4.
Right-click the mouse to access the sub-menu then click “Save” to
save any changes that you have made. To revert back to default settings
click “Add to All” or click “Cancel” to exit.
• Click the “Default” button to revert back to default settings.
• Use the “Copy to” button to apply all settings to the other cameras.
• Don’t forget to click “Apply” to save settings.
• Right-click the mouse to exit the Menu.
Using the “Sensitivity” function, you can
change the motion sensitivity level for each
time period available. The level is controlled
by a slider, allowing you to set a value be-
tween 0 and 50. The lower the number, the
more sensitive the motion detection will be.


