6
Mounting the Camera (ctd)
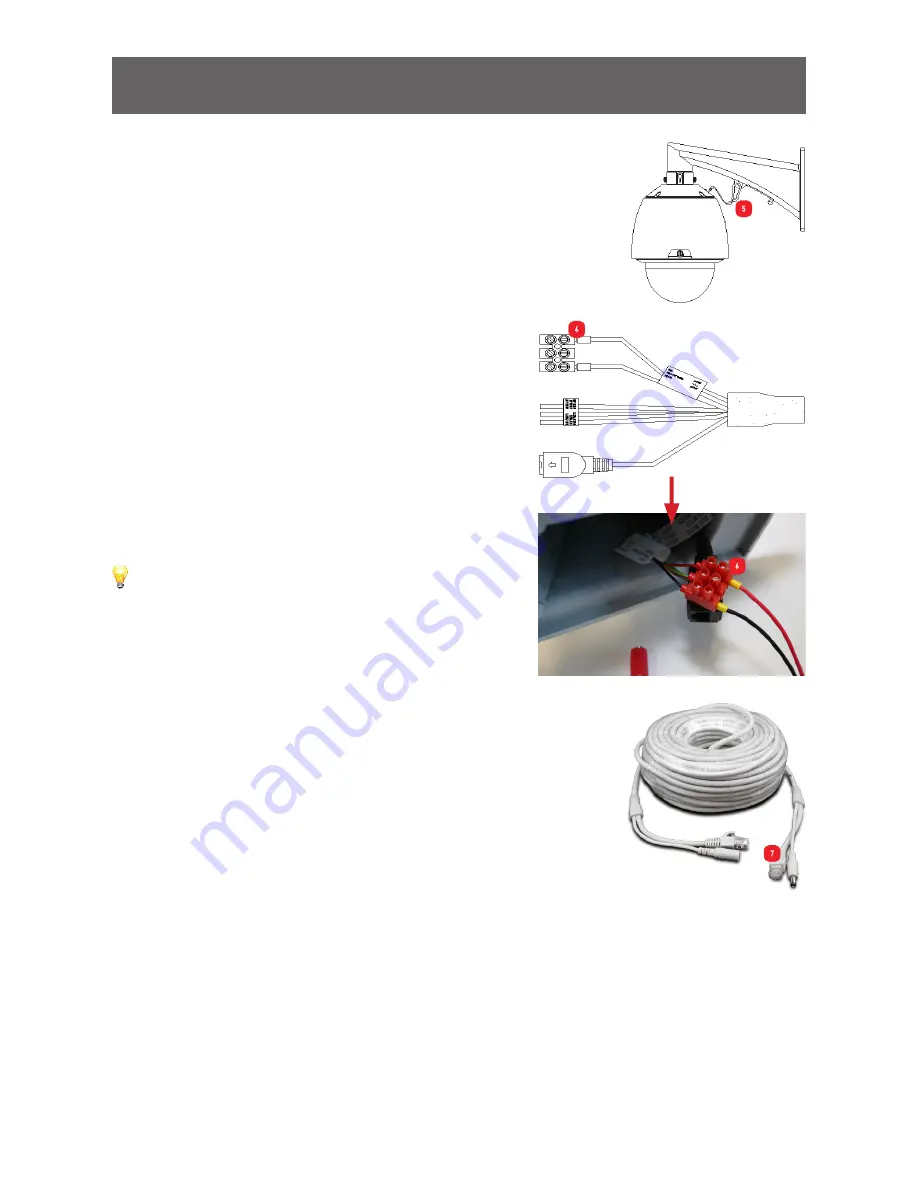
(5):
Secure one end of the provided safety cable
to the mounting bracket, and the other end to the
camera.
We’re nearly there, just need to connect the power
terminal cable and the grey coloured Ethernet &
power cable.
(6):
Using a flat head screwdriver, connect the
power terminal cable to the left and right hand
side of the terminal block, then tighten the screws
to secure the cable.
(7):
The grey coloured Ethernet & power cable has
two different connections for power, one male,
and the other female. Connect the male side of
the cable to the power terminal cable and the
Ethernet socket located on the cable connected to
the camera.
Please note; the audio connections located on
the camera cable are not used for this model.
(8):
Tuck the remainder of the camera cable inside
the mounting bracket.
You are now ready to mount the camera to its
permanent location.
(9):
Grab the mounting bracket and camera in both
hands, and then place the mounting bracket over
the marks that you previously created. It may be
helpful if you could get someone to hold the bracket
and camera in place as it is a little heavy. Use the
supplied mounting screws to securely fasten the
mounting bracket to the surface.
Don’t forget to remove the protective plastic sheath
from the dome after installation.
5
6
6
7


