background image

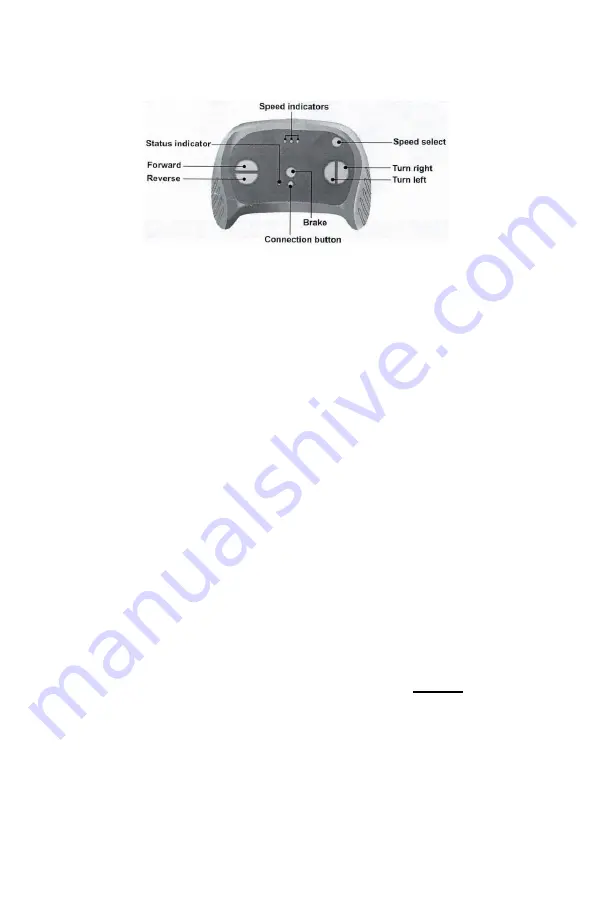
Connecting the Remote Control to the Car and  

Remote Control Function 


1.

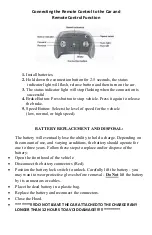
 Install batteries. 

2.

 Hold down the connection button for 2-5 seconds, the status  

                  indicator light will flash, release button and then turn on the car. 

3.

 The status indicator light will stop flashing when the connection is  

                  successful. 


4.

 Brake Button:


Press button to stop vehicle. Press it again to release  

                 the brake. 

5.

 Speed Button:


Selects the level of speed for the vehicle  


    (low, normal, or high speed).   


BATTERY REPLACEMENT AND DISPOSAL: 


The battery will eventually lose the ability to hold a charge. Depending on 
the amount of use, and varying conditions, the battery should operate for 
one to three years. Follow these steps to replace and/or dispose of the 
battery:


Open the front hood of the vehicle 


Disconnect the battery connectors (Red). 


Position the battery lock switch to unlock. Carefully lift the battery - you 
may want to wear protective gloves before removal - 

Do Not

 lift the battery 

by its connectors or cables. 


Place the dead battery in a plastic bag. 


Replace the battery and reconnect the connectors. 


Close the Hood. 


*******!!!!DO NOT LEAVE THE CAR ATTACHED TO THE CHARGER ANY 
LONGER THAN 12 HOURS TO AVOID DAMAGE!!!!!!******** 


Содержание UTV SCREEMER

Страница 1: ...uctions Please read this instruction manual carefully It is important to read and follow all of the steps during assembly to ensure proper operation and safety of the child Please keep this manual for...

Страница 2: ...collisions causing injury to the child or third party Do not pick up vehicle by steering wheel Do not pick up battery by wires or charger Keep all plastic bags out of the reach of young children Not r...

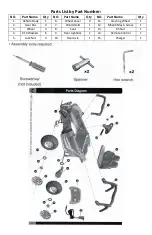
Страница 3: ...ame Qty NO Part Name Qty 1 Vehicle Body 1 6 Wheel Cover 4 11 Steering Wheel 1 2 Gear Box 2 7 Windshield 1 12 M5x40 Mach Screw 1 3 Wheel 4 8 Seat 1 13 5 Nut 1 4 10 Washers 6 9 Rear Light Bar 1 14 Remot...

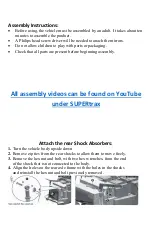
Страница 4: ...re present before beginning assembly All assembly videos can be found on YouTube under SUPERtrax Attach the rear Shock Absorbers 1 Turn the vehicle body upside down 2 Remove zip ties from the rear sho...

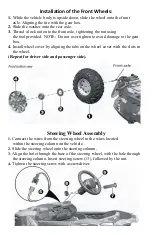
Страница 5: ...important to have gear boxes slid onto axle so that the gear box is touching the rear axle frames 4 Slide a wheel onto each side of axle NOTE During this process it is necessary to install the wheel...

Страница 6: ...gear box 4 Install wheel cover by aligning the tabs on the wheel cover with the slots in the wheel Repeat for driver side and passenger side Steering Wheel Assembly 1 Connect the wires from the steeri...

Страница 7: ...e tabs of the rear roll bar into the holes in the vehicle body Push downward until you hear it click into place Installing the Seat 1 Align the slide grove on the bottom of the seat with the slide gro...

Страница 8: ...lifting upward 2 INSPECT WIRING power connections should be red wire to positive side of battery and black wire to negative side of battery Typically these connections are made during the quality cont...

Страница 9: ......

Страница 10: ...T AND DISPOSAL The battery will eventually lose the ability to hold a charge Depending on the amount of use and varying conditions the battery should operate for one to three years Follow these steps...

Страница 11: ...the battery with the bracket Battery can fall out and injure a child if vehicle tips over The Power Switch must be turned in the OFF position when charging When the car begins to run slowly recharge...

Страница 12: ...h Vehicle is being used in harsh conditions Change the battery Charge the battery Do not exceed max weight limit Use on flat surfaces Avoid using car in harsh conditions Noise coming from motor gearbo...

Отзывы: