background image


7:  Installation of the steering wheel: 

     Remove nut and bolt from the steering wheel assembly.  Connect the  
     wire connector from the steering wheel to the corresponding  
     connector at the steering column.  Slide the steering wheel onto the  
     steering shaft while feeding the wire connector into the steering  
     column.  Line up the hole in the steering column to the hole through  
     the steering wheel assembly and slide bolt through.  Secure with the     
     nut.              

     NOTE:

  Due to possible movement in the steering shaft through the  

     column, the hole in the steering shaft may not line up with the hole  
     through the steering wheel assy.  If this happens, use one hand under  
     the car and push the steering shaft upward while attempting to line up  
     the holes for the bolt to secure the steering wheel.  Please see photo.   


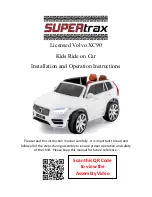
Содержание Licensed Volvo XC90

Страница 1: ...nstructions Please read this instruction manual carefully It is important to read and follow all of the steps during assembly to ensure proper operation and safety of the child Please keep this manual for future reference Scan this QR Code to view the Assembly Video ...

Страница 2: ... falls and collisions causing injury to the child or third party Do not pick up vehicle by steering wheel Do not pick up battery by wires or charger Keep all plastic bags out of the reach of young children Not recommended for children under the age of 2 yrs due to small parts that could cause a choking hazard Battery must be charged for a minimum of 8 12 hours prior to first use of the car to avoi...

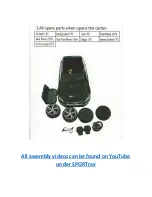
Страница 3: ...All assembly videos can be found on YouTube under SPORTrax ...

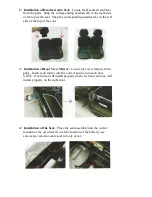
Страница 4: ...f the seat 3 Installation of Rear View Mirror Locate rear view mirrors from parts Insert each mirror into the correct position on each door NOTE One mirror will install properly on the left door and one will install properly on the right door 4 Installation of the Seat Place the seat assembly into the correct location of the car directly over the location of the battery use screws provided to secu...

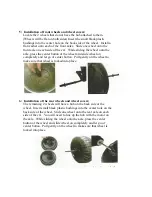
Страница 5: ...n completely and let go of center button Pull gently on the wheel to make sure that wheel is locked into place 6 Installation of the rear wheels and wheel covers The remaining 2 wheels will have a hub on the back side of the wheel Insert small black plastic bushings into the center hole on the back side of the wheel Slide one wheel onto the rear axle on each side of the car You will need to line u...

Страница 6: ... steering column Line up the hole in the steering column to the hole through the steering wheel assembly and slide bolt through Secure with the nut NOTE Due to possible movement in the steering shaft through the column the hole in the steering shaft may not line up with the hole through the steering wheel assy If this happens use one hand under the car and push the steering shaft upward while atte...

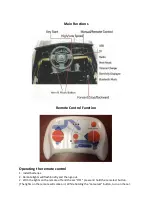
Страница 7: ...e control 1 Install batteries 2 Remote lights will flash briefly and then go out 2 With the lights on the remote off and the car OFF press and hold the car select button The lights on the remote will come on While holding the car select button turn on the car ...

Страница 8: ...s to change the education feature BATTERY REPLACEMENT AND DISPOSAL The battery will eventually lose the ability to hold a charge Depending on the amount of use and varying conditions the battery should operate for one to three years Follow these steps to replace and or dispose of the battery Remove the cars seats Disconnect the battery connectors Remove the metal battery bracket Carefully lift the...

Страница 9: ...open the battery Battery contains lead acid and other materials that are toxic and corrosive Do not open the charger Exposed wiring and circuitry inside case could cause electric shock NEVER allow a child to handle or charge the battery Battery is heavy and contains lead acid electrolyte Do not drop the battery Permanent damage to the battery could occur or cause serious injury Before charging the...

Страница 10: ...heat such as stoves and heaters Plastic parts may melt Recharge the battery after each use Only an adult should handle the battery Recharge the battery at least once a month when not being used Do not wash the vehicle with a hose Do not wash the vehicle with soap and water Do not drive the vehicle in rainy or snowy weather as water will damage the motor electric system and battery Clean the vehicl...

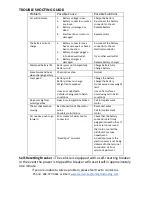
Страница 11: ...l path Vehicle is being used in harsh conditions Change the battery Charge the battery Do not exceed max weight limit Use on flat surfaces Avoid using car in harsh conditions Noise coming from motor gearbox Gear in motor gearbox broken Call for replacement motor The car shakes when moving Bad Connection of the motor wires Possible motor failure Reconnect wires Call for replacement motor Car needs ...

Отзывы: