


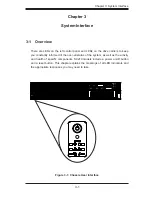
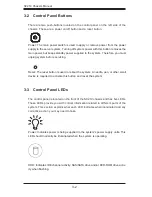
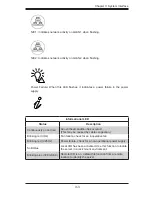
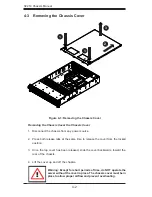


SC219 Chassis Manual
4-4
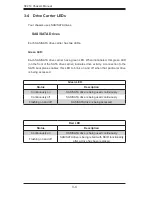
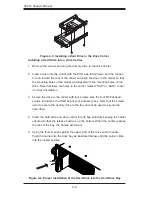
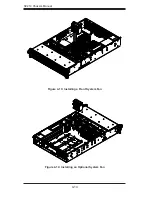
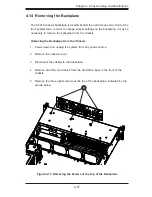
Figure 4-3: Installing a Hard Drive in the Drive Carrier
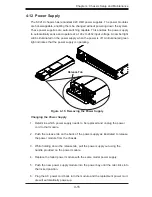
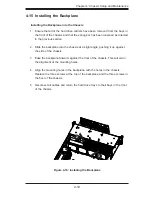
Figure 4-4: Proper Installation of the Hard Drive into the Hard Drive Bay
Installing a Hard Drive into a Drive Carrier
1. Remove the screws securing the dummy drive to the drive carrier.
2. Insert a drive into the carrier with the PCB side facing down and the connec-
tor end toward the rear of the carrier and align the drive in the carrier so that
the mounting holes of the carrier are aligned with the mounting holes of the
drive. Note that there are holes in the carrier marked "SAS" or “SATA” to aid
in correct installation.
3.
Secure the drive to the carrier with four screws. Use the four M3 flat-head
screws included in the HDD bag of your accessory box. Note that the screws
used to secure the dummy drive to the tray cannot be used to secure the
hard drive.
4. Insert the hard drive and drive carrier into its bay vertically, keeping the carrier
oriented so that the release button is on the bottom. When the carrier reaches
the rear of the bay, the handle will retract.
5. Using the thumb, push against the upper part of the drive carrier handle.
Push the carrier into the drive bay as illustrated below, until the carrier clicks
into the locked position.
Содержание SC219 Chassis Series
Страница 1: ...SC219 Chassis Series SC219A R920UB SC219A R920LPB SC219A R920WB USER S MANUAL 1 0 SUPER SUPERMICR ...
Страница 8: ...SC219 Chassis Manual viii Notes ...
Страница 12: ...SC219 Chassis Manual 1 4 Notes ...
Страница 40: ...SC219 Chassis Manual 4 20 Notes ...
Страница 50: ...SC219 Chassis Manual 5 10 Notes ...
Страница 54: ...SC219 Chassis Manual A 4 Notes ...
Страница 56: ...SC219 Chassis Manual B 2 Notes ...
Страница 67: ...C 11 Appendix C SAS 213A Backplane Specifications Notes ...