SBI-7127RG-E Blade Server Module User’s Manual
3-12
4.
Gently press down on the DIMM until it snaps into place in the slot. Repeat for all
modules.
5.
Replace the air shroud and the blade cover and install the blade module back into
the enclosure.
6.
Power up the blade unit (see
"Powering Up a Blade Unit" on page 3-1
).
3-6
Hard Drive Installation
The SBI-7127RG-E blade module does not mount a hard disk drive system. However
you may install an optional SATA DOM module for file or operating system storage,
install an HDD or SSD drive or use the USB port for a USB drive. See
for more details.
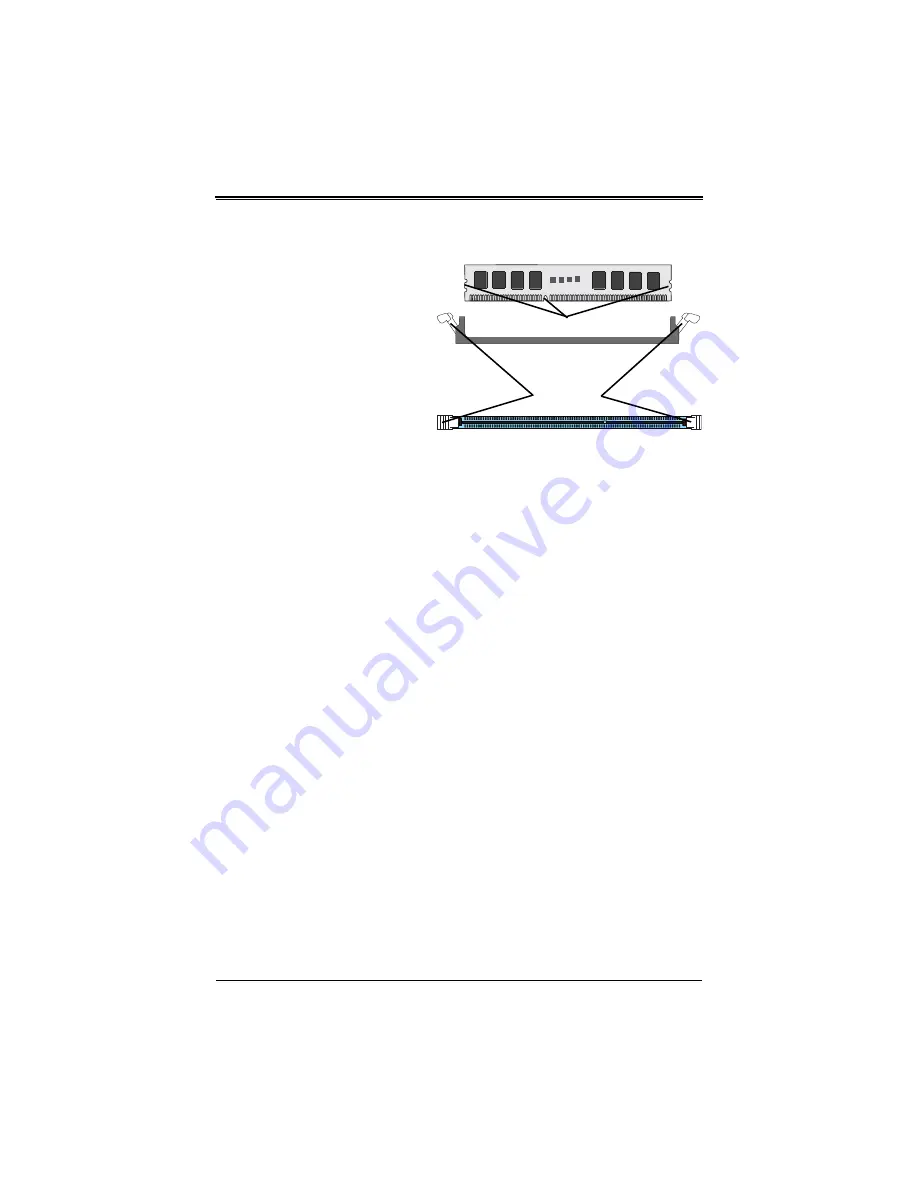
Figure 3-14. Installing a DIMM into a Memory Slot
To Install:
Insert module vertically
and press down until it snaps into
place. Pay attention to the bottom
notch.
To Remove:
Use your thumbs to
gently push each release tab
outward to free the DIMM from the
slot.
Note:
The notch should align with
the receptive key point on the slot.
Side View
Top View
Notch
Release Tabs
Содержание SBI-7127RG-E
Страница 1: ...SBI 7127RG E Blade Server Module User s Manual Revison 1 0...
Страница 4: ...SBI 7127RG E Blade Server Module User s Manual iv Notes...
Страница 8: ...SBI 7127RG E Blade Server Module User s Manual viii Notes...
Страница 30: ...SBI 7127RG E Blade Server Module User s Manual 2 18 Notes...
Страница 33: ...3 3 Chapter 3 Setup and Installation Figure 3 1 Inserting a Blade into the Enclosure...
Страница 46: ...SBI 7127RG E Blade Server Module User s Manual 3 16 Figure 3 18 Blade Module Front Assembly without GPU Modules...
Страница 74: ...SBI 7127RG E Blade Server Module User s Manual 5 18 Notes...
Страница 84: ...SBI 7127RG E Blade Server Module User s Manual A 10 Notes...
Страница 86: ...SBI 7127RG E Blade Server Module User s Manual 0 2 Notes...


