


Superabrasive
User
Manual
Original
Language
Lavina®
25G
‐
X
2/2015
22
Figure 8.8.5
Figure 8.8.6
8.8
CORRECTING
DEFLECTION
OF
THE
USED
PLANETARY
CHAIN
Unscrew
the
eight
bolts
(Fig.8.8.1)
and
take
out
the
cover
(Fig.8.8.2)
and
pull
out
the
hose
of
the
water
sprayer(Fig.8.8.3).
Lift
the
machine
in
position
to
change
the
tools.
Turn
manually
the
holders
in
order
to
turn
the
main
head,
stop
when
you
see
through
the
window
the
chain
tensioner
(Fig.8.8.4).
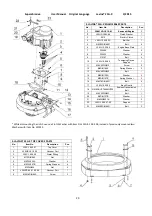
Loosen
a
quarter
to
1/2
rev
the
two
bolts
of
the
chain
tensioner
(Fig.8.8.5)
the
tensioner
should
turn
with
minimum
clearence,
without
inclination,
then
unscrew
the
inner
nut.
To
tension
the
chain
screw
the
outer
nut
(Fig.8.8.6).
The
tensioner
of
the
planetary
chain
should
allow
chain
sagging
3...5mm/1/8...3/16
in/
controlled
in
span
X
(Fig.8.8.7).
When
ready
screw
the
two
nuts
(Fig.8.8.6)
and
the
screw(Fig.8.8.5).
ATTENTION: NEVER “OVER” TENSION THE CHAIN,
THE CHAIN WILL BE DAMAGED
8.9
MOUNTING
NEW
PLANETARY
CHAIN
The
planetary
chain
is
replaced
with
new
one
when
the
step/drive
of
the
chain
tensioner
is
finished
or
there
is
a
break
in
the
integrity
of
the
chain.
Unscrew
the
eight
bolts
(Fig.8.8.1)
and
take
out
the
cover
(Fig.8.8.2)
and
pull
out
the
hose
of
the
water
sprayer
(Fig.8.8.3).
Lift
the
machine
in
position
to
change
the
tools.
Turn
manually
the
holders
in
order
to
turn
the
main
head,
stop
when
you
see
through
the
window
the
chain
tensioner
(Fig.8.8.4).
Separate
the
carriage
from
main
head,
point
8.3
,
pull
out
motor
plug,
water
tubes
and
vacuum
tubes.
Take
off
handle
(without
water
tubes)
(Fig.
8.8.3).
Release
the
pin
sets
which
attach
the
head
to
the
carriage.
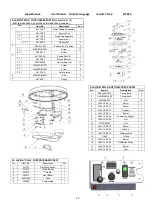
Take
off
the
weight
holders(Fig.
8.9.1),
machine
support(Fig.
8.9.2)
and
the
service
window
(Fig.
8.8.2)
so
you
can
dismount
the
top
cover(Fig.
8.9.3)
X
Figure 8.8.1
Figure 8.9.2
Figure 8.9.1
Figure 8.9.3
Figure 8.8.4
Figure 8.8.2
Figure 8.8.3


