background image

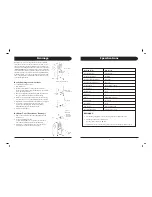
Specifications

3

Model Number

WA-7500M


Cooling Capacity

7,500 BTU/hr

Power Consumption

620W/6A

Humidity Removal Capacity

46 Pts./day

Recommended Room Size*

200 sq. ft.

Power Supply

120V / 60Hz / 1 Phase

Compressor

Rotary

Refrigerant

R-22

Fan Speed

2

Timer

WA-7500M: 1- 8 hours

Thermostat

64

°

F - 90

°

F

Net Weight

66  lbs.

Dimensions

16"W x 16"D x 30"H

Working Temperature

Cooling  64

°

F to 110

°

F

REMARKS:

1.  The data may vary, please refer to the rating label on the back of the unit.

2.   The above conditions are measured at:

Cooling - Indoor:  RT 81

°

F,  RH 60%

* Uninsulated rooms such as sunrooms, garages, or attics should be less than 200 sq. ft.

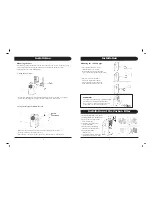
Drainage

10

Drain Pipe

Original
Water Tube

Extended
Water Tube
(OD: 3/4")

Rubber Plug

Drain Knob

Water Hole

Drain Knob

Rubber Plug

During the process of cooling, some water will be extracted
from the air into the unit.  Most of this water is used to cool
the unit and make it run more efficiently.  This is a feature not
found in most Portable Air Conditioners.  If the unit is operated
in VERY HUMID air, water will collect in the container inside the
unit.  If the water container is full, the compressor will stop, but
the fan will continue to circulate the air.  The POWER indicator
will blink to inform you to empty the internal container. To make
the cooling function work again, please empty the water by one
of the following methods:

By the Draining into a Container

Use a Shallow Container or Dish

1. Turn off the unit.

2. Position a flat container or dish under the drain hole.

Do not allow the water to drip continuously into the container,
as it might easily overflow.

3. Remove the drain knob & rubber plug from the drain hole.

The condensed water will drain out automatically.

4. When the container is almost full, replace the rubber plug

into the drain hole to stop the water. Empty the container.

5.  Repeat steps 2, 3 & 4 until all the condensed water is emptied.

6.  Once all the condensed water has been removed,

replace the rubber plug into the drain hole firmly.
The Full Water indicator should be off now.

7.  Replace the drain knob.

By Water Tube (Continuous Drainage)

1.  Remove the drain knob and rubber plug and keep them

for future use.

2.  Connect a suitable water tube

(of 3/4" internal diameter - supplied) to the water hole.
The condensed water will drain out automatically.

3. If you want to extend the water tube you can connect

it with another tube (outside diameter 3/4").

Содержание WA-7500M

Страница 1: ...antee after repair or replacement will not be extended beyond the original one year period All replacement parts or units will be new or reconditioned Parts or units which are replaced become the property of SUNPENTOWN The warranty applies to the use of this product in the United States Warranty does not include freight charges This GUARANTEE is in addition to your Statutory Rights Dear Customer P...

Страница 2: ...re direct sunshine Please close the curtains or blinds Are too many windows or doors open Are there too many people in the room Is there something in the room producing lots of heat The unit seems to do nothing Is the dust filter dirty Is the air intake or outlet blocked up Is the room temperature below the selected temperature The room is not cold enough The room being cooled should have proper i...

Страница 3: ...tainer is full the compressor will stop but the fan will continue to circulate the air The POWER indicator will blink to inform you to empty the internal container To make the cooling function work again please empty the water by one of the following methods By the Draining into a Container Use a Shallow Container or Dish 1 Turn off the unit 2 Position a flat container or dish under the drain hole...

Страница 4: ... Full water indicator 5 Thermostat 6 Speed switch with options for LOW FAN HIGH FAN LOW COOL HIGH COOL 7 Timer 1 8 hours as well as ON OFF switch WA 7500M 1 0 1 1 1 2 13 14 15 1 Control Panel 2 Cooling Air Outlet 3 Handle 4 Castors 5 Air Filter 6 Air Inlet 7 Exhaust Air Outlet 8 Cord Hanger 9 Water Stopper Rubber Plug inside Accessories 10 Adaptor for insertion over the hose and into the back of t...

Страница 5: ...re Fitting the exhaust hose is easy through a window or wall Please refer to either of the following ways 1 Using the foam strips Connect the supplied foam strips with the exhaust pipe let the hot air flow to the outside Should the foam strip s be too large cut off the extra part to fit the window 2 Using the through the Wall Connection Make a hole 43 8 in diameter in the wall to fit the supplied ...

Страница 6: ...l the warm air Do not cover or obstruct the appliance inlet or outlet grilles Figure 2 To avoid the risk of shock the product should never be used in bathrooms shower rooms or in any other steamy or wet areas The unit will cool when the room temperature is between 64 F and 110 F depending on the thermostat setting Do not sit or place objects on the unit Do not touch the unit with wet damp hands or...

Страница 7: ...clean Set the unit to maximum cooling and high speed fan initially then adjust the unit to a comfortable setting NOTE It is recommended to turn on the air conditioner when the room temperature is around 75 F Do not wait until the room is excessively hot 2 Maintenance 11 Always unplug the unit from the mains before beginning the cleaning Cleaning the Housing Use a soft damp cloth to wipe the body c...

Страница 8: ...ve Notice If this product is defective or not working properly Please DO NOT return to your retail store Please contact us directly with any Service or Technical Assistance Contact us toll free at 1 800 330 0388 ...

Отзывы: