background image


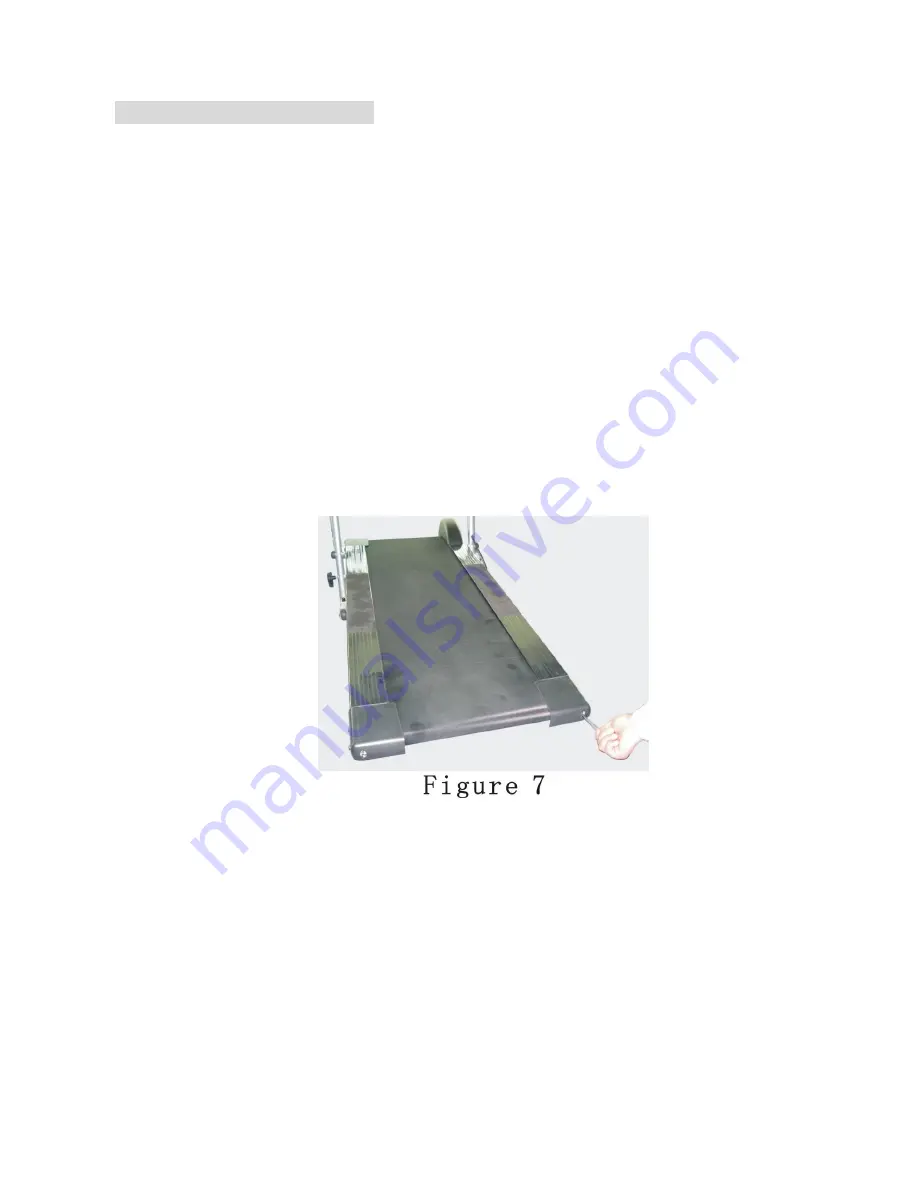
8. Running Belt Adjustment   

 
After assembly, please try running and check the following points: 
1) Check if the values of the Computer can display properly or not; be sure the wire and the plug 

are correctly connected and the batteries are placed. 

 
2) Check if the running belt turns smoothly or not and the running belt deviates or not when   

operating. Under normal condition, the running belt will turns freely and keep its position in the   
middle since the belt is adjusted at factory. It may run defectively if after rude transportation,   
please adjust it referring to the Figure 7. 
 

3) Please screw bolts in the end caps to adjust the tension of running belt. Be sure that you must 

adjust both bolts at the same time to avoid deviate the belt. Screw counterclockwise on both 
bolts can release the belt, clockwise can tighten the belt. (See Figure 7) 
 

4) If the running belt deviates to left side, please insert the hex end of the screwdriver


into the   

hexangular hole at the left or right side of the rear roller, turn 1/2 circle counterclockwise in the 
right side, try running again till the belt runs in the middle; or turn 1/2 circle clockwise in the left 
side, try running again. Please operate conversely if the running belt deviates to right side. 
During the operation, keep the belt in a proper tension state. (See Figure 7) 


Содержание SF-T808M

Страница 1: ...MANUAL TREADMILL Owner s Manual SF T808M...

Страница 2: ...the Equipment Safety Precautions 3 Parts List 4 Hardware Packing List Overview Drawing 5 Assembly Instructions 7 Folding and Moving 8 Running Belt Adjustment 9 Maintenance and Treatment 10 Operating...

Страница 3: ...ately keep the equipment out of use until repair 3 Make sure all parts bolts and nuts are well assembled and locked before exercise 4 Do not put your finger or clothes on the joint of moving parts to...

Страница 4: ...lt 1 41 M3X10 Screw 2 13 21 15 2 1 washer 2 42 M8X40 Bolt 2 14 21 15 2 2 5 washer 2 43 M10X40 Bolt 4 15 Roller s bearing bracket 3 44 M6 X35 Bolt 6 16 Right rail 1 45 M8 Lock nut 2 17 Right end cap 1...

Страница 5: ...4 4 Hardware Packing List 5 Overview Drawing...

Страница 6: ...pport Attach the Base support 6 to the Left and Right handlebar supports 2 3 with four Bolts 43 See figure2 Step 3 Install the Main Frame Raise up the front part of Main frame 1 by two people Attach t...

Страница 7: ...he arc plates of Left and Right handlebar supports 2 3 with two Bolts 37 and Arc washers 49 Finally cover two Hand foams 24 to the Front handlebar 4 See figure 4b Step 5 Install the Computer Connect t...

Страница 8: ...the Lock knob 23 to the upper hole of Left handlebar support 2 and tighten it See figure 6a Moving After folding up the treadmill hold the handlebars with your hands lean back the treadmill then you...

Страница 9: ...rring to the Figure 7 3 Please screw bolts in the end caps to adjust the tension of running belt Be sure that you must adjust both bolts at the same time to avoid deviate the belt Screw counterclockwi...

Страница 10: ...n freely and quietly Abnormality of moving parts will affect the safety of the equipment 3 Keep the equipment clean do not clean the equipment with strong solvent 4 The running belt is easy to wear ou...

Страница 11: ...on monitor will rotate through the following functions time speed distance calorie and total distance each display will be hold for 4 seconds TIME Display the time from start to end minutes seconds SP...

Страница 12: ...ises Inner Thigh Stretch Sit with the soles of your feet together with your knees pointing outward Pull your feet as close into your groin as possible Gently push your knees towards the floor Hold for...

Страница 13: ...ld then repeat on the other side for 15 counts Toe Touch Slowly bend forward from your waist letting your back and shoulders relax as you stretch toward your toes Reach down as far as you can and hold...

Отзывы: