22
CHAPTER 4 INTERFACE INTRODUCTION AND SETUP
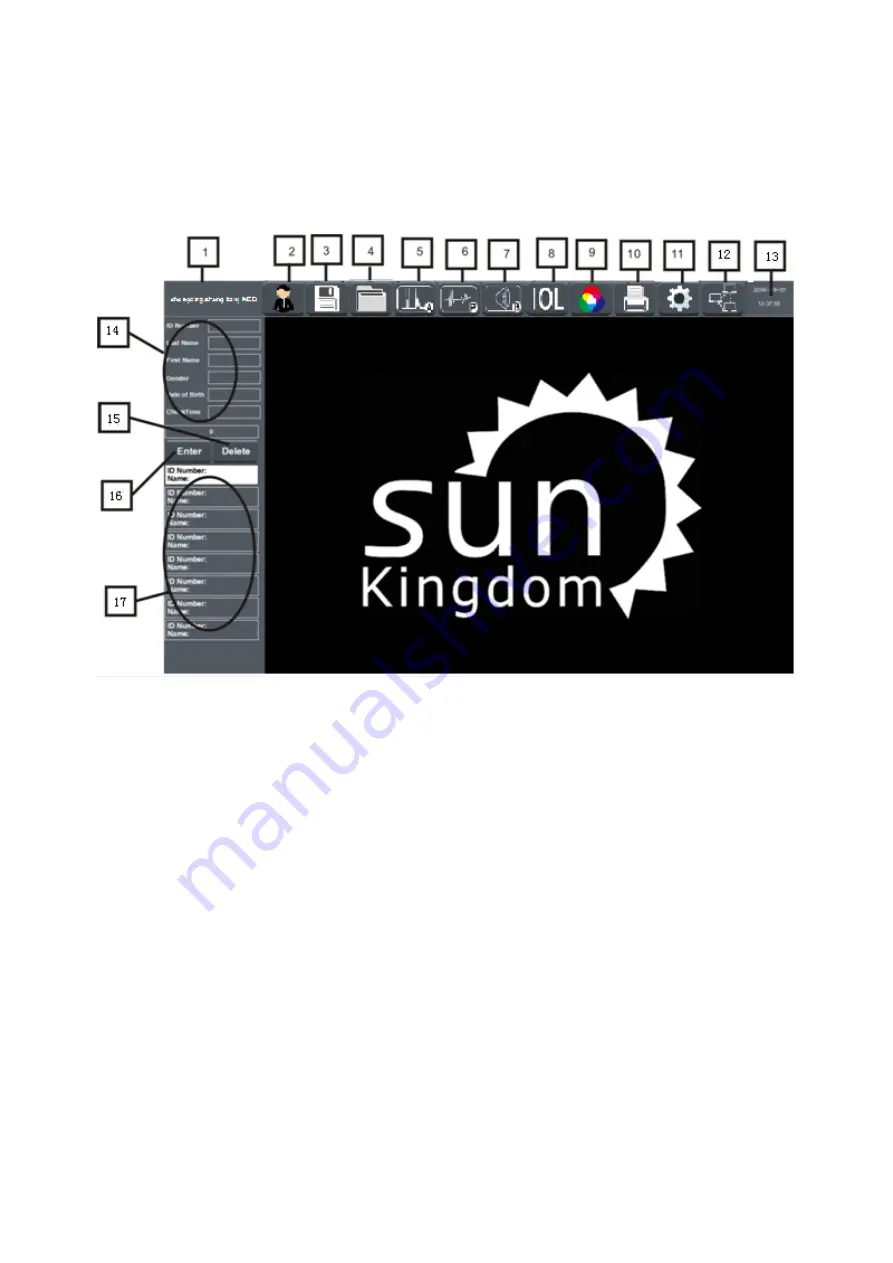
4.1 Main Screen Introduction
Button Functional Specification:
1.
Hospital name display zone
2.
New: Click to enter the patient information input interface
3.
Save: save data and upload data to PC
4.
Database:Click to enter data query interface
5.
A-scan mode: Click to enter A scan checking interface
6.
Pachymetry mode:Click to enter Pachymetry checking interface
7.
B-scan mode: Click to enter B scan checking interface
8.
IOL calculation: Click to enter IOL calculation interface
9.
B-scan image post-processing: Click to enter B scan image post-processing interface
10.
Print : Click to print the test result (Click Print on PC , one can preview test report )
11.
Setting : Click to enter setting interface.
12.
Online state: Blue means PC and PLC connect well, blank means PC and PLC offline
13.
System time display zone (In PC software , this zone is software close icon.)
14.
Patient information display zone
15.
Delete: Select a patient , then click the Delete , this patient will remove to waiting area
16.
Enter: Select a patient, click the Confirm to enter checking state
17.
Patient waiting list
Содержание SK-3000A
Страница 12: ...11 1 12 Label This label information is stick on main body of Ophthalmic ultrasound ...
Страница 28: ...27 4 5 P scan Test Interface 1 Eye Switch left eye and right eye ...
Страница 30: ...29 4 6 B scan Test Interface 1 Eye Switch left eye and right eye ...
Страница 35: ...34 ...
Страница 41: ...40 2 Click Properties 3 Double click Internet protocol version 4 ICP IPv4 ...


