Summit Professional 761101052267 Скачать руководство пользователя страница 14


14 

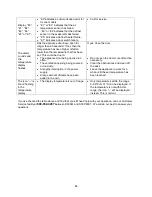
Display “E0”, 
“E1”. “E2”, 
“E3”, “E4”, 
“E5” or “E7”. 


“E0”indicates a communication error for 
3-zone models. 


“E1” or “E2” indicates that the air 
temperature sensor has failed. 


“E3” or “E4”indicates that the defrost 

sensor in the evaporator has failed. 


“E5” indicates a defrost heater failure. 


“E7” indicates a door switch failure. 

  Call for service. 

The alarm 
sounds and 
the 
temperature 
display 
flashes.


Has the appliance door been open for 
longer than 60 seconds? If not, then the 
temperature has risen higher or fallen 
lower than the temperature that has been 
set. This could be due to: 

  The appliance door being opened too 

often. 

  The ventilation opening being covered 

or too dusty. 

  A lengthy interruption in the power 

supply. 

  A large amount of items have been 

added to the unit. 

If yes, close the door.  


  Do not open the door more often than 

necessary. 

  Clear the obstructions and clean off 

the dust. 

  Leave the appliance to work for a 

while until the set temperature has 
been reached. 

The icon “--” is 
lit and flashing 
in the 
temperature 
display. 

  The display temperature is out of range. 

  Only temperatures within the range 

0~99°F/-9~37°C can be displayed. If 
the temperature is not within this 
range, the icon “--” will be displayed 
instead. This is normal. 


If you've checked the table above and find that you still need help with your appliance, call our Customer 
Service facility at 

800-932-4267

 between 9:00AM and 5:00PM ET.  We will do our best to answer your 

questions. 

Содержание 761101052267

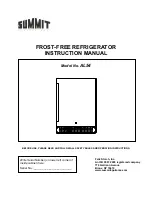
Страница 1: ...SE READ AND FOLLOW ALL SAFETY RULES AND OPERATING INSTRUCTIONS Felix Storch Inc An ISO 9001 2008 registered company 770 Garrison Avenue Bronx NY 10474 www summitappliance com Write Serial Number on lo...

Страница 2: ...Appliance 7 8 Adjusting the Height of the Unit 8 Adjusting the Kick plate 8 Installing the Stainless Steel Handle 8 Operating Your Appliance 9 11 Control Panel 9 Sabbath Mode 10 Temperature Memory Fu...

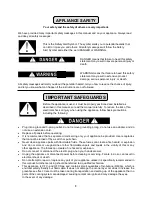
Страница 3: ...let do not remove grounding prong do not use an adapter and do not use an extension cord Replace all panels before operating It is recommended that a separate circuit serving only your appliance be pr...

Страница 4: ...re is between 72 and 78 F 23 to 26 C The appliance should not be located next to ovens grills or other sources of high heat The appliance must be installed with all electrical water and drain connecti...

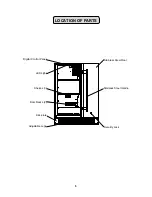
Страница 5: ...5 LOCATION OF PARTS Digital Control Panel Shelves 3 Ventilation Grille Adjustable Legs LED Light Security Lock Stainless Steel Door Stainless Steel Handle Door Racks 2 Kick plate...

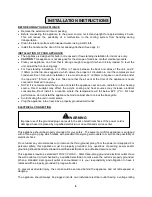
Страница 6: ...electrical consumption Don t install in a location where the temperature will fall below 44 F 7 C For best performance do not install the appliance behind a cabinet door or block the base grille Avoi...

Страница 7: ...grounding type appliance extension cord having a grounding type plug and outlet and that the electrical rating of the cord be 115 volts and at least 10 amperes REVERSING THE DOOR SWING OF YOUR APPLIA...

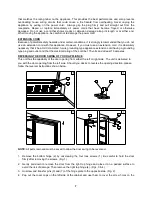
Страница 8: ...the upper section In order to adjust the kick plate height follow the instructions below 1 Remove the screws 1 from both the top left and top right hand sides of the kick plate 2 Loosen or remove the...

Страница 9: ...the set temperature by 1 C 1 F DOWN Used to decrease cool the set temperature by 1 C 1 F F C Selector Select the temperature display in Fahrenheit or Celsius degrees To change the temperature from Fa...

Страница 10: ...osts automatically in normal operating conditions The evaporator behind the rear wall of the unit defrosts automatically The condensate collects in the drainage channel behind the rear wall of the uni...

Страница 11: ...lves out of the rail compartment Any of the shelves can be removed to store larger items When removing the shelf from the rail compartment make sure to remove all items first Then move the shelf to th...

Страница 12: ...iance will not be used for several months remove all items and turn off the appliance Clean and dry the interior thoroughly To prevent odor and mold growth leave the door open slightly blocking it ope...

Страница 13: ...en The door is not closed completely The door gasket does not seal properly Put the appliance in a cooler place Leave the appliance to work for a while until the set temperature has been reached Do no...

Страница 14: ...ion opening being covered or too dusty A lengthy interruption in the power supply A large amount of items have been added to the unit If yes close the door Do not open the door more often than necessa...

Страница 15: ...15 NOTES...
Страница 16: ...nited States 5 Repairs to parts or systems resulting from unauthorized modifications made to the appliance 6 The removal and reinstallation of your appliance if it is installed in an inaccessible loca...

Отзывы: