45 Logan Ave S, Renton, WA 98057 – phone: 425-228-6831, toll free: 888-64METER
Page
4 or 4
www.SubmeterSolutions.com - [email protected]
Configuration Instructions:
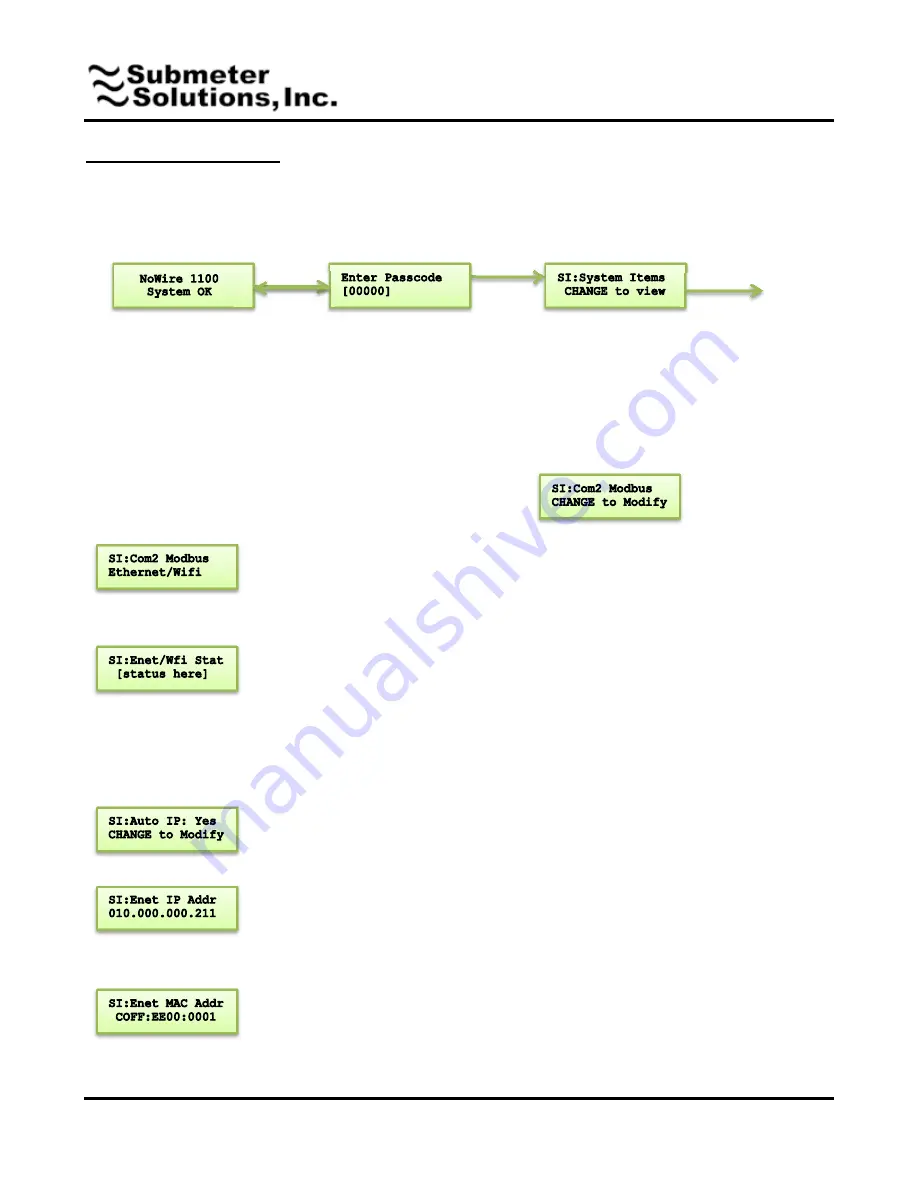
Reference the NoWire User Manual for navigating through the setup menus.
1. Navigate to the System Items setup menu.
2. Keep pressing NEXT in the System Items menu until you get to
3. Press CHANGE and NEXT a couple times to select “Ethernet/Wifi”. Press BACK.
4. Press NEXT to cycle thru the following menu items
CHANGE
NEXT
(if valid)
User changeable passcode is
entered here. Default is 00000.
CHANGE
increments each digit.
NEXT
moves to the next digit. If
the displayed passcode is correct
then flow will move to the System
Items in the setup menu.
BACK
CHANGE to view
This shows current Ethernet Modem Status. At any time you can see various
message displayed indicating progress of the communications with the Ethernet
modem. After initialization during startup it should eventually display:
• “
Loop: Chkg Modem
”
• “
Loop:Enet 01.xx
” (modem version number)
• “
On: ddd:hh:mm:ss
” (how long the modem has been turned on)
• “
Loop:Checkng Web
”
• “
Loop:Web Ok
” (this indicates the Submeter Solutions website has connected
successfully.)
“Yes” indicates the Ethernet modem will attempt to automatically retrieve an IP
address from the network DHCP server. “No” indicates a fixed IP address that must
be entered by the user on the next screen. To change this setting Press CHANGE
and NEXT then BACK when done.
If the Auto IP setting above is “Yes” then this displays the IP address provided by the
network to the Ethernet Modem. If the Auto IP setting above is “No” then this is the
user changeable IP address for connecting to the network. To change the IP address
press CHANGE. Then press CHANGE and NEXT to change the IP address. When
done press BACK.
This is the unique MAC address assigned to the Ethenet
modem.


