

6
G. Valet Mode Test
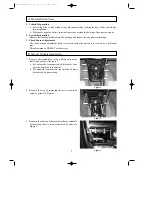
1. Open the driver’s door and then depress and hold the UNLOCK/DISARM button on the remote
for more than two seconds and the following should be observed:
a. The status indicator (LED) will begin flashing 2x per second indicating that the alarm is in
the valet mode.
2. Close all doors.
3. Depress the LOCK/ARM button on the remote and the following should be observed:
a. All vehicle doors will lock.
b. The horn will chirp once.
c. Parking lights will flash once.
d. The status indicator (LED) will continue to flash 2x per second indicating that the alarm is
in the valet mode.
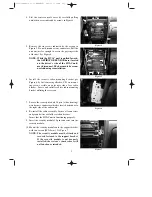
4. Wait 5 seconds then, using the key, open a door or the trunk and THE ALARM SHOULD NOT
TRIGGER.
5. Depress the UNLOCK/DISARM button and the driver’s door should unlock.
6. Open the driver’s door and then depress and hold the UNLOCK/DISARM on the remote for
more than 2 seconds and the following should be observed:
a. The status indicator (LED) will stop flashing indicating that the alarm is now out of valet
mode and has returned to normal operation.
b. All the doors will unlock.
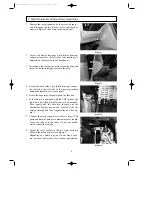
H. Shock Sensor Test
1. Lower the driver’s side window then close all doors.
2. Depress the LOCK/ARM button on the remote to enter the armed mode.
3. Wait 5 seconds, then reach through the window and lightly strike the rim of the steering col-
umn (DO NOT hit the horn or AIR BAG!) and the following should be observed:
a. The horn will chirp 2 times.
b. The parking lights will flash 2 times.
NOTE: This is shock sensor warning mode. For light vibrations and/or
impacts, only warning chirps are delivered.
4. Wait 10 seconds, then again reach through the window and firmly strike the rim of the steering
column (DO NOT hit the horn or air bag!) and the alarm should trigger.
NOTE: If shock sensor sensitivity is too high or too low, the sensitivity may be
adjusted by following the procedure section I.
5. Depress the UNLOCK/DISARM button on the remote transmitter to deactivate.
39412/SUBARU (P.01-09) 8/1/00 5:40 PM Page 6


