background image


5

3

4

2

1

S00100

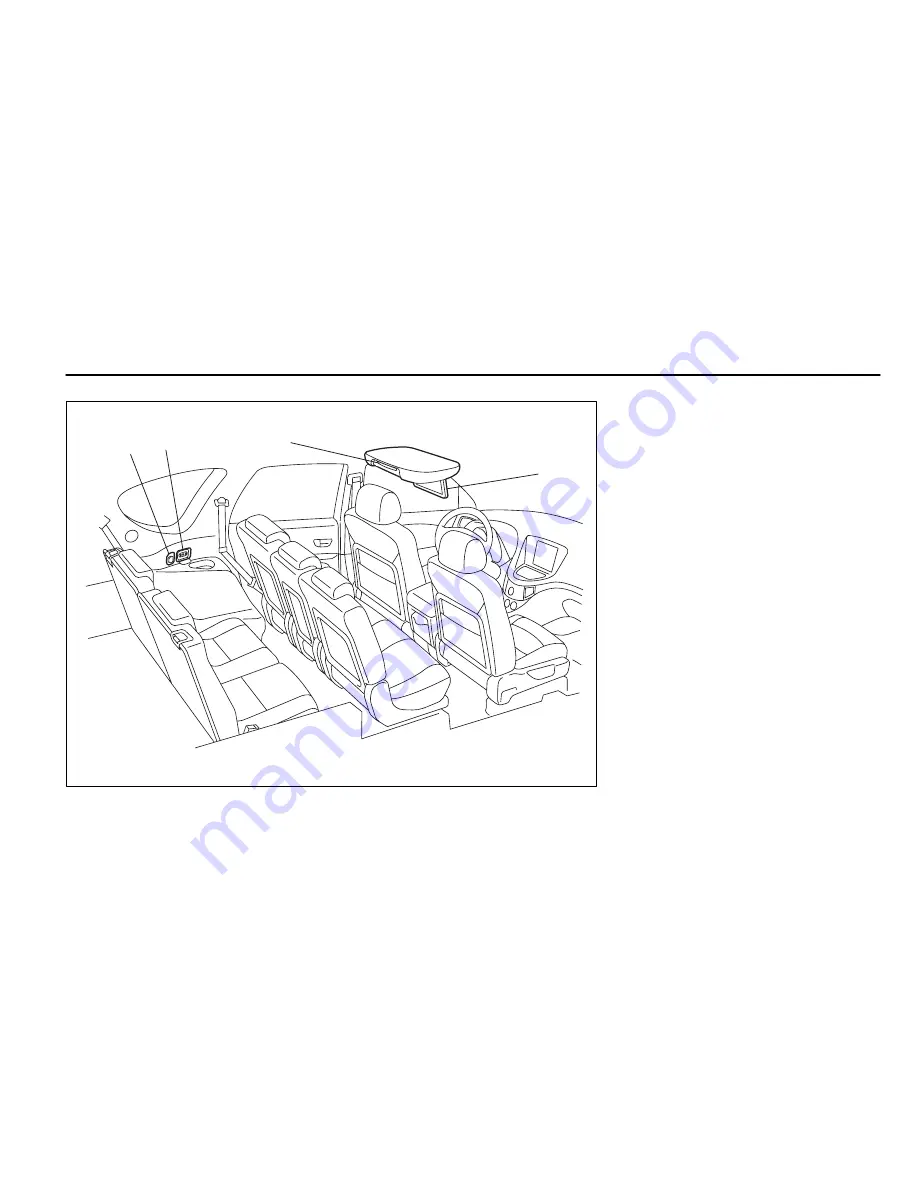
The Rear Seat Entertainment System

consists of the following components:

1) Display (Refer to Page 7.)

2) DVD player (Refer to Page 22.)

3) External device jacks (Refer to Page

50.)

4) Accessory power outlet (Refer to

Page 50.)

In addition to the components listed

above, there is a remote control and two

sets of wireless headphones as attach-

ments to the system.

System Components

Содержание B9 TRIBECA

Страница 1: ...m and correct use of your Rear Seat Entertain ment System please read this supplement and get acquainted with the system before using it Please keep this supplement together with your Owner s Manual a...

Страница 2: ...forwarding 28 Fast reversing 28 Skipping chapters forward 29 Skipping chapters backward 29 Title search 30 Skipping to a predetermined screen 31 Displaying each disc s menu on the screen 31 Changing t...

Страница 3: ...riction Level 48 Password registration 49 Connecting External Devices to Your Rear Seat Entertainment System 50 Adjusting Display Conditions and Selecting Display Mode 51 Display Condition Adjustment...

Страница 4: ...gain a better understanding of how to use your Rear Seat Entertainment System safely NOTE A NOTE gives information or suggestions how to make better use of your Rear Seat Entertainment System A WARNIN...

Страница 5: ...rage or other enclosed area Exhaust gases accumulated in such an area or entering the vehicle are dangerous or even lethal y The driver must not attempt to operate or watch the Rear Seat Entertainment...

Страница 6: ...Display Refer to Page 7 2 DVD player Refer to Page 22 3 External device jacks Refer to Page 50 4 Accessory power outlet Refer to Page 50 In addition to the components listed above there is a remote c...

Страница 7: ...te control are available from your SUBARU dealer should you lose them y You can also enjoy TV games from a home use TV game machine or video programs from a video tape player with the Rear Seat Entert...

Страница 8: ...7 Display How to open and close the display Push the release button to open the display The display will swing down partway along its full swing angle 1 Release button 1 S00101 Basic Operations...

Страница 9: ...angle To close the display to its storage position swing and push it up until it locks Close the display when it is not in use to help reduce the chance of injury in the event of an accident or sudden...

Страница 10: ...ard cloth or any other scratchy material NOTE y The screen is made of a liquid crystal display LCD panel When the system is turned on in an extremely low outside tem perature the LCD takes a relativel...

Страница 11: ...ry in case of an accident or sudden stop y Do not disassemble or modify the remote control Doing so could cause an accident fire or electric shock y Do not expose the remote control to direct sunlight...

Страница 12: ...11 To use the remote control direct its signal emitting eye toward the signal reception window of the display 1 Signal emitting eye 2 Signal reception window 2 1 S00104 Basic Operations...

Страница 13: ...the player is in operation 5 Joystick The joystick is used to highlight a control switch or a menu item on the screen and also to make an entry Click an ap propriate one of its four arrow marked ends...

Страница 14: ...can select a desired subtitle language when the player is playing a DVD video disc 15 RETURN button When this button is pressed the disc will skip to a predeter mined screen 16 MENU button When this b...

Страница 15: ...white When you then press the ENTER button your selection is executed To make control switches appear on the screen when playing a DVD video disc or video CD You can use the CURSOR button on the remot...

Страница 16: ...TER button If you highlight and execute the HIDE switch the TITLE number CHAPTER number and playback time at the bottom of the screen also disappear Video CD Menu To make the switches disappear from t...

Страница 17: ...pushed in the direction of the arrow with your fin gernail inserted in the slot slide out the holder in the direction of the arrow using a cross head mini screwdriver Take great care not to allow chil...

Страница 18: ...tall a new battery Type CR2025 or equivalent in the holder Make sure the bat tery s positive side and the mark on the holder are on the same side Slide the battery holder into the remote control until...

Страница 19: ...med and the batteries in them could leak or even explode under these condi tions y Avoid dropping the headphones and hitting them against hard objects y Do not sit on the headphones or place anything...

Страница 20: ...ess the ON OFF button on the left earpiece to turn on the headphones the POW ER lamp will come on Adjust the sound level as desired with the volume dial on the right earpiece S00109 S00110 Basic Opera...

Страница 21: ...has gone out Replacing the batteries When the batteries begin to get weak the POWER lamp will not come on even if you press the ON OFF button If this is the case replace the batteries as soon as possi...

Страница 22: ...w with a flat head screwdriver Remove the old batteries and install new ones two AAA batteries Pay careful at tention to the and marks on the battery case Reinstall the cover in position by tightening...

Страница 23: ...the label side facing up The disc will be carried inward automatically when you insert it partially The disc indicator light will turn on when the disc reaches the full inward position To eject the di...

Страница 24: ...tem is not compatible with DVD audio discs and MP3 file or WAV file based music CDs y The system does not support 8 cm 3 inch CDs if inserted they will automatically be ejected The following products...

Страница 25: ...ld cause poor image or sound quality Do not touch the disc surface y Use a clean disc whenever possible If there are any deposits wipe the disc sur face from the center outward with a dry soft cloth B...

Страница 26: ...attempt to play it in the player a REGION CODE ERROR message will appear on the screen Some DVD video discs without any region code may not be usable with your system s DVD player The disc conforms t...

Страница 27: ...f certain U S patents and other intellectual prop erty rights owned by Macrovision Corporation and other rights owners Use of this copyright protection technology must be authorized by Macrovision Cor...

Страница 28: ...playback Stopping playback Method using screen and remote control Highlight the switch on the screen with your remote control joystick then press the ENTER button Method using remote control alone Pre...

Страница 29: ...either of the above operations while the player is in pause mode the disc will advance slowly Fast reversing Method using screen and remote control Highlight the switch on the screen with the remote...

Страница 30: ...at this operation as many times as neces sary to reach the desired chapter Method using remote control alone Briefly press the remote control TRACK button Refer to the above for the subsequent process...

Страница 31: ...reen with the remote control joystick then press the ENTER button The display switches to the title number entry screen Enter the title number using the remote control joystick then press the ENTER bu...

Страница 32: ...isc s menu on the screen You can display the menu stored in the disc Menus and their contents differ from disc to disc After displaying a menu using the method below follow the indications that each d...

Страница 33: ...ress the ENTER button The display will switch to the audio language selection screen Click the end of the remote control joystick to highlight the desired language on the screen and then press the ENT...

Страница 34: ...to the subtitle language selection screen Click the end of the remote control joystick to highlight the desired language on the screen then press the ENTER button To revert to the original video scree...

Страница 35: ...will switch to the angle selection screen Click the end of the remote control joystick to highlight the desired angle on the screen then press the ENTER button To revert to the original video screen...

Страница 36: ...s the audio sounds gentler to your ears Highlight the DRC switch on the screen with the remote control joystick then press the ENTER button The display will switch to the dynamic range control selecti...

Страница 37: ...yback Stopping playback Method using screen and remote control Highlight the switch on the screen with the remote control joystick then press the ENTER button Method using remote control alone Press t...

Страница 38: ...nuously until reaching the de sired scene When you perform either of the above operations while the player is in pause mode the disc advances slowly Fast reversing Method using screen and remote contr...

Страница 39: ...e control joystick then briefly press the ENTER button The disc skips the current track and advances to the beginning of the next track Repeat this operation as many times as necessary to reach the de...

Страница 40: ...CD only Track skipping is not possible with some Ver 2 0 video CDs For information on track skipping of each Ver 2 0 video CD refer to the guide accompanying it Skipping to a predetermined screen Ver...

Страница 41: ...ting is MAIN SUB Playing Music CDs Starting playback With the ignition switch in the ACC or ON position insert the CD into the disc slot of the DVD player with the label surface facing up The player a...

Страница 42: ...nuously Method using remote control alone Press the remote control TRACK button continuously Fast reversing Method using screen and remote control Highlight the switch on the screen with the remote co...

Страница 43: ...the remote control TRACK button Refer to the above for the subsequent process and operation Skipping tracks backward Method using screen and remote control Highlight the switch on the screen with the...

Страница 44: ...button The repeat play mode will be cancelled if you press the ENTER button again Random playback You can play all of the tracks on the disc currently in the player in a random order by doing the foll...

Страница 45: ...of each track on the disc in succession Do the following to scan play the disc Highlight the SCAN switch on the screen with the remote control joystick then press the ENTER button The scan mode will b...

Страница 46: ...set tings return to the default settings y Some discs already contain audio language and other settings These settings take priority over your settings y If the vehicle s power supply is interrupted d...

Страница 47: ...te control joystick and then press the ENTER button Once the language mode has been selected you can now set the desired language by highlighting it with the joystick and then press ing the ENTER butt...

Страница 48: ...en highlight the switch with the joystick and then press the ENTER button This figure shows the screen for setting the audio language Setting the Angle Mark Display This setting allows you to decide w...

Страница 49: ...g their angle even when OFF is set for the angle mark display Setting the Viewer Restriction Level If you make this setting certain scenes contained in the DVD video disc in the player are prevented f...

Страница 50: ...f you forget your password return the system to the state before register ing the password The method for doing this is described in NOTE of Pass word registration below Next register a new password P...

Страница 51: ...ces White external audio devices Of the three accessory power outlets provided in your vehicle the one located next to the external device jacks can be used to supply power to an external device When...

Страница 52: ...c CD is loaded in the player y This setting is defaulted to medium within the adjustable range for each of the above adjustment items Adjusting method Press the remote control DISPLAY button The displ...

Страница 53: ...2 NOTE y You cannot change the display mode when a music CD is loaded in the player y The default display mode setting is Wide 1 Item direction direction BRIGHTNESS Brighter Darker CONTRAST Stronger...

Страница 54: ...ed Each time you press the remote control DISPLAY MODE button the mode chang es in the following sequence Release the DISPLAY MODE button 6 seconds later a full screen will be dis played in the select...

Страница 55: ...de down y The disc is dirty y The disc is incompatible with the sys tem Remedy Check the inserted disc for any of the above causes Correctly insert clean or change the disc as necessary Cause The inse...

Страница 56: ...405 Bhutani 0426 Greek 0512 English 0514 Esperanto 0515 Spanish 0519 Estonian 0520 Basque 0521 Persian 0601 Finnish 0609 Fiji 0610 Faroese 0615 French 0618 Frisian 0625 Irish 0701 Language Code Scots...

Страница 57: ...ngolian 1314 Moldavian 1315 Marathi 1318 Malay 1319 Maltese 1320 Burmese 1325 Nauru 1401 Nepali 1405 Dutch 1412 Norwegian 1415 Occitan 1503 Afan Oromo 1513 Oriya 1518 Punjabi 1601 Polish 1612 Pashto P...

Страница 58: ...7 Thai 2008 Tigrinya 2009 Turkmen 2011 Tagalog 2012 Setswana 2014 Tonga 2015 Turkish 2018 Tsonga 2019 Tatar 2020 Language Code Twi 2023 Uighur 2107 Ukrainian 2111 Urdu 2118 Uzbek 2126 Vietnamese 2209...

Страница 59: ......

Отзывы: