


4
WARNING:
Be sure all tools and personnel are clear before lowering load. Use only
attachments and/or adapters supplied by the manufacturer. Lift only on areas of the vehicle as
specified by the vehicle manufacturer.
ASSEMBLY INSTRUCTIONS
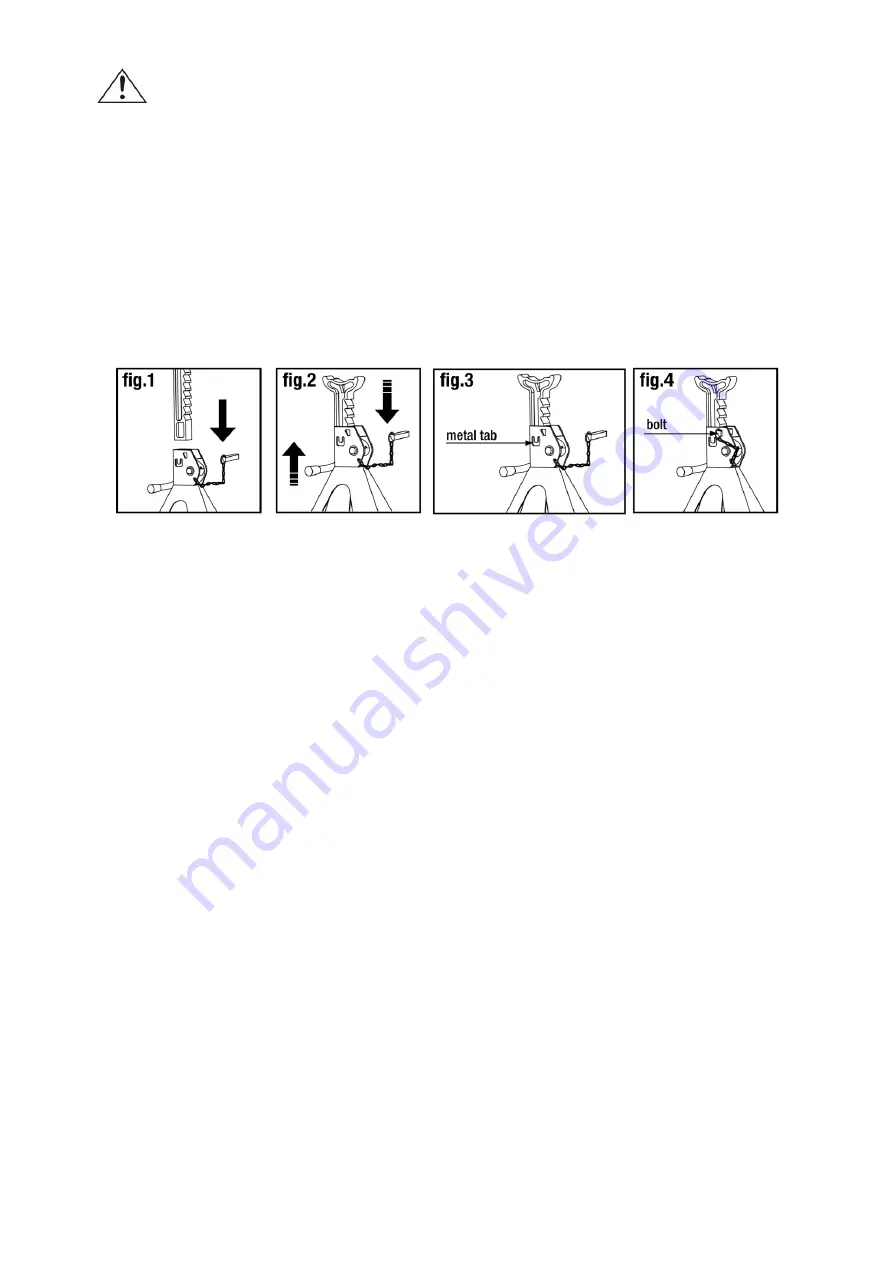
1. Install ratchet bar into frame (fig.1) with ratchet portion of bar aligned with locking pawl (stopper).
2. Move the ratchet bar to its lowest position by raising the locking handle, thereby releasing the
stopper, and guiding the bar downward (fig. 2).
3. Bend metal tab in (Fig. 3) using a hammer and punch. This will help prevent inadvertent
separation of the ratchet bar from base frame.
OPERATING INSTRUCTIONS
1. Adjust height by pulling up on ratchet bar.
2. The weight of the locking handle should secure the ratchet bar in desired position. To confirm this,
simply push down on the locking handle. Check to ensure ratchet is secure before loading.
3.
Carefully position jack stands so that load is centered on stand’s saddle.
4.
Slowly
lower the vehicle onto the stands.
5. Check to ensure vehicle is secure before working on, around or under. When used to support
vehicle, use wheel chocks on all unlifted wheels in both directions to prevent inadvertent
movement.
TO LOWER LOAD
1. Ensure that all tools, equipment and personnel are clear before lowering load.
2. With suitable jack, raise vehicle clear of stands.
3. Carefully release stopper and allow ratchet to glide down to lowest position.
4. Carefully remove stands, then carefully lower vehicle with lift device.


