background image

USER’S MANUAL
Manuel D’utilisation

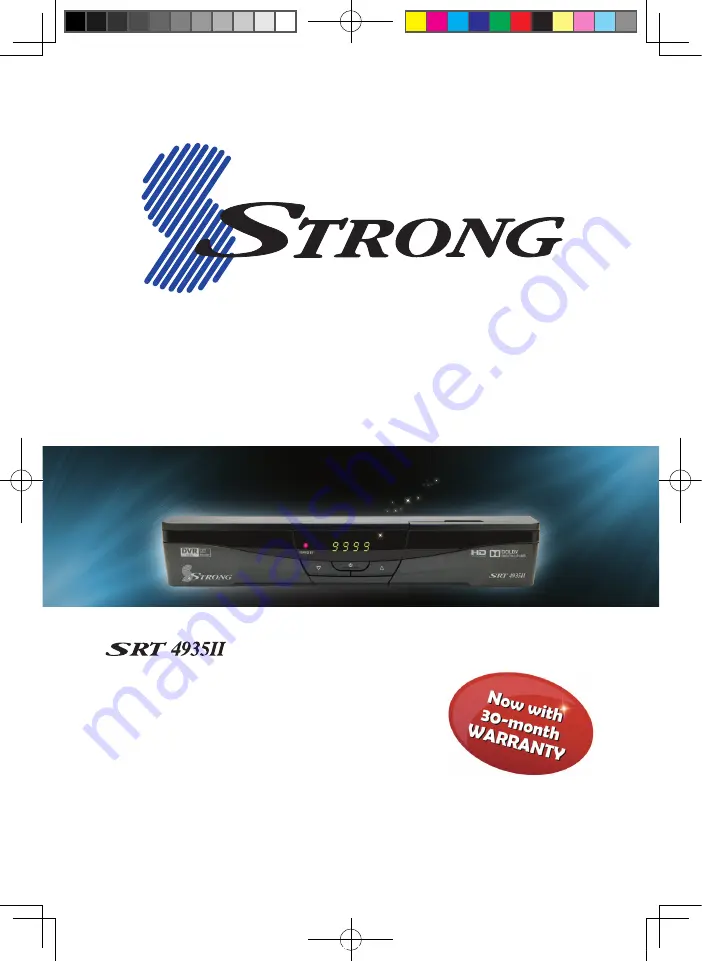
HIGH DEFINITION DIGITAL SATELLITE
TELEVISION RECEIVER AND RECORDER

DEMODULATEUR & ENREGISTREUR DE
TELEVISION NUMERIQUE DE HAUTE DEFINITION
VIA SATELLITE

[2015.06.15]SRT4935Ⅱ Manual_French_NIG_rev1.0.indd   1

2015-06-16   오후 2:21:40

Содержание SRT 4935II

Страница 1: ...n HIGH DEFINITION DIGITAL SATELLITE TELEVISION RECEIVER AND RECORDER DEMODULATEUR ENREGISTREUR DE TELEVISION NUMERIQUE DE HAUTE DEFINITION VIA SATELLITE 2015 06 15 SRT4935Ⅱ Manual_english French_NIG_rev1 0 indd 1 2015 06 16 오후 2 21 40 ...

Страница 2: ...ions 6 4 1 Front Panel 4 2 Rear Panel 4 3 Remote controller 5 How to Connect 9 6 Operation 10 6 1 Getting Started 6 2 System Setting 6 3 Channels 6 4 Electronic Program Guide 6 5 Entertainment 6 6 System Information 6 7 Conditional Access System 6 8 External Device 6 9 DVR 7 Troubleshooting 28 8 Specifications 29 2015 06 15 SRT4935Ⅱ Manual_english French_NIG_rev1 0 indd 2 2015 06 16 오후 2 21 41 ...

Страница 3: ...DVB S DVB S2 Compliant HDMI Output On screen display with true color full resolution Advanced Blind Scan Auto Manual Channel Search Dolby Digital Output Channel Sorting by Alphabet Transponder or CAS 16 Favorite Channel Groups OSD in 17 Languages Multi Picture Display and Zoom 16 9 Full Screen 4 3 Letterbox Full Screen DiSEqC 1 2 and USALS Compatible Extended Electronic Program Guide EPG and progr...

Страница 4: ...stall the unit horizontally An uneven installation may cause the unit to be damaged Where the MAINS plug or an appliance coupler is used as the disconnect device the disconnect device shall remain readily operable l Do not put heavy items such as a TV set on the unit That may damage the unit l Do not leave the unit where the water drops or splashes l Do not put water holding items such as vases on...

Страница 5: ...w are included with this receiver Your dish should be properly installed and azimuth and elevation must be precisely set up 3 1 Accessories 3 2 The Satellite dish Remote control User s manual Batteries AAA type 2EA BATTERY BATTERY BATTERY BATTERY RCA Cable HDM I HDM I HDMI Cable Abuja Nigeria Plot 746 IDU Industrial Area Phase 1 www stronghd tv Warranty card Power Adaptor 2015 06 15 SRT4935Ⅱ Manua...

Страница 6: ...ard for encrypted channel access USB 1USB A type USB2 0 LNB INPUT IF input from LNB to digital tuner LOOP OUT IF loop through output from digital tuner VIDEO Composite video output AUDIO L Left audio output AUDIO R Right audio output S PDIF Digital audio output Coaxial USB 1USB A type USB2 0 HDMI Digital Video Audio Output RF OUT UHF 21 69 Output to TV TV ANT IN Input from terrestrial antenna 4 2 ...

Страница 7: ...off after minutes GUIDE To show the TV Radio program guide INFO To display information box RECALL To move to the previous channel Used for special functions in menu mode ASPECT To select a TV aspect ratio with Pan Scan or Letter Box 4 3 Full screen or pillar box 16 9 MENU To enter or exit the main menu EXIT To exit from the present menu and move to the previous menu Up Down To switch channels in n...

Страница 8: ...W Playback in rewind mode Time Shift Play Content PLAY Play Content FWD Playback in forward mode REC Start recording STOP Stop Playback SLOW Playback in slow mode ADVANCE Go to live channel MOSAIC To display multiple pictures FREEZE To pause the video ZOOM To zoom In Out V FORMAT To switch the resolution of video output USB To show the file manager menu TV SAT To switch between the satellite input...

Страница 9: ...2 Connect the Video and Audio of the TV to Video and Audio connect the red and white connectors to Audio R and Audio L and the yellow connector to Video 3 Connect your satellite dish Video Audio HDMI TV Satellite Dish L R 2015 06 15 SRT4935Ⅱ Manual_english French_NIG_rev1 0 indd 9 2015 06 16 오후 2 21 46 ...

Страница 10: ...you have a motorized dish press OK on Motorized Setting Figure 6 1 3 Note Enter a 4 Digit password if need arise The default password is 0000 4 Select the item that you want to edit and set its parameters as desired Dish Setting LNB Power Select among ON OFF 13V 18V LNB Type Select among Single Universal OCS LNB Freq Set the frequency of the LNB oscillator 22KHz When not AUTO set the signal path f...

Страница 11: ... Set the Antenna Longitud Antenna Latitude Usals can move dish automatically Note You need to know what LNB you are using to correctly set the L O local oscillator frequency Note You need to understand how your receiver is connected to properly set the 22KHz and DiSEqC 5 Select the item that you want to edit and set its parameters as desired Motorized Setting Frequency You can select appropriate T...

Страница 12: ...light to Press OK and press OK to scan Figure 6 1 5 Blind Scan Figure 6 1 5 1 Select the satellites you want to search by pressing the OK button 2 Press to set the parameters TP Select TP Frequency Polarization Select among All Vertical Horizontal Mode Select among All Free TV Manual Scan Figure 6 1 6 1 Select a transponder 2 To change a transponder s information Frequency Symbol Rate use the NUME...

Страница 13: ...ls sorted alphabetically YELLOW Shows all channels sorted by Transponder BLUE Shows all channels sorted by CAS system 2 Press OK when the selection bar is positioned on the desired channel Other Functions of the Remote Control Volume Control 1 While watching a program press or to control the volume 2 You can press the MUTE button to remove the sound of the program the mute icon will be displayed P...

Страница 14: ...ent channel Audio Mode Select between Stereo Mono Left Mono Right Audio Track Select between tracks available in this program Note These subtitle and audio parameters are workable only when the desired channel supports these functions TEXT The Teletext service is a text data service sometimes available from the Service Provider FREEZE You can press this key to freeze the video Press it again to re...

Страница 15: ...ncy Off Once Daily Sleep Time Set the sleep time using the NUMERIC buttons A V Output Settings Audio Language Set the default audio language when selecting a channel Subtitle Language Set the default subtitle language TV Type Select TV Type PAL NTSC AUTO Screen Format Select the screen format 16 9 4 3 Display Format Select the TV aspect ratio FULL Screen Pillar Box Letter Box Pan Scan Video Format...

Страница 16: ...ailable from broadcaster and this age limit exceeds the selection a PIN code is required to access the channel program Current Password To change your password first enter your current password New Password Enter the new password that you want to set Verify Password Enter the new password again for confirmation Note The default password is 0000 Database Reset This function is useful when encounter...

Страница 17: ...sing the GROUP button Set Favorites The receiver supports 16 favorite groups 1 Press on OK Set Favorites The list of groups will be displayed Figure 6 3 1 2 Press and OK to choose a group The following menu will be displayed Figure 6 3 2 If you want to change the name of a favorite group press the RED button 3 Press to OK add or remove if previously added the selected channel to from the favorite ...

Страница 18: ...hat you want to skip un skip the skip icon will be displayed removed Delete Channels Note Be careful If you delete a channel you will not be able to access it again until you rescan 1 Press OK on the channel that you want to set unset for deletion the delete icon will be displayed removed 2 Press the INFO button to delete all channels in the current list Add Channels Frequency Select TP Frequency ...

Страница 19: ...elected channel and access its EPG data If you press OK in the right side of the screen Event display list If the current time EPG is selected you will return to the previous menu and get signal from the selected channel If a future time next EPG is selected the selected program will be reserved and the event color will change Figure 6 4 1 2015 06 15 SRT4935Ⅱ Manual_english French_NIG_rev1 0 indd ...

Страница 20: ... that you want to modify 1 32 State Select the timer frequency off once daily Date Press OK to display a Calendar pop up Select a date Start Time Input the time for your receiver power on use the NUMERIC buttons End Time Input the time for your receiver power off use the NUMERIC buttons Channel Press OK to display a Channel list pop up Select a channel File Name Press OK and enter file name using ...

Страница 21: ...m more than one service provider you will need a Smart Card from each one Since a Smart Card is connected to a single service provider a limited range of channels will be available via it Note Without the Smart Card you can watch only Free To Air programs 1 Insert the Smart Card into the receiver 2 The message Smart Card Initializing will appear on the screen Figure 6 7 1 3 You will be able to wat...

Страница 22: ...d i e used size total size free size Format Disk Format disk enables you to delete all information stored on the selected storage device Warning If you select Format Disk all data on the storage device will be deleted Timeshift Rec Time Set the preferred Timeshift Recording Time 10Min 30Min 60Min Skip Time Set the preferred amount of Skip Forward and Back time during playback 30sec 1Min 2Min 3Min ...

Страница 23: ...eceiver before the download is complete Timer Manager Manage Existing or Add Manual Timers for Reserving or Recording of Programs 1 Press the OK button on the desired timer number to access and modify the timers parameters 2 Press the and arrow buttons to select timer parameters 3 Press the arrow buttons to change parameters Timer No choose the desired timer using and Arrows buttons 1 32 State Sel...

Страница 24: ...ver to turn to standby after recording has finished Figure 6 8 4 6 Operation Figure 6 8 4 6 9 DVR Figure 6 9 1 Edit Menu You will be asked to enter a password whenever you try to edit it 1 Rename Press RED on the file tha you want to rename 2 Lock Press GREEN on the file that you want to lock unlock 3 Delete Press YELLOW on the file that you want to delete If you set Channel Lock refer to security...

Страница 25: ...Forward When playing the file you can press to adjusting the playing speed The speed will change to x2 x4 x8 x16 and x32 6 Operation RWD Rewind When playing the file you can press to adjusting the playing speed The speed will change to x2 x4 x8 x16 and x32 Slow 1 2x 1 4x 1 8x When playing the file you can press to adjusting the playing speed Jump You can locate the control position to the desired ...

Страница 26: ...point Note The maximum number of the bookmark is 20 in a file Instant Recording 1 You can record a current channel by using If you then press a time banner will be displayed Figure 6 9 3 2 Press once more The following picture shows that you can select item when you record a current channel Figure 6 9 4 Duration You can change the duration of recording time by using the And current recorded time a...

Страница 27: ...will then appear in red Press the EXIT key to return to normal viewing This program will automatically be recorded by the DVR Timer Recording This function is availabe when usb device is connected You can choose a channel to record the Program Guide menu by using Refer to 6 4 Electric Program Guide 2 Timer Time Shift 1 If you want to pause and resume live TV channel press TIMESHIFT button The defa...

Страница 28: ...NU screen Connect the two terminals correctly with RCA or HDMI cable s Connect the antenna cable correctly Adjust the direction of the antenna Check the cable connections the LNB and other equipment connected between the LNB and the receiver or adjust the antenna Type the setting values correctly Black and white screen or V Hold Your TV mode PAL NTSC is different from the satellite broadcasting mo...

Страница 29: ... inversion Auto conversion System resource Processor 32bit processor DDR3 128Mbyte FLASH 8Mbyte Video decoder MPEG 2 MPEG 2 MPEG 4 H 264 Data Rate up to 15M bits s Resolution 1920 X 1080P i 1280 X 720P 720 X 576P i 720 X 480P i Video format PAL NTSC Aspec Ratio 4 3 16 9 Teletext DVB compliant MPEG Audio MPEG 1 layer I II MPEG 2 layer II AC3 Dolby Digital Type Mono Stereo Joint Stereo Sampling rate...

Страница 30: ...rials will help to conserve natural resources For more detailed information about recycling of this product please contact your local city office your household waste disposal service or the shop where you purchased the product Conditional Access Interface Smart Card Reader 1 Slot External Adaptor Power consumption max 18W Supply voltage AC 100V 240V Supply frequency 50Hz 60Hz Output Voltage Curre...

Страница 31: ...5 4 1 Panneau de Commande Avant 4 2 Panneau de Commande Arrière 4 3 Télécommande 5 Comment Connecter 8 6 Opérer 9 6 1 Préparatifs 6 2 Configuration du Système 6 3 Chaînes 6 4 Guide Electronique du Programme EPG 6 5 Divertissement 6 6 Manager Média 6 7 Informations sur le Système 6 8 Appareil Externe 6 9 DVR 7 Résolution de Pannes 27 8 Caractéristiques 28 2015 06 15 SRT4935Ⅱ Manual_english French_N...

Страница 32: ...ies couleurs Blind Scan Avancé Recherche de Chaînes Automatique et Manuel Sortie Dolby Digital Classification de Chaînes par Ordre Alphabétique Transpondeur ou CAC 16 Groupes de Chaînes Favorites Affichage sur Ecran en 17 Langues Affichage de Plusieurs Images et Zoom Affichage 16 9 Plein Ecran 4 3 Boîte à Lettres et Plein Ecran Compatible avec DiSEqC 1 2 et Système Universel de Repérage Satellite ...

Страница 33: ...unité horizontalement Une installation inégale pourrait endommager l unité l Ne pas placer des objets lourds tel un poste de télévision sur l unité car cela pourrait l endommager l Ne pas placer l unité près de l eau l Ne pas placer des objets contenant de l eau tel un vase sur l unité l Ne pas installer l unité Où elle est sujette aux vibrations Où elle est exposée directement à la lumière du sol...

Страница 34: ...ut fonctionner avec un positionneur d antenne compatible Pour plus d informations contacter votre revendeur Si l un des accessoires ci dessus énumérées est manquant veuillez contacter votre représentant des ventes Remote control User s manual Batteries AAA type 2EA BATTERY BATTERY BATTERY BATTERY RCA Cable HDM I HDM I HDMI Cable Abuja Nigeria Plot 746 IDU Industrial Area Phase 1 www stronghd tv Wa...

Страница 35: ...e carte à puce pour accéder aux chaînes cryptées USB 1USB de type A USB 2 0 4 2 Panneau Arrière LNB INPUT entrée IF de LNB au tuner numérique LOOP OUT sortie IF en boucle du tuner numérique VIDEO Sortie vidéo composite AUDIO L Sortie audio gauche AUDIO R Sortie audio droite S PDIF sortie audio numérique coaxial USB 1USB de type A USB 2 0 HDMI Sortie numérique audio vidéo RF OUT UHF 21 69 sortie à ...

Страница 36: ...amme TV Radio Info Afficher des informations à propos du programme en visionnement Appuyer dessus deux fois pour plus de détails Rappel Revenir à la chaîne précédente Utilisé pour des fonctions spéciales en mode MENU Aspect Sélectionner un aspect ratio TV Pan Scan ou Letterbox 4 3 ou Full Screen ou Pillar Box 16 9 Menu Pour sortir ou entrer au menu principal Sortie Sortir du menu actuel et passer ...

Страница 37: ...age Temporaire Afficher le contenu PLAY Visionner le contenu FWD Visionner en mode rapide REC Commencer à enregistrer STOP Arrêter le visionnement SLOW Visionner au ralenti ADVANCE Passer à la chaîne en direct MOSAIC Afficher des images incrustées FREEZE Geler l image Appuyer de nouveau pour le reprendre ZOOM Zoomer plus près loin V Format Changer la résolution de la sortie vidéo USB Pour afficher...

Страница 38: ...s fonctions Vidéo et Audio de la télévision aux fonctions correspondates connecter les connecteurs rouge et blanc à Audio D R et Audio L et le connecteur jaune à Video 3 Connecter l antenne parabolique Video Audio HDMI TV Satellite Dish L R 2015 06 15 SRT4935Ⅱ Manual_english French_NIG_rev1 0 indd 8 2015 06 16 오후 2 21 58 ...

Страница 39: ...que motorisée appuyez sur OK sur Configuration Motorisée Figure 6 1 3 Note Tapez un mot de passe de 4 chiffres en cas échéant Le mot de passe par défaut est 0000 Alimentation LNB Sélectionner ON OFF 13V 18V Type LNB Sélectionner Singulier Universel OCS Solution à Câble Unique SaTCR Fréquence LNB Ajuster la fréquence de l oscillateur LNB 22KHz En dehors du mode AUTO ajuster le trajet du signal du L...

Страница 40: ... antenne la Latitude de l Antenne USALS peut déplacer l Antenne automatiquement Remarque Vous avez besoin de savoir l LNB que vous utilisez pour définir correctement la fréquence du LO oscillateur local Remarque Vous avez besoin de comprendre comment votre récepteur est connecté pour définir correctement le 22KHz et DiSEqC 5 Sélectionner l article que vous voulez modifier et en conimage les parame...

Страница 41: ...z rechercher en appuyant sur le bouton OK 2 Appuyez sur pour définir les paramètres TP Sélectionner la fréquence du transpondeur Polarisation Choisir parmi Tous Vertical Horizontal Mode Choisir parmi Tous Accès Libre TV Figure 6 1 6 Scan Manuel Figure 6 1 6 1 Sélectionner un transpondeur 2 Pour changer les informations d un transpondeur fréquence débit de symboles utiliser les touches NUMERIQUES 3...

Страница 42: ...Passer de la Télévision à la Radio Appuyer sur cette touche pour passer de la télévision à une station radio Appuyer sur cette touche de nouveau pour revenir à la télévision RAPPEL Appuyer sur cette touche ramène l unité à la chaîne visionnée précédemment Sélection de Chaînes Si vous connaissez le numéro de la chaîne vous pouvez l introduire en utilisant les touches NUMERIQUES et attendre 2 second...

Страница 43: ...aîne visionnée précédemment Audio Appuyer sur cette touché pour ajuster les sous titres ou le statut audio de la chaîne en visionnement Mode Audio Sélectionner du menu Stéréo Mono Gauche Mono Droite Morceau Audio Sélectionner parmi les morceaux disponible de ce programme Niveau Audio Sélectionner Haut Moyen Bas Note Les sous titres et configuration audio ne sont disponible que pour les chaînes qui...

Страница 44: ...e fois Journalier Lundi Vendredi Heure de Veille Sélectionner l heure de Veille en utilisant les touches NUMERIQUES A V Output Settings Langage Audio sélectionner la langue audio Langage Sous titres Sélectionner la langue des sous titres Type de TV Sélectionner le type de TV PAL NTSC AUTO Format d Ecran Sélectionner le format de l écran 16 9 4 3 Format d affichage Sélectionner l aspect ratio Plein...

Страница 45: ...onibles et ne correspondent pas à la limite que vous désirez un code PIN est nécessaire pour accéder au programme ou à la chaîne Mot de passe actuel Pour le changer introduire votre mot de passe actuel Nouveau mot de passe Introduire le mot de passe que vous désirez Vérification du mot de passe réintroduire le nouveau mot de passe pour le confirmer NOTE Le PIN par défaut est 0000 le même que le mo...

Страница 46: ...upe appuyer sur la touche ROUGE 3 Appuyer sur OK pour ajouter ou supprimer une chaîne de la liste 6 3 Chaînes 6 Opération Edition Chaînes Ce sous menu vous permet de renommer les canaux et d entrée le PID NOTE Les informations PID Vidéo Audio et PCR sont extrêmement importantes pour une réception de signal satellite optimale Nous vous conseillons de demander une aide professionnelle si possible Fi...

Страница 47: ...s les chaînes dans la liste actuelle Ajouter Chaînes Fréquence Sélectionner la Fréquence Nom de Chaîne Appuyer dessus pour afficher le clavier contextuel modifier le nom d une chaîne Type de Chaîne Sélectionner TV RADIO Vous pouvez ajouter une chaîne spécifique du transpondeur en configurant ses données PID Vidéo Audio et PCR Type de Vidéo Sélectionner le type de vidéo MPEG1 2 H 264 Type d Audio S...

Страница 48: ...sélectionnée et accéder aux informations EPG Si vous appuyez sur OK du côté droit de l écran liste d affichage d événements Si l EPG actuel est sélectionné vous retournerez au menu précédent et obtiendrez le signal de la chaine sélectionnée Si un EPG futur ou suivant est sélectionné le programme sélectionné sera retenu et la couleur en sera changée Figure 6 4 1 2015 06 15 SRT4935Ⅱ Manual_english F...

Страница 49: ...re de l arrêt Chaîne Appuyer sur OK pour afficher la liste des chaînes et en sélectionner une Nom du Fichier Appuyer sur OK et introduire le nom en utilisant le clavier Enregistrement Sélectionner le mode d enregistrement ON OFF en utilisant les flèches gauche et droite Eteindre Sélectionner cette option si vous voulez que le récepteur s éteigne après la fin de l enregistrement 6 Opération 6 4 Gui...

Страница 50: ...formations sur le Système Figure 6 6 1 Votre récepteur affiche les informations actualles Figure 6 6 1 Concernant le nom du modèle la version du logiciel et la date de fabrication Ces informations sont utiles quand vous téléchargez un nouveau logiciel Noter qu une mise à jour du logiciel requiert une réinitialisation du récepteur Se reférer à la section Réinitialisation de la Base de Données dans ...

Страница 51: ...ichées Format de Disque Supprimer toutes les informations stockées sur l appareil de stockage sélectionné Caution Si vous choisissez de formater vos appareils de stockage vous perdrez toutes les données qui y sont stockées Temps d enregistrement TimeShift Déterminer le temps d enregistrement TimeShift préféré 10Min 30Min 6 0Min 90min 120min Sauter Déterminer la durée du saut en avant et en arrière...

Страница 52: ...omplété le téléchargement Gestionnaire du programme Gérer ou ajouter des compte minutes manuels pour réserver ou enregistrer des programmes 1 Appuyer sur la touche OK sur la durée désirée pour accéder aux compte minutes et en modifier les paramètres 2 Appuyer sur les flèches et pour sélectionner les paramètres du compte minutes 3 Appuyer sur les touches pour changer les paramètres Numéro du Compte...

Страница 53: ... s éteigne après la fin de l enregistrement Figure 6 8 4 Figure 6 8 4 6 9 DVR Enregistreur Numérique Figure 6 9 1 Menu de Modification Vous devez introduire un mot de passe pour y accéder 1 Renommer Appuyez sur ROUGE sur le fichier que vous souhaitez renommer 2 verrouiller Appuyez sur VERT sur le fichier que vous souhaitez verrouiller déverrouiller 3 Supprimer Appuyez sur JAUNE sur le fichier que ...

Страница 54: ...tesse de lecture Mode Trick Vous pouvez activer ce mode en visionnant les fichiers enregistrés Ces fonctions sont disponibles en mode playback ou mode décalage temporel LECTURE Ceci montre la barre durée et le progrès du programme enregistré Si vous voulez que s affiche la liste de lecture en lisant le fichier en utilisant PAUSE Cette touche pausera la lecture du programme Pour la recommencer appu...

Страница 55: ...uel apparaîtra NOTE Ne pas ôter la clé USB en enregistrant un programme Point de Reprise Marquer un point spécifique pour y revenir plus tard Figure 6 9 2 ROUGE appuyez sur la touche ROUGE Un triangle rouge apparaîtra à ce point Pour supprimer les points de reprise appuyez sur la touche ROUGE de nouveau et le triangle rouge disparaîtra VERTE appuyez sur cette touche pour passer au point de reprise...

Страница 56: ...er sur la touche EXIT pour retourner à la vue normale Ce programme sera automatiquement enregistré par le DVR STRONG Enregistrement au Compte Minutes Cette fonction est disponible quand un appareil USB est connecté Vous pouvez choisir une chaîne pour enregistrer le menu du Guide du Programme en utilisant Voire 6 4 Guide Electronique du Programme 2 Compte minutes Time Shift 1 Si vous voulez pauser ...

Страница 57: ...ut équipement connecté entre le LNB et le récepteur ou ajuster l antenne Introduire les valeurs de configuration correctement Ecran blanc et noir ou V Hold Votre mode TV PAL NTSC est différent du mode de diffusion du satellite Utiliser une TV de même mode Connecter un convertisseur NTSC PAL entre le récepteur et la TV La télécommande ne fonctionne pas Les piles de la télécommande sont vides Des lu...

Страница 58: ...sion Auto conversion System resource Processeur des Ressources du Système 32bit processor DDR3 128Mbyte FLASH 8Mbyte Décodeur Vidéo MPEG 2 MPEG 2 MPEG 4 H 264 Débit de Données jusqu à 15M bits s Résolution 1920 X 1080P i 1280 X 720P 720 X 576P i 720 X 480P i Format Vidéo PAL NTSC Aspec Ratio 4 3 16 9 Teletext DVB compliant MPEG Audio MPEG 1 layer I II MPEG 2 layer II AC3 Dolby Digital Type Mono St...

Страница 59: ...plus d informations sur le recyclage de ce produit prière de contacter votre municipalité votre service de traitement de déchets domestiques ou le magasin qui vous a vendu ce produit ver 1 0 Interface Accès Conditionnel Lecteur de Cartes à Puce 1 fente Adaptateur externe Consommation électrique max 18W Voltage d alimentation AC 100V 240V Fréquence d alimentation 50Hz 60Hz Output Voltage Current DC...

Страница 60: ...v Technical Support Nigeria techng strong technologies com Ghana techgh strong technologies com RDC techcd strong technologies com Cote d Ivoire techci strong technologies com Other Countries tech strong technologies com 2015 06 15 SRT4935Ⅱ Manual_english French_NIG_rev1 0 indd 30 2015 06 16 오후 2 22 04 ...

Отзывы: