

CASSANDRA ARBOUR ASSEMBLY INSTRUCTIONS
Please ensure that you check all component parts for quantity
and quality before you commence building the product.
If there are any missing parts, please contact the sales
company immediately.
Timber is a natural product. It will shrink and swell as a
result of varying moisture content.
This product has been pressure treated to ensure protection
against all weather conditions. Annual cleaning and re-
treatment with a timber preservative will help to prolong the
life of the product.
A power drill/screwdriver plus tape measure will be required
to assemble this product.
NB.
It is recommended that pilot holes are pre drilled where necessary before
screws are fixed. This reduces the risk of splitting of timber.
Screw fixings supplied
14 x 25mm screws
8 x 50mm screws
16 x 70mm screws
4 x 90mm screws
4 x 6mm screw caps
2 x metal roof brace plates
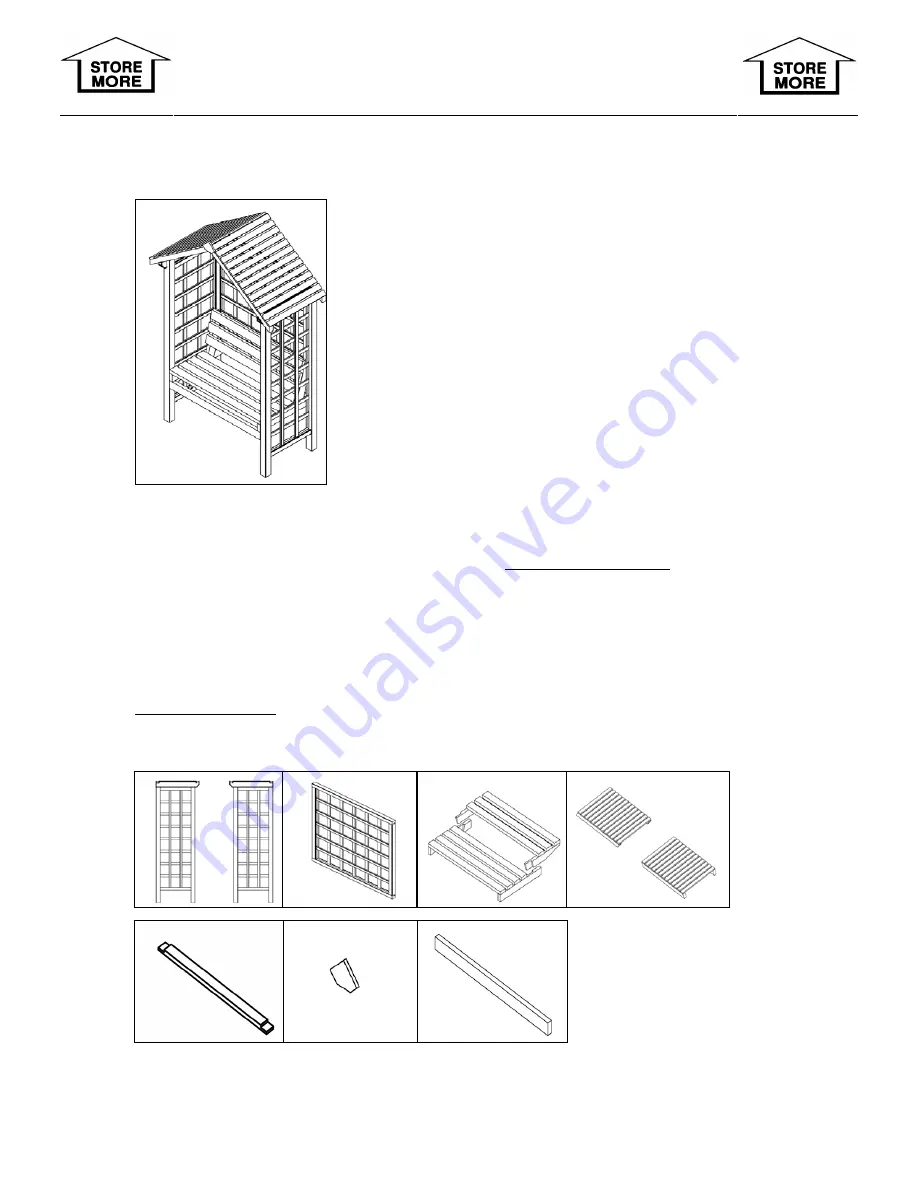
Component supply.
2 x side panels 1x back panel 1 x seat base + 1 x seat back 2 x roof panels
1 x top back support 1 x finial 1 x bottom front support
Store More Garden Buildings Ltd.
Edward Merton House, Park Gate Close, Bredbury Park Way, Bredbury Industrial Park,
Stockport, Cheshire. SK6 2SN
Tel: (0161) 430 3347 Fax: (0161) 406 6054 E-mail: [email protected]
www.shedbaron.co.uk


