10
To disassemble the freezer, refer to the following steps:
A.
Remove hopper cover and drain tray.
B.
Remove the mix inlet regulator from the hopper by
pulling straight up.
C.
Remove the front door by turning the circular
knobs and then pulling the front door off the studs.
D.
Remove the rosette cap from the front door. Push
the spigot body through the bottom of the front
door and remove.
E.
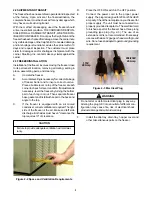
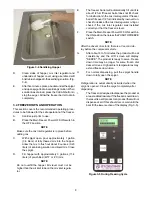
Remove the front auger support and bushing (Fig.
3-7).
F.
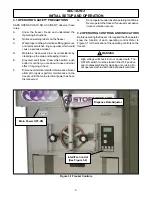
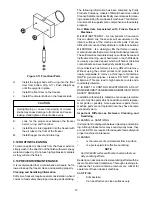
Remove the auger assembly from the freezer
(Fig. 3-8). Pull the auger out of the freezer barrel
slowly. As the auger is being pulled out, carefully
remove each of the plastic flights with springs.
G.
Keep the rear of the auger shaft tipped up once it
is clear of the freezer to avoid dropping rear seal.
H.
Remove the rear seal.
I.
Wipe socket lubricant from the drive end (rear) of
the auger with a cloth or paper towel.
J.
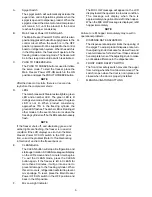
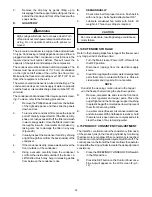
Remove all o-rings from parts by first wiping off
the lubricant using a clean paper towel. Then
squeeze the o-ring upward with a dry cloth (Fig. 3-
8). When a loop is formed, roll out of the o-ring
groove.
CAUTION
Do not use any type of sharp object to remove the
o-rings.
3.9 CLEANING THE FREEZER PARTS
Place all loose parts in a pan or container and take to the
wash sink for cleaning. To clean freezer parts refer to the
following steps:
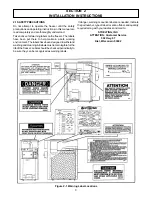
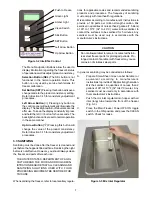
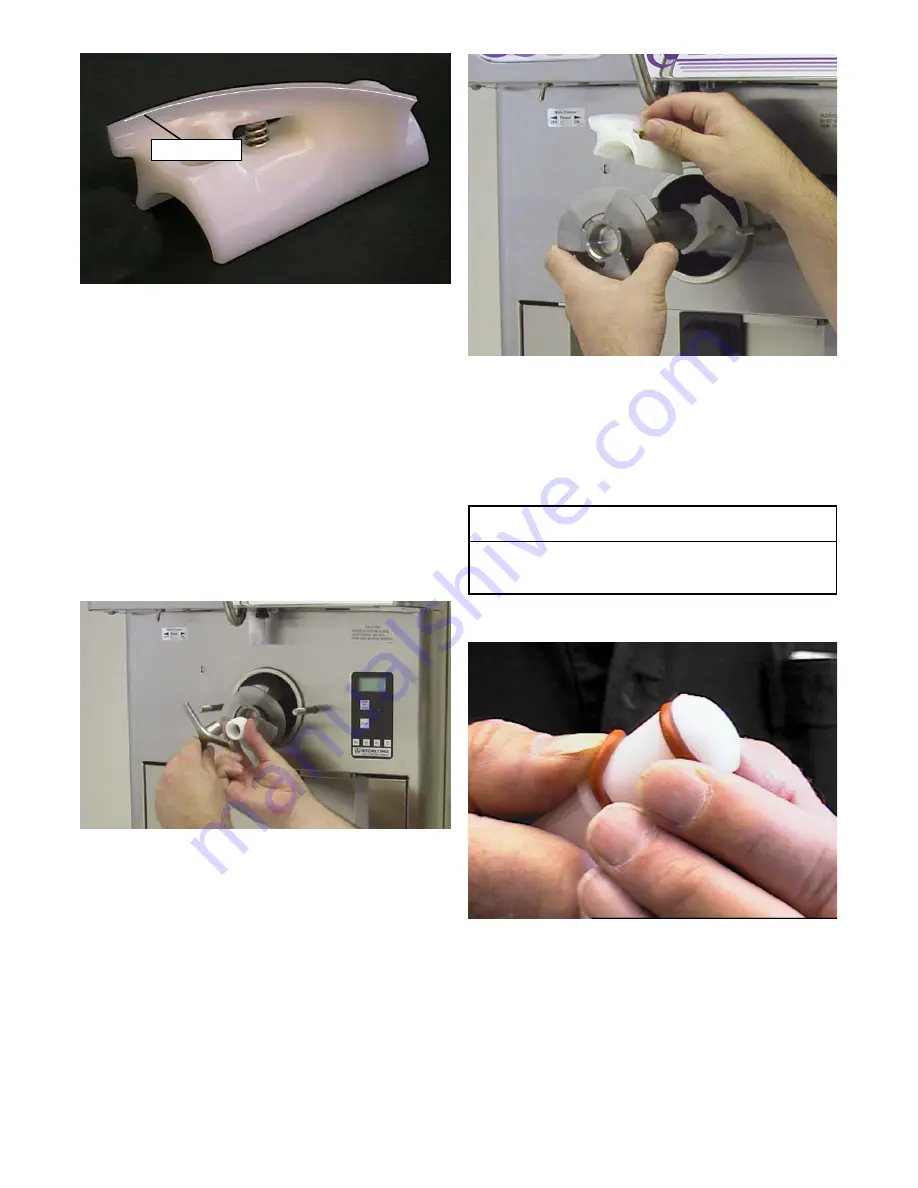
Figure 3-6 Auger Flight Wear
Figure 3-7 Removing Auger Support
Figure 3-8 Removing Auger Shaft and Flights
Figure 3-9 Removing O-Ring
Wear Line
Содержание O111
Страница 1: ...O111 IntelliTec Models OWNER S MANUAL Manual No 513588 1 Sept 2006...
Страница 2: ......
Страница 22: ...16...
Страница 28: ...22 O111 REPLACEMENT PARTS...
Страница 30: ......


