background image

Page 9

Due to continuous product research and development,

the information contained herein is subject to change without notice.

www.stoddart.com.au

www.stoddart.co.nz

•  All Gastronorm pans and extra dividers are sold separately
•  Each module can hold one 1/1 pan, two 1/2 pans, three 1/3 pans, four 1/4 pans, six 1/6 pans and nine 1/9 pans. Pan depths are 25mm, 

65mm, 100mm and 150mm. Contact your distributor about the best possible depth for the product you intent to display

•  For 1/6 and 1/9 Gastronorm pans, extra dividers are required

4.1.3 Gastronorm Pans

•  All food MUST be pre-heated/cooked before placing in the unit. Attempting to cook food with this unit can lead to food poisoning
•  Ensure the well is maintaining the food temperature over 65°C
•  The temperature reached on the temperature gauge is the air temperature, NOT the food temperature
•  It is important to regularly monitor the food temperature in the unit

4.2.1 Food Temperature

•  All storage of food should comply with local health standards and regulations
•  All pans should be cleaned and placed in night storage. No pans should be left in the unit
•  This unit is NOT designed to store product after hours. The unit MUST be switched OFF
•  If the unit is moved for night storage, ensure the castors are locked (mobile units only)

4.2.2 Food Storage

4.2 Food Safety

•  Fill the three removable water wells (located in-between the elements) with water, approximately 6mm from the top
•  Place the GN pans in the unit, ensure there are no gaps
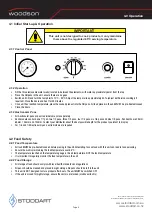
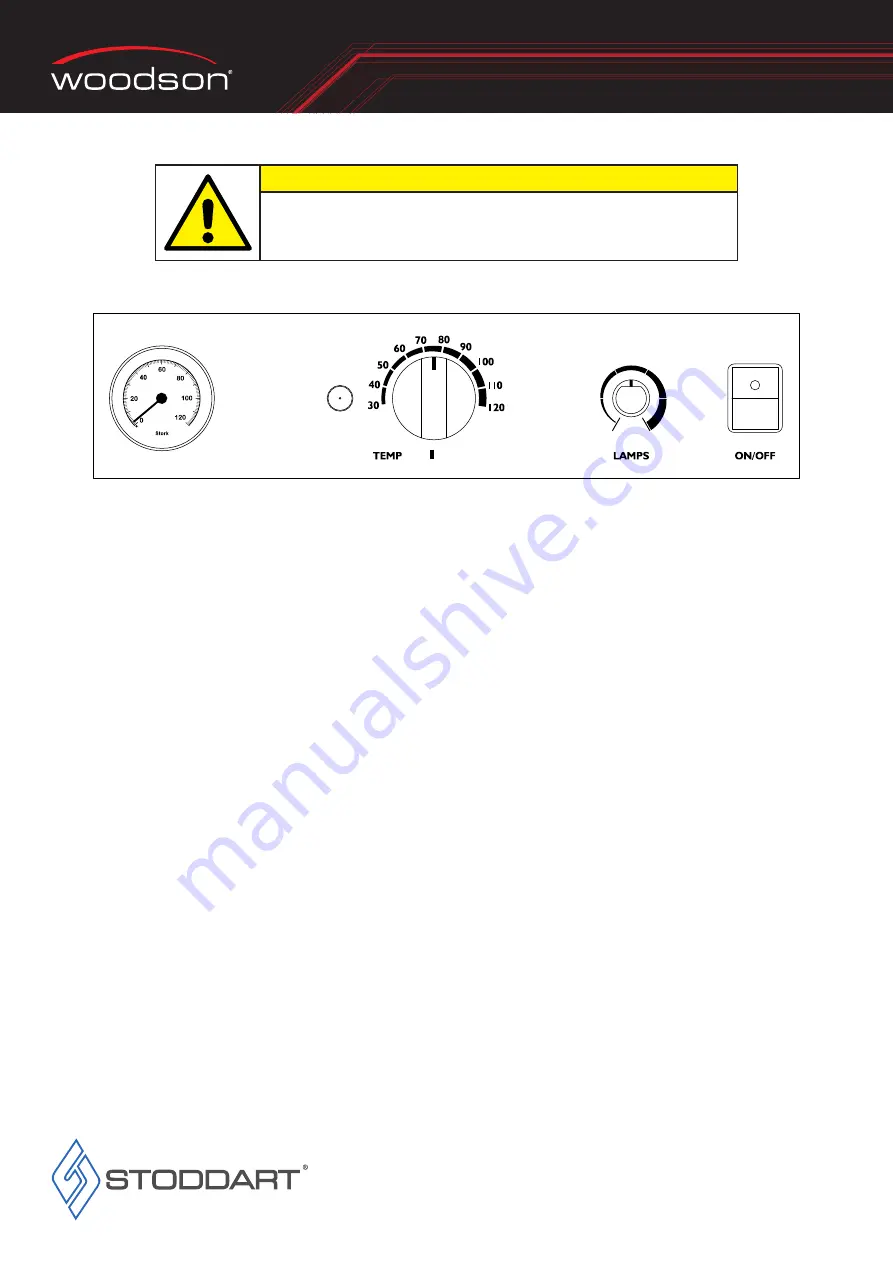
•  Switch unit ON and turn the temp dial to 70°C - 90°C. Adjust the lamp dial to approximately 80%. (adjust both dials accordingly if 

required). Close the doors and heat for 45 minutes

•  Once unit has reached temperature, place the cooked product into the GN pans. All food placed in the unit MUST be pre-heated/cooked
•  Close the doors

IMPORTANT

This unit is not designed to cook products, it only maintains 

them above the regulated 65°C serving temperature. 

4.1.2 Operation

4.1.1 Control Panel

4.1 Initial Start-up & Operation

4.0 Operation

Содержание Woodson W.HFHSQ23

Страница 1: ...e use care and maintenance of your quality Woodson product Models W HFHSQ23 W HFHSQ24 Heated Chicken Display SPECIFICATION INSTALLATION AND OPERATION MANUAL READ ALL INSTRUCTIONS BEFORE USE Revision A 15 07 2022 01 ...

Страница 2: ...Page Intentionally Left Blank Page 1 Due to continuous product research and development the information contained herein is subject to change without notice www stoddart com au www stoddart co nz ...

Страница 3: ...2 Unpacking 2 2 3 Positioning 2 2 4 Disposal 2 3 Electrical Connection 7 3 0 Specification 3 1 Technical Specifications 8 3 1 1 W HFHSQ23 3 1 2 W HFHSQ24 4 0 Operation 4 1 Initial Start up Operation 9 4 1 1 Control Panel 4 1 2 Operation 4 1 3 Gastronorm Pans 4 2 Food Safety 9 4 2 1 Food Temperature 4 2 2 Food Storage 5 0 Cleaning and Maintenance 5 1 Cleaning 10 5 1 1 Cleaning Schedule 5 1 2 Materi...

Страница 4: ...ersons units or others due to abuse and misuse of this unit in regards to installation removal operation servicing or maintenance or lack of conformity with the instructions indicated in this documentation Disclaimer All units made by the manufacturer distributor are delivered assembled where possible and ready to install Any installation removal servicing maintenance and access or removal of any ...

Страница 5: ...ols If any fault is detected refer to troubleshooting The manufacturer declines any liability for damages to persons and or things due to an improper wrong and or unreasonable use of the machine Only specifically trained qualified Technicians Stoddart one of our service agents or a similarly qualified persons should carry out any and all repairs maintenance and services When using any electrical u...

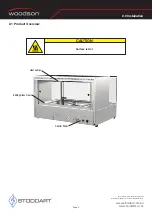
Страница 6: ...search and development the information contained herein is subject to change without notice www stoddart com au www stoddart co nz 2 0 Installation Heat Lamps Sliding Glass Doors Control Panel CAUTION Surface is Hot 2 1 Product Overview ...

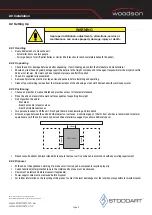
Страница 7: ...entilated and provides access for future maintenance Place the unit on a level stable work surface capable of supporting its weight Do not position the unit in Wet areas Near heat and or steam sources Near flammable substances Two persons required to lift the unit Pinch point hazard when lowering unit into bench Allow an air gap between the unit and other objects or surfaces A minimum gap of 100mm...

Страница 8: ...power supply lead by the plug body If the power point is not readily accessible turn the equipment off at the isolation switch or the circuit breaker in the switchboard Attach a yellow CAUTION DO NOT OPERATE tag This must be performed where relevant unless the procedures specify otherwise FAILURE TO DO SO MAY RESULT IN ELECTRIC SHOCK WARNING Notes If the supply cord is damaged it must be replaced b...

Страница 9: ...z 3 1 1 W HFHSQ23 3 1 2 W HFHSQ24 Specifications Model W HFHSQ 23 Height 696mm Width 1120mm Depth 757mm Power 240VAC 50Hz 2 1kW 10A Plug lead fitted Specifications Model W HFHSQ 24 Height 696mm Width 1460mm Depth 757mm Power 240VAC 50Hz 3 6kW 15A Plug lead fitted 696 26 1120 297 460 757 750 696 26 1460 297 460 750 757 3 0 Specification 3 1 Technical Specifications ...

Страница 10: ... the unit 4 2 1 Food Temperature All storage of food should comply with local health standards and regulations All pans should be cleaned and placed in night storage No pans should be left in the unit This unit is NOT designed to store product after hours The unit MUST be switched OFF If the unit is moved for night storage ensure the castors are locked mobile units only 4 2 2 Food Storage 4 2 Food...

Страница 11: ...EVER use abrasive pads or cleaners for cleaning All metal surfaces should be checked while cleaning for damage scuffs or scrapes as these can lead to rust and further damage to the product Mild rust and or corrosion can be treated with a commercial cleaning agent that contains citric oxalic nitric phosphoric acid DO NOT use cleaning agents with chlorides or other harsh chemicals as this can cause ...

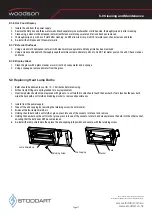
Страница 12: ...ring that the bulb does NOT become broken 6 Re install the lamp shield bars then place the end capping into position and secure with the retaining screw Retaining Screw End Capping Bulb Socket Lamp Shield Bars 5 0 Cleaning and Maintenance 5 1 6 Hot Food Display 1 Isolate the unit from the power supply 2 Remove the GN pans and three water wells Wash separately in a dishwasher or kitchen sink thorou...

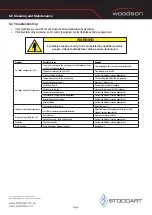
Страница 13: ...rvice department Unit does not reach temperature Temperature not set to the right setting Check setting and adjust the temperature Exhaust fan above the unit Move unit exhaust fan Cold items in units Remove items and heat properly Cold water in the unit Close the water valve Wait 30 minutes Temperature gauge broken Contact the Stoddart service department Thermostat or Temperature probe broken Cont...

Страница 14: ...Page 13 Due to continuous product research and development the information contained herein is subject to change without notice www stoddart com au www stoddart co nz ...

Страница 15: ...Page 14 Due to continuous product research and development the information contained herein is subject to change without notice www stoddart com au www stoddart co nz ...

Страница 16: ...d Business Number 6837694 New Zealand Sales Tel 0800 79 1954 Email sales stoddart co nz Service Spare Parts Tel 0800 935 714 Email service stoddart co nz Email spares stoddart co nz Service Request www stoddart com au Australian Business Number 16009690251 Australia Sales Tel 1300 79 1954 Email sales stoddart com au Service Spare Parts Tel 1300 307 289 Email service stoddart com au Email spares st...

Отзывы: