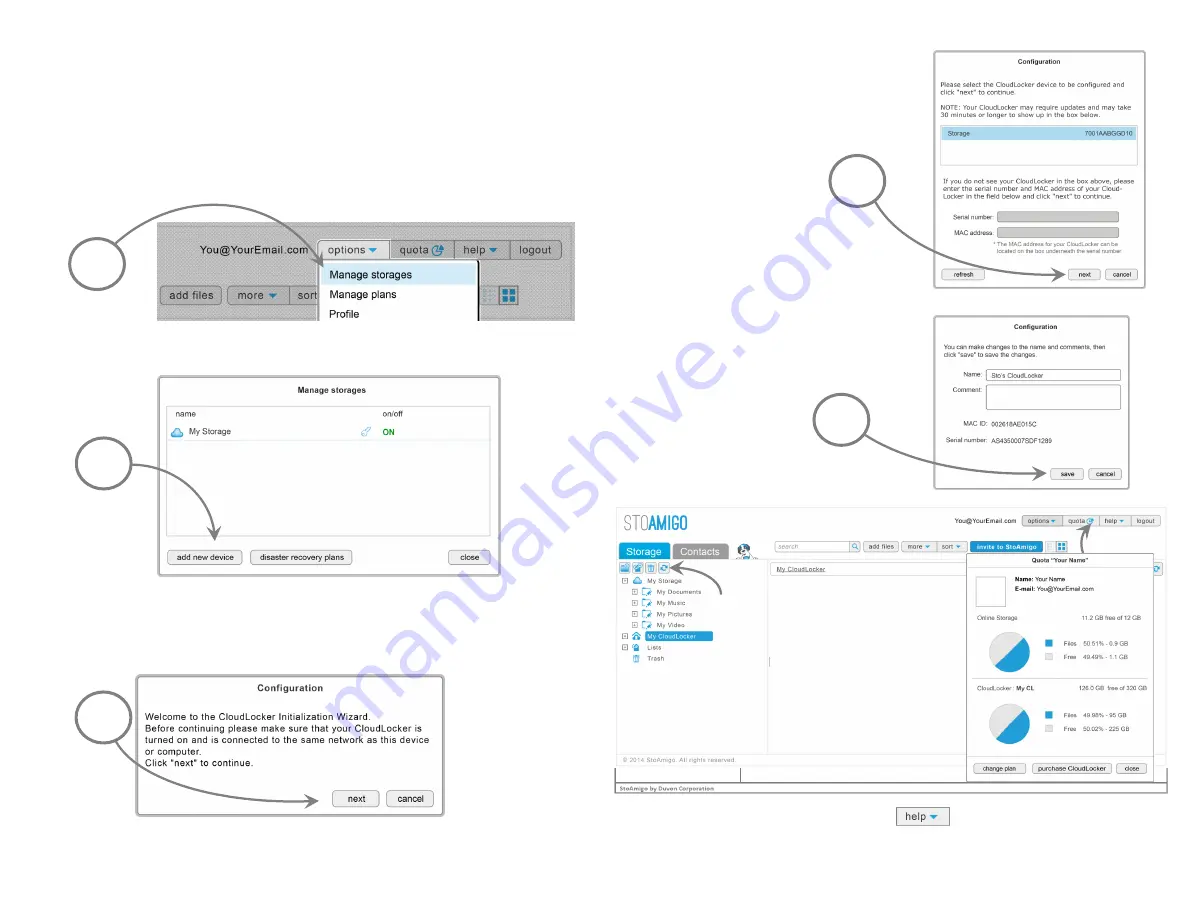
Adding your CloudLocker to your StoAmigo Account
Log in to your StoAmigo account and follow the instructions below to connect the device to
your account.
If you do not have an account, sign up at www.stoamigo.com/signup.
To Configure Your CloudLocker
A. From the options menu, select “Manage StoAmigo CloudLocker”.
B. From the pop-up window, select “add new device”.
C. From the configuration welcome menu, select “next” to continue
Click “Refresh” to display your CloudLocker
if it doesn’t show up automatically.
The “Quota” allows you to see
details about your storage usage,
and to manage your account.
D. Select the device shown in the window
(ensure that it’s highlighted) and click “next” to
continue.
To get started with your CloudLocker, select the icon in your StoAmigo account to view
the Quick Start Guide, Quick Start Video and Help Content. If you have problems, go to
www.stoamigo.com/troubleshooting for solutions to some common issues.
A
B
C
D
E
NOTE: Your CloudLocker may
require additional updates. It
may take 30 minutes or longer
for your CloudLocker to show
up in StoAmigo. Times vary
depending on your network
speed and required updates.
E. You may now rename your device
and click “save”.


