background image

BEdIENuNg 


Allgemeine Hinweise

www.stiebel-eltron.com 

LWE  40 | 

3

D

EU

TS

CH

BEdIENuNg

1.  Allgemeine Hinweise

Die Kapitel „Besondere Hinweise“ und „Bedienung“ richten sich 

an den Gerätebenutzer und den Fachhandwerker.


Hinweis

Lesen Sie diese Anleitung vor dem Gebrauch sorgfältig 

durch und bewahren Sie sie auf.

Geben Sie die Anleitung ggf. an einen nachfolgenden 

Benutzer weiter.

1.1  Sicherheitshinweise

1.1.1  Aufbau von Sicherheitshinweisen


SIGNALWORT Art der Gefahr

Hier stehen mögliche Folgen bei Nichtbeachtung des Si-

cherheitshinweises.

f

f

Hier stehen Maßnahmen zur Abwehr der Gefahr.

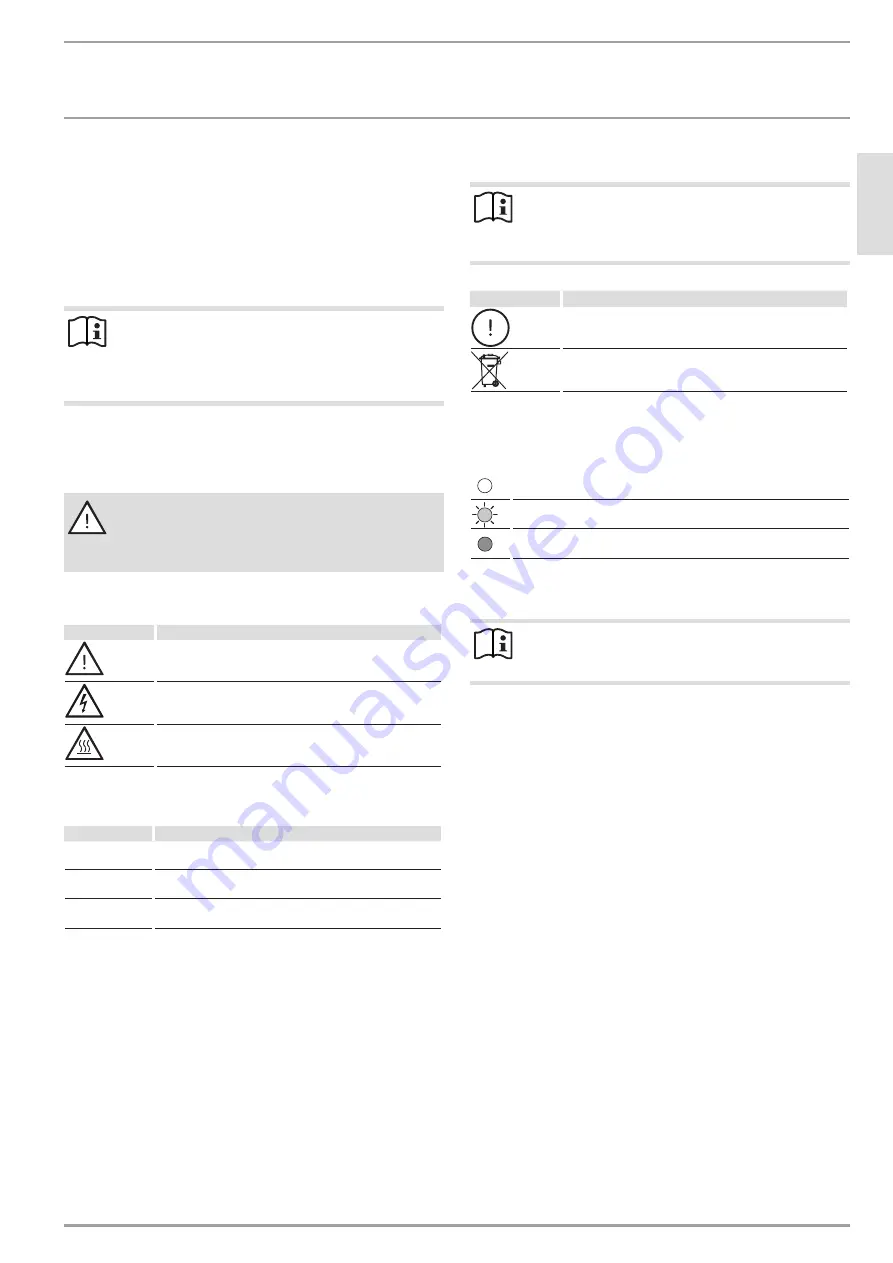
1.1.2  Symbole, Art der Gefahr

symbol

Art der gefahr


Verletzung 


Stromschlag 


Verbrennung

(Verbrennung, Verbrühung) 

1.1.3  Signalworte

sIgNALWorT

Bedeutung

GEFAHR 

Hinweise, deren Nichtbeachtung schwere Verletzungen 

oder Tod zur Folge haben.

WARNUNG 

Hinweise, deren Nichtbeachtung schwere Verletzungen 

oder Tod zur Folge haben kann.

VORSICHT 

Hinweise, deren Nichtbeachtung zu mittelschweren oder 

leichten Verletzungen führen kann.

1.2  Andere Markierungen in dieser Dokumentation


Hinweis

Allgemeine Hinweise werden mit dem nebenstehenden 

Symbol gekennzeichnet.

f

f

Lesen Sie die Hinweistexte sorgfältig durch.

symbol

Bedeutung


Sachschaden

(Geräte-, Folge-, Umweltschaden) 


Geräteentsorgung 


f

f

Dieses Symbol zeigt Ihnen, dass Sie etwas tun müssen. 

Die erforderlichen Handlungen werden Schritt für Schritt 

beschrieben.


LED aus 


LED blinkt 


LED leuchtet 

1.3  Maßeinheiten


Hinweis

Wenn nicht anders angegeben, sind alle Maße in Milli-

meter.

2.  Sicherheit

2.1  Bestimmungsgemäße Verwendung

Das Gerät ist ein dezentrales Lüftungsgerät mit Wärmerückgewin-

nung. Das Gerät dient zur Be- und Entlüftung von Wohnräumen. 

Das Gerät wird in die Außenwand eingebaut.
Das Gerät ist für den Einsatz im häuslichen Umfeld vorgesehen. 

Es kann von nicht eingewiesenen Personen sicher bedient wer-

den. In nicht häuslicher Umgebung, z. B. im Kleingewerbe, kann 

das Gerät ebenfalls verwendet werden, sofern die Benutzung in 

gleicher Weise erfolgt.
Eine andere oder darüber hinausgehende Benutzung gilt als nicht 

bestimmungsgemäß. Zum bestimmungsgemäßen Gebrauch ge-

hört auch das Beachten dieser Anleitung sowie der Anleitungen 

für eingesetztes Zubehör.

2.2  Nicht bestimmungsgemäße Verwendung

Das Gerät eignet sich nicht zur Be- und Entlüften von Räumen, für 

die es hohe Anforderungen an die Keimarmut gibt.
Das Gerät darf nicht in Anlagen mit aggressiven oder ätzenden 

Gasen eingesetzt werden. Die Luft muss frei von Gefahrstoffen 

sein.
Das Gerät eignet sich nicht für die Bauaustrocknung.

Содержание 236659

Страница 1: ...O Dezentrales Lüftungsgerät mit Wärmerückgewinnung Decentralised ventilation unit with heat recovery Appareil de ventilation décentralisée avec récupération de chaleur Unità di ventilazione decentralizzata con recupero di calore LWE 40 ...

Страница 2: ...llgemeine Hinweise 3 1 1 Sicherheitshinweise 3 1 2 Andere Markierungen in dieser Dokumentation 3 1 3 Maßeinheiten 3 2 Sicherheit 3 2 1 Bestimmungsgemäße Verwendung 3 2 2 Nicht bestimmungsgemäße Verwendung 3 2 3 Allgemeine Sicherheitshinweise 4 2 4 Prüfzeichen 4 3 Gerätebeschreibung 4 4 Einstellungen 4 4 1 Bedienelemente 4 4 2 Gegentaktbetrieb 5 4 3 Querlüftung 5 4 4 Lüfterstufe 5 4 5 Intensivlüftu...

Страница 3: ...stexte sorgfältig durch Symbol Bedeutung Sachschaden Geräte Folge Umweltschaden Geräteentsorgung f f Dieses Symbol zeigt Ihnen dass Sie etwas tun müssen Die erforderlichen Handlungen werden Schritt für Schritt beschrieben LED aus LED blinkt LED leuchtet 1 3 Maßeinheiten Hinweis Wenn nicht anders angegeben sind alle Maße in Milli meter 2 Sicherheit 2 1 Bestimmungsgemäße Verwendung Das Gerät ist ein...

Страница 4: ...ftungsgerät mit Wärmerückgewin nung Das Gerät dient zur Be und Entlüftung einzelner Räume oder zur Teilbelüftung von Wohnungen Das Gerät wird in die Außenwand eingebaut Das Wandeinbaugehäuse ist ein Teles kopgehäuse Das Gerät arbeitet nach dem Prinzip der regenerativen Wärme übertragung Im Luftstrom sind Wärmespeicher angeordnet Diese Geräte funktionieren nur paarweise im wechselseitigen Betrieb E...

Страница 5: ...AB die Lüfterstufe ein f f Die eingestellte Lüfterstufe erkennen Sie an den drei LEDs der Anzeige Lüfterstufe Bei der Lüfterstufe Intensiv lüftung leuchten gleichzeitig die drei LEDs der Anzeige Lüfterstufe 4 5 Intensivlüftung Um die Intensivlüftung einzustellen drücken Sie bei aktiver Nenn lüftung LED III leuchtet die Taste AUF Dauer der Intensivlüftung einstellen f f Drücken Sie bei aktivierter ...

Страница 6: ... Helligkeit der LED Anzeigen f f Drücken Sie gleichzeitig mindestens 3 Sekunden die Tasten Querlüftung und AB bis alle Anzeigen außer der Anzeige Störung leuchten f f Stellen Sie mit den Tasten AUF und AB die Helligkeit ein f f Das Gerät speichert die Einstellung nach einigen Sekunden 4 11 Anzahl der Betriebsstunden auslesen Die Anzahl der Betriebsstunden wird mit den LED Anzeigen dar gestellt die...

Страница 7: ...hrauben f f Nehmen Sie die Grundplatte der Innenblende ab Schallschutz Innenblende D0000070713 1 1 Federknopf f f Halten Sie den Federknopf auf der Unterseite der Schall schutz Innenblende gedrückt f f Ziehen Sie die Schallschutz Innenblende auf der Unterseite vom Wandrahmen ab D0000070714 f f Heben Sie die Schallschutz Innenblende nach oben aus den beiden Rastbolzen heraus 5 2 2 Lüftereinheit her...

Страница 8: ...eicher reinigen Reinigen Sie zu Beginn der Heizsaison den Wärmespeicher des Gerätes Falls die Umgebungsluft verunreinigt ist reinigen Sie den Wärmespeicher alle 6 Monate D0000070051 Die Halbschalen der Lüftereinheit sind durch Bajonettschrauben verbunden die Sie durch Drehen um 90 gegen den Uhrzeigersinn lösen f f Schrauben Sie die zwei Schrauben an der Längsseite der Lüf tereinheit heraus f f Dre...

Страница 9: ...en Sie die zwei Schrauben an der Längsseite der Lüf tereinheit hinein f f Drehen Sie die Lüftereinheit um 180 f f Schrauben Sie die zwei Schrauben an der Längsseite der Lüf tereinheit hinein 5 4 Gerät zusammenbauen Hinweis Aus hygienischen Gründen müssen Sie verschmutzte Filter durch neue Filter ersetzen Verwenden Sie nur Original Ersatzteile Die Verwendung von alternativen Filtern kann zu deutlic...

Страница 10: ...äuse f f Setzen Sie den Deckel der Innenblende wieder an D0000070028 f f Drehen Sie den Deckel der Innenblende um 45 im Uhrzeigersinn f f Schalten Sie im Sicherungskasten die Spannungsversorgung des Gerätes wieder ein Schallschutz Innenblende 1 2 D0000070706 1 Schallschutz Innenblende 2 Wandrahmen f f Kippen Sie die Schallschutz Innenblende oben näher zur Wand f f Hängen Sie die Schallschutz Innen...

Страница 11: ...en Reset an indem die rechts angeordneten Anzeigen mehrfach von unten nach oben abwechselnd leuchten Anzeige während des Gerätestarts Alle Anzeigen der Bedieneinheit leuchten für wenige Sekunden Von den Anzeigen auf der linken Seite erlischt alle zwei Sekunden eine weitere Anzeige Alle Anzeigen blinken in der Häufigkeit des eingelernten Systems 6 2 Fachhandwerker rufen Wenn Sie die Ursache nicht b...

Страница 12: ...en Deckel der Innenblende f f Schalten Sie mit der Sicherung in der Hausinstallation die Spannungsversorgung des Gerätes ein 9 Technische Daten LWE 40 236659 Schallangaben Schallleistungspegel Lwges bezogen auf Luftvolumenstrom dB A 32 bei 20 m h 37 bei 30 m h Normschallpegeldifferenz dB 37 Einsatzgrenzen Temperatureinsatzbereich C 15 bis 40 Energetische Daten Energieeffizienzklasse bei durchschni...

Страница 13: ...erden unser Eigentum Für die Dauer und Reichweite der Garantie übernehmen wir sämtliche Material und Montagekosten Soweit der Kunde wegen des Garantiefalles aufgrund gesetzli cher Gewährleistungsansprüche gegen andere Vertragspartner Leistungen erhalten hat entfällt eine Leistungspflicht von uns Soweit eine Garantieleistung erbracht wird übernehmen wir keine Haftung für die Beschädigung eines Gerä...

Страница 14: ...ysteme in Deutschland Entsorgung von Altgeräten in Deutschland Geräteentsorgung Die mit diesem Symbol gekennzeichneten Geräte dür fen nicht mit dem Hausmüll entsorgt werden Als Hersteller sorgen wir im Rahmen der Produktverantwor tung für eine umweltgerechte Behandlung und Verwertung der Altgeräte Weitere Informationen zur Sammlung und Ent sorgung erhalten Sie über Ihre Kommune oder Ihren Fach han...

Страница 15: ...ww stiebel eltron com LWE 40 15 DEUTSCH FILTERWECHSEL PROTOKOLL Innenfilter Datum des Filterwechsels Nächster Filterwechsel Filtertyp Außenfilter Datum des Filterwechsels Nächster Filterwechsel Filtertyp ...

Страница 16: ... 1 1 Safety instructions 17 1 2 Other symbols in this documentation 17 1 3 Units of measurement 17 2 Safety 17 2 1 Intended use 17 2 2 Incorrect use 17 2 3 General safety instructions 18 2 4 Test symbols 18 3 Appliance description 18 4 Settings 18 4 1 Controls 18 4 2 Differential mode 18 4 3 Cross ventilation 18 4 4 Fan stage 19 4 5 Intensive ventilation 19 4 6 Reference air flow rate 19 4 7 Venti...

Страница 17: ... these texts carefully Symbol Meaning Material losses appliance damage consequential losses and environmen tal pollution Appliance disposal f f This symbol indicates that you have to do something The ac tion you need to take is described step by step LED off LED flashes LED illuminates 1 3 Units of measurement Note All measurements are given in mm unless stated oth erwise 2 Safety 2 1 Intended use...

Страница 18: ...nal wall The wall mount casing is a telescopic casing This appliance works according to the principle of regenerative heat transfer Heat exchange sections are located in the air flow These appliances only function in pairs in alternate operation One appliance operates for approx 40 seconds in supply air mode the other operates simultaneously in extract air mode The air direction is then changed Th...

Страница 19: ...the Differential mode and Cross ventilation buttons simultaneously for at least 3 seconds The Differential mode indicator and the Cross ventilation in dicator are illuminated f f Set the duration using the UP and DOWN buttons Display Intensive ventilation duration min Fan stage after end of intensive ventilation 15 30 45 60 75 90 105 II II II II II II II III II I Filter Delivered condition 15 minu...

Страница 20: ...ds 4 11 Reading the number of hours run The number of hours run is shown with the LED indicators which flash one after another Count how often each indicator flashes Indication of hours run starts with the flashing of the Filter indi cator An LED flashes every 0 5 seconds After a pause of 3 seconds look at the next LED Once all four LEDs have indicated their num ber of hours there is a pause of 5 ...

Страница 21: ...nsulation panel D0000070713 1 1 Spring button f f Press and hold the spring button underneath the internal sound insulation panel f f Pull the bottom of the internal sound insulation panel away from the wall mounting frame D0000070714 f f Lift the internal sound insulation panel up and off the two stop bolts 5 2 2 Removing the fan unit D0000070716 f f Use a screwdriver to lift the appliance connec...

Страница 22: ... of the heating season If the ambient air is polluted clean the heat exchangers every 6 months D0000070051 The semi shells of the fan unit are secured with bayonet screws which are loosened by turning 90 anti clockwise f f Undo the two screws on the long side of the fan unit f f Rotate the fan unit 180 f f Undo the two screws on the long side of the fan unit D0000070053 f f Lift off the top half o...

Страница 23: ...it f f Rotate the fan unit 180 f f Screw in the two screws on the long side of the fan unit 5 4 Assembling the appliance Note For reasons of hygiene always replace contaminated fil ters with new ones Always use original spare parts Use of alternative filters may lead to considerable losses of appliance output and functionality Note We recommend using an internal filter with a higher filter class t...

Страница 24: ...ternal panel D0000070028 f f Rotate the internal panel cover 45 clockwise f f Switch on the power supply to the appliance again at the fuse box Internal sound insulation panel 1 2 D0000070706 1 Internal sound insulation panel 2 Wall mounting frame f f Tilt the internal sound insulation panel top towards the wall f f Hook the internal sound insulation panel onto the wall mounting frame so that the ...

Страница 25: ...tely several times from bottom to top Display during appliance start up All indicators on the programming unit light up for a few seconds Of the indicators on the left a further indicator goes off every two seconds All indicators flash at the frequency of the connected system 6 2 Notifying a qualified contractor If you cannot remedy the fault contact your qualified contractor To facilitate and spe...

Страница 26: ...internal panel cover f f Switch on the power supply to the appliance via the fuse MCB in the distribution board 9 Specification LWE 40 236659 Sound emissions Sound power level Lwttl relative to air flow rate dB A 32 at 20 m h 37 at 30 m h Standard sound power level differential dB 37 Application limits Operating temperature range C 15 to 40 Energy data Energy efficiency class in moderate climates ...

Страница 27: ...y those subsidiaries Such guarantee is only grant ed if the subsidiary has issued its own terms of guarantee No other guarantee will be granted We shall not provide any guarantee for appliances acquired in countries where we have no subsidiary to sell our products This will not affect warranties issued by any importers Environment and recycling We would ask you to help protect the environment Afte...

Страница 28: ...28 LWE 40 www stiebel eltron com FILTER CHANGE REPORT Internal filter Date of filter change Next filter change Filter type External filter Date of filter change Next filter change Filter type ...

Страница 29: ...s de sécurité 30 1 2 Autres pictogrammes utilisés dans cette documentation 30 1 3 Unités de mesure 30 2 Sécurité 30 2 1 Utilisation conforme 30 2 2 Utilisation non conforme 30 2 3 Consignes de sécurité générales 31 2 4 Label de conformité 31 3 Description de l appareil 31 4 Configuration 31 4 1 Organes de commande 31 4 2 Mode inversé 32 4 3 Ventilation transversale 32 4 4 Allure de ventilation 32 ...

Страница 30: ...mbole Signification Dommages matériels dommages touchant à l appareil dommages indirects et pollution de l environnement Recyclage de l appareil f f Ce symbole signale une action à entreprendre Les actions nécessaires sont décrites étape par étape LED éteinte La LED clignote La LED reste allumée 1 3 Unités de mesure Remarque Sauf indication contraire toutes les cotes sont indiquées en millimètres ...

Страница 31: ...ert à la ventilation et à l aération de pièces individuelles ou à la ventilation partielle d habitations L appareil se monte dans le mur extérieur Le boîtier mural en castrable dans le mur est un boîtier télescopique L appareil fonctionne selon le principe du transfert de chaleur par récupération Des accumulateurs de chaleur sont disposés dans le flux d air Ces appareils fonctionnent en alternance...

Страница 32: ...sive prend automatiquement fin au bout d une durée que vous pouvez paramétrer f f Utilisez les touches HAUT et BAS pour paramétrer l al lure de ventilation f f L allure de ventilation réglée peut être déterminée à l aide des trois LED des témoins d allures de ventilation En allure Ventilation intensive les trois LED des témoins Allure de ventilation sont allumées en même temps 4 5 Ventilation inte...

Страница 33: ...du mode inversé s allume le témoin de ventilation transversale s allume et le témoin de défaut clignote f f Utilisez les touches HAUT et BAS pour paramétrer la durée Affi chage Intervalle de changement du filtre mois 12 9 6 3 Réinitialisation du filtre hors calendrier III II I Filtre Etat livraison 6 Mois f f Pour valider la valeur paramétrée appuyez simultanément sur les touches Mode inversé et V...

Страница 34: ...z remplacer les filtres plus sou vent 5 2 1 Ouvrir l obturateur intérieur Obturateur intérieur standard D0000070031 f f Si l obturateur intérieur n est pas ouvert écartez légèrement et avec précaution le couvercle de l obturateur intérieur par rapport au mur D0000070027 f f Tournez le couvercle de l obturateur intérieur sur 45 dans le sens antihoraire f f Retirez le couvercle D0000070712 f f Desse...

Страница 35: ... au moins 3 secondes sur les touches Ventila tion transversale et Mode inversé Le témoin des filtres s éteint 5 2 4 Consigner le changement des filtres f f Notez le changement des filtres dans le rapport de change ment des filtres à la fin de la notice 5 3 Nettoyer l accumulateur de chaleur Au début de la saison de chauffe nettoyez l accumulateur de cha leur de l appareil Si l air ambiant est sale...

Страница 36: ...idage prévu à cet effet sur le côté gauche D0000070055 f f Veillez à ce que l étrier soit correctement en place dans la demi coque f f Placez la demi coque supérieure de l unité de ventilation en l introduisant vers le bas en la secouant légèrement D0000070051 f f Vissez les deux vis sur le côté longitudinal de l unité de ventilation f f Tournez l unité de ventilation sur 180 f f Vissez les deux v...

Страница 37: ...ordue et ne reste pas suspendue au boîtier mural encastrable f f Poussez l unité de ventilation dans le boîtier mural en castrable jusqu à la butée D0000070076 f f Assemblez à nouveau la connexion électrique Obturateur intérieur standard Dommages matériels Serrez les vis uniquement à la main f f Vissez la plaque de base de l obturateur intérieur sur le boî tier mural encastrable à l aide des quatr...

Страница 38: ...econ naissance du système dé faut de stabilité Veuillez en informer un installateur 5 L unité de commande et l ensemble de commande ne sont pas compatibles Interrogez l unité de commande pour connaître les composants formant l installation Veuillez en informer un installateur clignote en permanence La programmation du module de commande est incorrecte Recommencez la pro grammation du module de com...

Страница 39: ...un seul clignotement le point entre les chiffres du numéro de version f f Comptez le nombre de fois que le témoin de ventilation transversale clignote Ce nombre correspond au deuxième chiffre du numéro de version Le témoin de défaut indique par un seul clignotement le point entre les chiffres du numéro de version f f Comptez le nombre de fois que le témoin de ventilation transversale clignote Ce n...

Страница 40: ...ltre ISO Coarse 60 G4 ISO Coarse 30 G2 Indice de protection IP IP41 Dimensions Hauteur mm 258 Largeur mm 258 Profondeur mm 550 Hauteur d installation maximale m 2000 Ouverture de passage mini mm Ø200 carré 185x185 Poids Poids kg 4 25 Valeurs Débit volumétrique de l air m h 20 30 40 49 70 Débit volumique de l air mode différentiel m h 10 15 20 25 35 Rendement de récupération de chaleur jusqu à 93 É...

Страница 41: ...FRANÇAIS RAPPORT DE CHANGEMENT DES FILTRES Filtre intérieur Date du changement des filtres Prochain changement des filtres Type de filtres Filtre extérieur Date du changement des filtres Prochain changement des filtres Type de filtres ...

Страница 42: ...rantie ne pourra cependant être accordée que si la filiale a publié ses propres conditions de garantie Il ne sera accordé aucune garantie par ailleurs Nous n accordons aucune garantie pour les appareils achetés dans des pays où aucune filiale de notre société ne distribue nos produits D éventuelles garanties accordées par l importa teur restent inchangées Environnement et recyclage Merci de contri...

Страница 43: ...ezza 44 1 2 Altre segnalazioni utilizzate in questo documento 44 1 3 Unità di misura 44 2 Sicurezza 44 2 1 Uso conforme 44 2 2 Utilizzo non conforme alle normative 44 2 3 Istruzioni di sicurezza generali 45 2 4 Marchio di collaudo 45 3 Descrizione dell apparecchio 45 4 Impostazioni 45 4 1 Elementi di comando 45 4 2 Funzionamento a singolo flusso alternato 46 4 3 Ventilazione trasversale 46 4 4 Sta...

Страница 44: ...anni materiali danni all apparecchio danni indiretti e danni ambientali Smaltimento dell apparecchio f f Questo simbolo indica che si deve intervenire Le azioni ne cessarie vengono descritte passo per passo LED spento LED lampeggiante LED acceso 1 3 Unità di misura Nota Ove non altrimenti specificato tutte le misure sono in dicate in millimetri 2 Sicurezza 2 1 Uso conforme unità decentrata di vent...

Страница 45: ...unità di ventilazione decentralizzata con recupero di calore L apparecchio permette di ventilare singoli locali o parti di appartamenti L apparecchio viene integrato nella parete esterna L alloggiamento integrato nella parete è di tipo telescopico L apparecchio funziona secondo il principio dello scambio rige nerativo di calore Nel flusso d aria sono disposti gli accumulatori di calore Questi appa...

Страница 46: ...tadio del ventilatore con i tasti SU e GIÙ f f Lo stadio impostato per il ventilatore si riconosce dai tre LED della spia Stadio ventilatore Quando è impostato lo stadio Ventilazione intensiva i tre LED della spia Stadio ventilato re si illuminano contemporaneamente 4 5 Ventilazione intensiva Per impostare la ventilazione intensiva premere il tasto SU quando è attiva la ventilazione nominale LED I...

Страница 47: ...e altre due volte il tasto GIÙ 4 9 Intervallo sostituzione filtro f f Premere contemporaneamente per almeno 3 secondi i tasti Funzionamento a singolo flusso alternato e SU La spia Funzionamento a singolo flusso alternato è accesa la spia Ventilazione trasversale è accesa e la spia Guasto lampeggia f f Impostare la durata con i tasti SU e GIÙ Spia Intervallo sostituzione filtro mesi 12 9 6 3 Reset ...

Страница 48: ...ostare a piacere si illumina la spia Filtro f f Quando si illumina la spia Filtro sostituire i filtri Si consiglia di sostituire i filtri ogni 6 mesi Se l aria dell ambiente non è pura sostituire i filtri con maggiore frequenza 5 2 1 Apertura del controportellino interno Controportellino interno standard D0000070031 f f Se il controportellino interno non è aperto tirare con cautela il suo coperchi...

Страница 49: ... i tasti Ventilazione trasversale e Funzionamento a singolo flusso alternato per almeno 3 secondi La spia Filtro si spegne 5 2 4 Registrazione della sostituzione filtri f f Annotare la sostituzione dei filtri nell apposita scheda di ma nutenzione presente in fondo alle istruzioni 5 3 Pulizia dell accumulatore di calore Prima dell inizio della stagione termica pulire l accumulatore di calore dell a...

Страница 50: ...sulla sinistra nell apposita guida D0000070055 f f Verificare che il manico sia regolarmente alloggiato nel se miguscio di isolamento f f Posizionare il semiguscio di isolamento superiore dell unità ventilatori facendolo muovere a piccoli scatti verso il basso D0000070051 f f Avvitare le due viti sul lato lungo dell unità ventilatori f f Ruotare l unità ventilatori di 180 f f Avvitare le due viti ...

Страница 51: ...sull alloggiamento integrato nella parete f f Spingere l unità ventilatori fino a battuta nell alloggiamento integrato nella parete D0000070076 f f Ripristinare il collegamento elettrico Controportellino interno standard Danni materiali Stringere le viti senza forzare f f Con le quattro viti zigrinate avvitare la piastra di base del controportellino interno all alloggiamento integrato nella parete...

Страница 52: ...ecnico specializzato 4 Difetto nel rilevamento del sistema guasto stabilità Informare un tecnico specializzato 5 Unità di programmazione e struttura di comando sono incompatibili Individuare sull unità di programmazione i componenti del sistema Informare un tecnico specializzato lampeggiante continua L unità di comando non è inizializzata correttamente Inizializzare l unità di comando Se l inizial...

Страница 53: ...o numero è la prima cifra del numero di versione La spia Guasto indica con un lampeggio il punto tra le cifre del numero di versione f f Contare i lampeggi della spia Ventilazione trasversale Que sto numero è la seconda cifra del numero di versione La spia Guasto indica con un lampeggio il punto tra le cifre del numero di versione f f Contare i lampeggi della spia Ventilazione trasversale Que sto ...

Страница 54: ...lore fino a 93 Spessore della parete mm 300 550 Unità ventilatore LWE 40 VE 236664 Dati elettrici Potenza assorbita max W 6 Tensione di alimentazione V 24 Versioni Classe filtro ISO Coarse 60 G4 ISO Coarse 30 G2 Dimensioni Altezza mm 142 Larghezza mm 142 Profondità mm 282 Valori Portata d aria m h 20 30 40 49 70 Ulteriori dati Versione software 3 0 0 Garanzia Per apparecchi acquistati non in Germa...

Страница 55: ...5 ITALIANO SCHEDA SOSTITUZIONE FILTRI Filtro interno Data della sostituzione dei filtri Prossima sostituzione dei filtri Tipo di filtro Filtro esterno Data della sostituzione dei filtri Prossima sostituzione dei filtri Tipo di filtro ...

Страница 56: ...tiebel eltron cz www stiebel eltron cz Finland STIEBEL ELTRON OY Kapinakuja 1 04600 Mäntsälä Tel 020 720 9988 info stiebel eltron fi www stiebel eltron fi France STIEBEL ELTRON SAS 7 9 rue des Selliers B P 85107 57073 Metz Cédex 3 Tel 0387 7438 88 Fax 0387 7468 26 info stiebel eltron fr www stiebel eltron fr Hungary STIEBEL ELTRON Kft Gyár u 2 2040 Budaörs Tel 01 250 6055 Fax 01 368 8097 info stie...

Отзывы: