


stewmac.com
©2018 StewMac
page 10 of 14
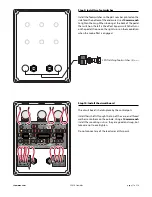
Step 8: Install two LED indicator lights
The LED mounting bezel consists of two main parts: A ring
that the LED fits into, and a plastic plug that goes over the
LED from the back side to keep it in place.
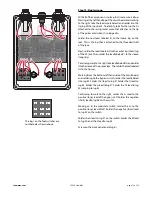
Like some of the caps and diodes, the LEDs are polarized
and have to be installed in a specific direction. One side
of the diode has a flat edge, indicating the negative lead.
Another indication is that the negative lead is shorter than
the positive.
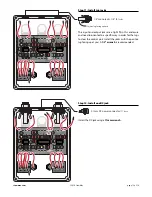
Install the mounting bezels through the front of the
enclosure. From the inside, slip a lock washer and nut on both
and tighten them up using a 3/8" socket. Insert the LEDs into
the bezel so the flat side (short lead) faces the holes for the
footswitches. Feed the leads through the plastic plug, press
the plug down until it’s tight in the bezel. The LEDs will be
held in place when you solder the leads to the switches and
circuit board. For a more secure mount, you can run a bead
of clear silicone adhesive around the plastic plug.
5mm LED mounting bezels (2)
#7432
5mm white LEDs (2)
#7422
case
x2
5mm LED mounting bezels (2)
#7432
5mm white LEDs (2)
#7422
case
x2


