background image

14

14

2. REMOTE CONTROL

Good for: 

On the fairways, around the greens or when you are in the rough.

Not for:

 Car parks, bridges, paths.

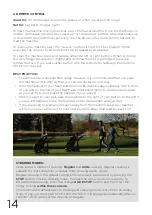
To start the machine moving forwards, press the forward button. Once the machine is in 

motion, continually pressing the “speed up” or “slow down” buttons will either speed up 

or slow down the machine respectively. You can also use the cruise control buttons to 

start the machine.

To reverse the machine press the “reverse” button (it must first be stopped). When 

reversing, the speed is fixed and cannot be increased or decreased.

To steer the machine, press and release either the left or right buttons. When in motion 

this will change the direction slightly and continue moving. A prolonged press will 

tighten the turn. If you press either button with the Q Remote stationary, the machine  

will turn on the spot.

BEST PRACTICE

:

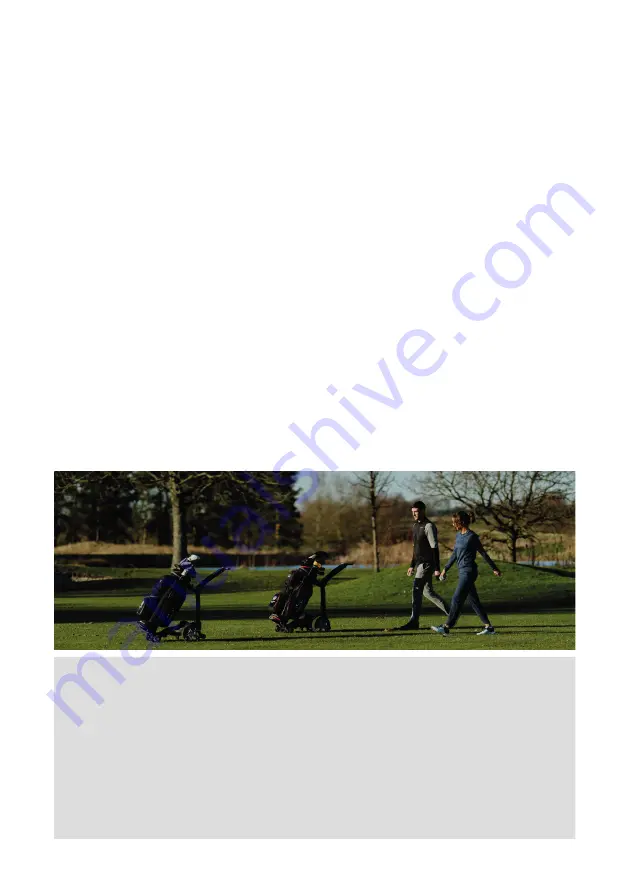
•  The remote has a nominal 50m range. However it is recommended that you keep 

the machine within 25m so that you can see obstacles in its way. 

•  Hold the handset in your hand and position the machine approximately 10m in front 

of you and on the line of your ball. Make small adjustments to direction and speed 

as you see fit. Do not place the handset in your pocket.

•  When you get to your ball, park the machine to the right of your ball (or to the left if 

you are left handed). Place the handset on the cradle when taking a shot.

•  If you are going to walk any distance away from the machine, keep your handset 

with you so you can drive it to your next position rather than walking back to it. 

STEERING MODES: 

There are two modes of steering: 

Regular

 and 

Glide

 steering. Regular steering is 

suitable for most situations, whereas Glide steering reacts slower.
Regular steering is the default setting and can always be restored by pressing the 

STOP

 button. In Glide steering mode, the machine steers much more gently. To 

activate Glide Steering, press the orange 

GLIDE STOP

 button and then start the 

trolley moving 

within three seconds

The machine will default back to the Regular steering mode every time the trolley 

stops. If you use the GLIDE STOP, then the ‘STOP’ will engage automatically after six 

seconds which will reset the steering to Regular.

Содержание Q REMOTE

Страница 1: ...1 OWNER S MANUAL ...

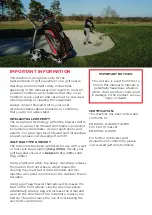
Страница 2: ...butor dealer about problems or conditions that you do not understand INTELLECTUAL PROPERTY The design and technology within the Stewart Golf Q Series as well as the Stewart Golf brand is protected by numerous trademarks design registrations and patents For a full register of Stewart Golf intellectual property please visit stewartgolf com IP GOLF BAG TYPE WEIGHT The Q Remote has been optimised for ...

Страница 3: ...it we recommend a weight of 14kg or 31lbs Using it on grass is important speed and steering are both affected by the surface the Q Remote is on and it s obviously designed to be used on grass You should steer the machine manually from the handle when on paths or in a car park for example or by using remote control when you re in the rough or around tees and greens Please see pages 12 15 for more o...

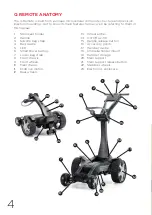
Страница 4: ... bag strap 4 Bag cradle 5 LED 6 SmartPower battery 7 Lower bag strap 8 Front chassis 9 Front wheels 10 Main chassis 11 EcoDrive motors 12 Rear wheels 13 Wheel arches 14 On Off switch 15 Handle release button 16 Accessory points 17 Handset cradle 18 Umbrella holder mount 19 Handset storage 20 Main support 21 Main support release button 22 Stabiliser wheels 23 Electronics enclosure 1 2 3 4 5 6 7 8 9...

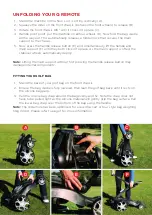
Страница 5: ...he main support is lifted the stabliser wheels automatically deploy Note Lifting the main support without first pressing the handle release button may damage internal components FITTING YOUR GOLF BAG 1 Stand the base of your golf bag on the front chassis 2 Ensure the bag cradle is fully lowered then lean the golf bag back until it rests on the silicone bag pads 3 Pull the silcone bag strap around ...

Страница 6: ... your handset on the main support Be sure to keep the handset in its silicone case to avoid marking the main support You can pick up your Q Remote from either its vertical or horizontal positions Vertical When folded the carry handle is in the centre of the trolley and clearly visible Lift with the wheel arches closest to your body image B WARNING Always ensure that your Q Remote is turned OFF at ...

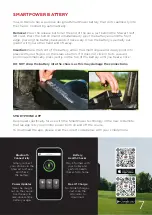
Страница 7: ...s not click in to its secured position automatically press gently on the top of the battery until you hear a click DO NOT drop the battery into the chassis as this may damage the connections SMARTPHONE APP Developed specifically for use with the SmartPower technology in the new Q Remote the free app lets you monitor power both on and off the course To download the app please scan the correct code ...

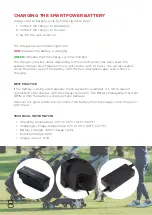
Страница 8: ...0 hours You can accurately check the power level of the battery with the free smartphone app even while it is charging BEST PRACTICE If the battery is being used regularly once a week for example it is OK to leave it connected to the charger with the charger turned on The Battery Management System BMS within the battery will prevent any damage However it is good practice to disconnect the battery ...

Страница 9: ...e a complex technology and a number of variables contribute to battery performance and thus the performance of your Q Remote All rechargeable batteries are consumables and have a limited lifespan eventually their capacity and performance decline so that they need to be replaced As batteries age it can contribute to changes in their performance CARING FOR YOUR BATTERY DO follow these instructions e...

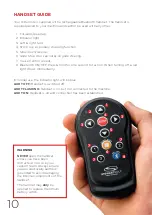
Страница 10: ... hold for one second to turn on When turning off a red light shows momentarily In normal use the indicator light will be blue LIGHT OFF Handset is switched off LIGHT FLASHING Handset is on but not connected to the machine LIGHT ON Handset is on and connection has been established WARNING NEVER open the handset unless you have been instructed to do so by our support team Always ensure you are elect...

Страница 11: ...ectronics are natural enemies and you must take care to make sure no water ever gets inside the handset Never allow the handset to be immersed in water and don t wash it If you want to wash the silicone skin remove it from the handset before washing it then dry it thoroughly before replacing it If you use the handset in the rain or other wet conditions remove the silicone skin as soon as you have ...

Страница 12: ...a car park crossing a road or negotiating a tight path you should steer manually from the handle You can control the speed of the machine using the speed up slow down buttons or program the cruise control speeds to your walking pace see P16 BEST PRACTICE When in tight areas you should physically keep control of the Q Remote by steering from the handle The dual handle allows you to steer with eithe...

Страница 13: ...13 ...

Страница 14: ...d the handset in your hand and position the machine approximately 10m in front of you and on the line of your ball Make small adjustments to direction and speed as you see fit Do not place the handset in your pocket When you get to your ball park the machine to the right of your ball or to the left if you are left handed Place the handset on the cradle when taking a shot If you are going to walk a...

Страница 15: ...his fuse in such cases replacement of the fuse will NOT be covered by warranty SPEED The Q Remote can travel at speeds of upto 6mph but performing delicate manoeuvres such as negotiating bridges or steering between obstacles should not be performed at top speed and any damage caused will NOT be covered by warranty The machine will perform best when being driven at walking speed and this is what is...

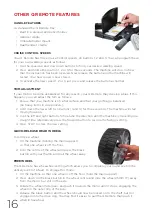
Страница 16: ...two buttons 1 and 3 for three seconds The machine will start moving forwards 3 Use the left and right buttons to fine tune the direction until the machine is travelling in a straight line Alternatively press the forward button to restore the factory setting 4 Press STOP to store the new setting QUICK RELEASE REAR WHEELS To remove a wheel 1 Tilt the machine holding the main support so that one whee...

Страница 17: ...be anywhere between 100 and 600 yards long so is not a reliable unit of measurement Terrain ground condition bag weight and a number of other factors can make a difference How you play will also affect power consumption you ll cover less ground shooting 65 than you will shooting 120 Can I improve the battery life Yes there are a number of things you can do Don t overload your golf bag Steering is ...

Страница 18: ...tomer has not fully understood all of the functions of the Q Remote or the part in question Exclusions to the warranty include but are not limited to damage during shipment if not packed in a Stewart Golf designated box or according to Stewart Golf instructions wear tear results of neglect misuse or accidents damage howsoever caused or utilisation for any purpose other than carrying a golf bag on ...

Страница 19: ...wheel in freewheel one in drive Ensure both wheels are not in freewheel mode The Q Remote does not travel in a straight line 1 Bag not balanced 2 Motors have become inbalanced 1 Ensure your bag is evenly weighted from side to side 2 Follow the guide on trim adjustment on P16 SYMPTOMS POSSIBLE ISSUE POSSIBLE SOLUTION The handset won t turn on Battery not charged Charge handset using USB power cable...

Страница 20: ...20 100350 ...

Отзывы: