background image

24

24

3. Press

 OK key to confirm, then using UP▲ or ▼DOWN key to select ON or OFF, press   

key to confirm.

4. If select ON, using the digit key to input four groups of maximum 4-digit numbers you 

want to barring.

After setting up the barring numbers, once you dial a number begin with anyone of them, 

LCD will display CALLS BARRED and the number is not allowed to be dialed out.

• DATE & TIME:

 The user is able to set the date and time on the handset, by selecting the 

following option. Press OK key to enter date and time settings. 

1. Press OK key. Using UP▲ or ▼DOWN key to select DATE&TIME, 

2. Press

 OK key and the last two digits of the year flash. 

3. Edit the year, month, time and date by pressing UP▲ or ▼DOWN key. 

4. Press

 OK key to confirm the setting, and return to the DATE & TIME menu.

Note: The date and time will be automatically set when the first caller ID message is received. 

• 

SELECT BASE

This  function  allows  the  handset  to  choose  to  link  any  one  of  the  bases  the  handset                       

registered.

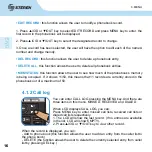
1. Press OK key, then using UP▲ or ▼DOWN key to choose SELECT BASE.

2. Press

 OK key and the LCD displays BASE 1  + .

3. Press UP▲ or ▼DOWN to select base (BASE 1~4) or AUTO.

4. Press

  OK  to  begin  searching,  if  you  hear  a  sound  of  “di-du-di”,  means  the  link  was                 

successful.

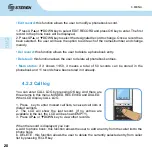
• HANDSET DEFAULT: 

This function allows the user to restore the handset setting to the factory default. 

1. Press OK key, then using UP▲ or ▼DOWN key to select HS DEFAULT item. 

2. Press

 OK key to confirm. 

3. The user will be prompted to enter the PIN CODE. If the PIN code is validated all base 

settings will be returned to the factory default. 

4. MENU

Содержание TEL-2490

Страница 1: ......

Страница 2: ...2 ...

Страница 3: ...e cómo utilizar apropiadamente el producto Para apoyo compras y todo lo nuevo que tiene Steren visite nuestro sitio web www steren com SISTEMA DOBLE DE TELÉFONO ALÁMBRICO E INALÁMBRICO La información que se muestra en este manual sirve únicamente como referencia sobre el producto Debido a actualizaciones pueden existir diferencias Por favor consulte nuestra página web www steren com para obtener l...

Страница 4: ...oloque objetos pesados sobre el equipo ni sobre sus accesorios No exponga el equipo ni sus accesorios al polvo humo o vapor No utilice solventes u otros productos químicos para limpiar el exterior del sistema ADVERTENCIAS EXTENSIÓN Utilice únicamente baterías recargables Ni MH Níquel Metal Hidruro La utilización de cualquier otro tipo de baterías no recargables puede resultar peligrosa Puede provo...

Страница 5: ...15 4 1 Teléfono alámbrico 15 4 1 1 Agenda 15 4 1 2 Reg llam 16 4 1 3 Ajustes 17 4 2 Extensión inalámbrica 19 4 2 1 Agenda 19 4 2 2 Reg llam 20 4 2 3 Ajustes base 21 4 2 4 Ajustes TLF 22 5 OPERACIÓN 25 5 1 Función de pausa botón REDIAL P 25 5 2 Programación Marcación de números de memorias 26 5 3 Función intercomunicador 26 5 4 Transferencia de llamadas 27 5 5 Llamada en conferencia 27 6 PROBLEMAS ...

Страница 6: ...e incorpora una amplia gama de funciones como idiomas timbres ajuste de volumen reloj identificador de llamada trasferencia de llamada y conferencia Teléfono Inalámbrico Pantalla LCD 14 segmentos 40 Memorias con identificador de llamadas Intercomunicador Indicador de batería visual y audible Bloqueo de teclado 10 tonos diferentes de timbrado Pantalla luminosa de color azul Teléfono alámbrico Altav...

Страница 7: ...eda desactivado Indica que se está explorando la agenda telefónica Aparece cuando ha recibido un mensaje de voz Repeat call Indica que una llamada ha sido recibida más de una vez Indica que hay una nueva llamada entrante con un número no identificado Aparece para indicar el número de llamada entrante o saliente visualizada en el menú REG LLAM Aparece cuando el teléfono está en modo de manos libres...

Страница 8: ...telefónica en el modo de espera y conversación Use esta tecla para salir de los menús 3 INT útil para realizar llamadas internas al segundo auricular Sirve para transferir llamadas entrantes al segundo auricular Permite realizar llamadas en conferencia con una línea externa 2 ICONOGRAFÍA Y CONTROLES ...

Страница 9: ...9 OUT permite navegar hacia abajo en los menús Reduce el nivel de volumen cuando selecciona el modo altavoz En el modo de espera presione para consultar los números marcados 10 VOL permite navegar hacia arriba en los menús Aumenta el nivel de volumen en el auricular o cuando selecciona el modo altavoz En el modo de espera presione para consultar las llamadas entrantes 11 VOL permite navegar hacia ...

Страница 10: ...cular está descolgado es decir que ha presionado el botón de llamar Señala que el bloqueo de teclado está activado Indica que la alarma está activada Indica que está activada la función no molestar De este modo el timbre de la extensión queda desactivado Aparece al consultar la agenda telefónica Aparece cuando ha recibido un mensaje de voz Repeat call Indica que una llamada ha sido recibida más de...

Страница 11: ...11 2 ICONOGRAFÍA Y CONTROLES ...

Страница 12: ...abajo en los menús Reduce el nivel de volumen en el auricular o cuando selecciona el modo altavoz En el modo de espera presione para consultar los números marcados 8 Durante la visualización de la agenda o consulta de llamadas recibidas o marcadas presione para borrar el número seleccionado 9 Presione para volver a llamar al último número marcado Marca una pausa entre cada dígito marcado cuando se...

Страница 13: ...uzca dos baterías AAA recargables incluidas poniendo atención en la polaridad 3 Coloque nuevamente la tapa del compartimento de baterías 4 En el primer uso se recomienda cargar las baterías por 14 horas Utilice las pilas suministradas o equivalentes Para obtener pilas de repuesto visite nuestro sitio web www steren com Coloque el auricular del teléfono en la base cuando no esté en uso para obtener...

Страница 14: ... que la pila se haya cargado por 14 horas También compruebe que tiene tono de marcado SI ESTÁ SUSCRITO A UN SERVICIO DE DSL OPCIONAL SiustedrecibeInternetdealtavelocidadatravés de su línea telefónica comúnmente referido como DSL y oye interferencia durante sus conversaciones y o las funciones de su identificador de llamadas no están funcionando apropiadamente instale un filtro DSL steren 300 997 e...

Страница 15: ...días Lista seleccione para visualizar los contactos guardados en la memoria Utilice para navegar en la lista Si lo desea también puede realizar llamadas desde esta opción En caso de que tenga el auricular colgado simplemente levántelo para marcar Nueva entr ingrese a esta opción para introducir un nuevo número telefónico 1 Use para seleccionar esta opción e ingrese con MENU Una vez que aparezca el...

Страница 16: ...ico para introducir la letra correspondiente 3 Una vez que concluya la edición del nombre presione MENU para comenzar la edición del número telefónico Utilice para seleccionar el carácter a editar presione DEL para borrar Utilice el teclado numérico para introducir el número correcto a continuación utilice para elegir una melodía Presione MENU para guardar los cambios Borr Regis seleccione esta op...

Страница 17: ... EXT 4 Confirme con MENU 5 Con seleccione la función que desea personalizar MELODÍA o VOLUMEN y confirme con MENU MODO MARC selecciona el modo de marcado por tonos o pulsos TIEMPO FLASH mediante esta opción el usuario podrá cambiar el tiempo de Flash función de llamada en espera Puede elegir entre 100 300 600 y 1000 ms milisegundos 4 1 3 Ajustes 4 MENÚ MENU AJUSTES ELIMINAR TLF Esta opción le perm...

Страница 18: ... Seleccione con esta opción e ingrese con MENU 2 Cuando en la pantalla aparezca el mensaje PIN introduzca el número actual de identificación el número predeterminado es 0000 cuatro ceros Presione MENU para confirmar la opción 3 En pantalla aparecerá el mensaje NUEVO PIN Introduzca un nuevo número de identificación de 4 dígitos Presione MENU para confirmar 4 Repita el número de identificación y pre...

Страница 19: ...opciones son Lista seleccione para visualizar los contactos guardados en la memoria Utilice para navegar en la lista Si lo desea también puede realizar llamadas desde esta opción Simplemente presione el botón de marcar Nueva entr ingrese a esta opción para introducir un nuevo número telefónico 1 Use para seleccionar esta opción e ingrese con OK Una vez que aparezca el indicador parpadeando en pant...

Страница 20: ...ico para introducir la letra correspondiente 3 Una vez que concluya la edición del nombre presione OK para comenzar la edición del número telefónico Utilice para seleccionar el carácter a editar presione R CLR para borrar Utilice el teclado numérico para introducir el número correcto a continuación utilice para elegir una melodía Presione OK para guardar los cambios Borr Regis seleccione esta opci...

Страница 21: ...ir entre 100 300 600 y 1000 ms milisegundos MODIFICA PIN mediante esta opción podrá cambiar el número de identificación PIN que se utiliza para modificar ciertos parámetros del teléfono 1 Seleccione con esta opción e ingrese con OK 2 Cuando en pantalla aparezca el mensaje PIN introduzca el PIN actual de identificación el número predeterminado es 0000 cuatro ceros Presione OK para confirmar la opci...

Страница 22: ...vó correctamente NOTA Si seleccionó ZUMBIDO ENCE la alarma sonará cada 5 minutos durante una hora Para desactivar esta función presione el botón de colgar Si seleccionó ZUMBIDO APAG la alarma sonará durante 45 segundos una sola vez Detener alarma presione cualquier tecla del auricular mientras esté activada Toda llamada entrante también desactivará la alarma CONF TIMBRE esta opción le permite camb...

Страница 23: ...se con OK 2 Cuando en pantalla aparezca el cursor parpadeando utilice el teclado numérico para introducir un nombre 3 En caso de cometer errores use R CLR para borrar Para confirmar presione OK RESP AUTO utilice esta opción para activar o desactivar la función de contestación automática Si está activada el equipo contestará automáticamente una llamada al levantar la extensión cuando se encuentre e...

Страница 24: ...ases diferentes también puede hacerlo de manera automática 1 Seleccione con esta opción e ingrese con OK 2 Use para seleccionar la base a la que desea vincular el teléfono BASE 1 4 o AUTOMÁTICO 3 Confirme la búsqueda de bases disponibles con OK La vinculación se habrá ejecutado una vez que escuche un tono de confirmación REINICI TLF restaura los ajustes predeterminados de la extensión Al seleccion...

Страница 25: ...base a la que desea vincular la extensión BASE 1 4 3 Previo al enlace deberá introducir el código de identificación y presionar OK para comenzar la búsqueda 4 Confirme la búsqueda de bases disponibles con OK La vinculación se habrá ejecutado una vez que escuche un tono de confirmación 4 2 5 Registro 5 OPERACIÓN Durante el proceso de marcación el teléfono ofrece la opción de insertar una pausa de 3...

Страница 26: ...l altavoz automáticamente Esta función le permite realizar llamadas internas gratuitas Sólo es posible si la extensión está registrada en la base 1 Para llamar internamente primero considere que los dos teléfonos deberán estar en modo de espera colgados Después presione el botón INT ya sea en el teléfono alámbrico o inalámbrico 2 Una vez que el teléfono 2 comience a sonar el usuario deberá contest...

Страница 27: ...stablecer una conferencia con llamadas externas e internas 1 Cuando reciba una llamada conteste descolgando el teléfono alámbrico o presione la tecla en la extensión 2 A continuación pulse la tecla INT en el teléfono que atendió la llamada teléfono 1 3 El segundo teléfono comenzará a sonar indicando que se le está llamando y debe contestar 4 El teléfono 1 deberá presionar la tecla asterisco para a...

Страница 28: ...onitores televisores hornos de microondas aparatos de cocina etc Aleje el teléfono de estos aparatos El identificador de llamadas no funciona El servicio de identificador de llamadas es un servicio por suscripción Usted debe estar suscrito a este servicio para que funcione en su teléfono No tengo tono de marcado Mueva la extensión inalámbrica a una posición más cercana a la base Podría haberse mov...

Страница 29: ...AAA Convertidor Alimentación 100 240 V 50 60 Hz 150 mA Salida 6V 500 mA Teléfono alámbrico Alimentación 6V 500mA convertidor 48V línea telefónica Convertidor Alimentación 100 240V 50 60 Hz 150 mA Salida 6V 500mA Consumo nominal 2 Wh día Consumo en espera 1 3 Wh día 7 ESPECIFICACIONES ...

Страница 30: ...la propia casa comercial donde adquirió el producto Si la presente garantía se extraviara el consumidor puede recurrir a su proveedor para que le expida otra póliza previa presentación de la nota de compra o factura respectiva DATOS DEL DISTRIBUIDOR Nombre del Distribuidor __________________________ Domicilio ______________________________________ Producto ______________________________________ Ma...

Страница 31: ......

Страница 32: ......

Страница 33: ...iew this manual thoroughly to ensure proper installation and operation of this product For support shopping and everything new at Steren visit our website www steren com TEL 2490 CORD CORDLESS TELEPHONE SYSTEM The instructions of this manual are for reference about the product There may be differences due to updates Please check our web site www steren com to obtain the latest version of the instr...

Страница 34: ...to vibration Do not put heavy objects on the device or accessories Do not expose the device or accessories to dust smoke or steam Do not use solvents or other chemicals to clean the exterior of the device CORDLESS PHONE Only use 2 x AAA NiMH rechargeable batteries Do not attempt to recharge non rechargeable type batteries Do not open the handset except to replace the handset batteries or the base ...

Страница 35: ... MENU 15 4 1 Corded phone 15 4 1 1 Phone book 15 4 1 2 Call log 16 4 1 3 Settings 17 4 2 Cordless phone 19 4 2 1 Phone book 19 4 2 2 Call log 20 4 2 3 BS settings 21 4 2 4 HS Settings 22 5 OPERATION 25 5 1 Pause function P 25 5 2 Programming Dialing from speed dial buttons 26 5 3 Intercom function 26 5 4 Call transfer 27 5 5 Conference call 27 6 TROUBLESHOOTING 28 7 SPECIFICATIONS 29 ...

Страница 36: ...ordless phone Allows connecting up to 4 additional extensions to the same base has a wide range of functions such as languages ringtones volume clock caller ID transfer and conference call Cordless phone 14 segment LCD display 40 Caller ID memory Intercom Low battery tone and icon indicator Key lock 10 ring tones Blue background Corded phone Speaker 3 lines 12 characters display 29 memories with c...

Страница 37: ...iewing the phonebook entries The icon will be shown when a new voice message is received Repeat call indicate that the call has been received more than one time The icon will be displayed when a new call comes and hasn t been viewed yet When you scroll and review the incoming or outgoing numbers it appears along with the digit to indicate the sequence of the call The icon will be displayed when th...

Страница 38: ...his key is used to enter the phonebook both in standby mode and in talk mode Exiting from a function during menu operation 3 INT to set up an internal call to handset To transfer an incoming call to handset To set up a conference call with an external line and an internal handset 2 ICONS CONTROLS ...

Страница 39: ...it increses the volume level In standby mode press to view incoming calls 9 OUT used to navigate through menus Press this key to reduce the volume of the speaker In standby mode press to see dialed numbers 10 VOL used to navigate through menus If the speaker mode is selected it increses the volume level In standby mode press to view incoming calls 11 VOL used to navigate through menus Press this k...

Страница 40: ...own as steady on when the alarm is set The alarm icon will flash when the alarm is triggered The icon will be displayed when ring set to off The phonebook icon will be displayed when the viewing the phonebook entries This icon will be shown as steady when a new voice message is received Repeat call indicate that the calls have been received more than one time and the icon will be displayed 2 ICONS...

Страница 41: ...11 11 2 ICONS CONTROLS ...

Страница 42: ...w to navigate through menus Press this key to reduce the volume of the speaker In standby mode press to see dialed numbers 8 The key is used to delete memory Delete the current input by a short pressing while on menu edit 9 In talk mode press once to redial the last dialed number The key will perform PAUSE function if pressed after any digit input both in talk mode and in standby mode 10 A Long pr...

Страница 43: ...isture dust or extreme cold 1 Remove the battery compartment cover 2 Place two rechargeable AAA batteries included pay attention to polarity 3 Replace the battery compartment cover 4 Charge the batteries for 14 hours in the first use Use only the provided batteries or equivalents To obtain a replacement battery visit our website at www steren com Place the wireless headset on the base while is not...

Страница 44: ...that you have dial tone IF YOU ARE SUBSCRIBER TO A DSL SERVICE OPTIONAL If you receive high speed Internet through your telephone line commonly referred to as DSL and you are experiencing interference during conversations and or your caller ID features are not functioning properly and you subscribe to DSL service from your telephone company install a DSL filter steren 300 997 to the telephone line...

Страница 45: ...unction allows the user to review the phone book record lists by pressing CID or OUT key and user can also make a call from the phonebook NEW ENTRY this function allows the user to add an entry to the phone book 1 Press CID or OUT key to select NEW ENTRY and press MENU key to enter if the phonebook is full an appropriate message will be presented to the user as shown MEM IS FULL if a free phoneboo...

Страница 46: ...d entry from caller list by pressing DEL key EDIT RECORD this function allows the user to modify a phonebook record 1 Press CID or OUT key to select EDIT RECORD and press MENU key to enter the first record in the phonebook will be displayed 2 Press CID or OUT key to select the designated record to change 3 Once a record has been selected the user will have the option to edit each of the names numb...

Страница 47: ...ing on internal calls and external calls There are 10 ringer melodies and 5 different volume levels can be set 1 Press MENU key then using CID or OUT key to select RING SETUP item 2 Press MENU key to enter 3 Press CID or OUT key to select the INT RING and EXT RING setup 4 Press MENU key to confirm 5 Press CID or OUT key to select the MELODY and VOLUME setup DIAL MODE the user can select to change ...

Страница 48: ...IFY PIN this function allows the user to change the PIN number of the currently active base 1 Press MENU key then using CID or OUT key to select MODIFY PIN item 2 Press MENU key to confirm The user will first be requested to entry the existing PIN code for the base 3 If the old code is validated the user will be prompted to enter a new PIN code 4 Once a new PIN code has been entered the user will ...

Страница 49: ...en 1 and 10 LIST the function allows the user to review the phone book record lists by using UP or DOWN key The user can also make a call from phonebook NEW ENTRY this function allows the user to add an entry to the phone book 1 Press UP or DOWN key to select NEW ENTRY and press OK key to enter If the phonebook is full an appropriate message will be presented to the user shown as MEM IS FULL If a ...

Страница 50: ...yed 2 Press UP or DOWN key to select the designated record to change Once a record has been selected the user will have the option to edit each of the names number and change melody Del record this function allows the user to delete a phonebook entry Delete all this function allows the user to delete all phonebook entries Mem status if it shows 11 50 it means a total of 50 records can be stored in...

Страница 51: ...00ms 300ms 600ms and 1000ms MODIFY PIN this function allows the user to change the pin number of the currently active base default PIN code is 0000 1 Press OK key then using UP or DOWN key to select MODIFY PIN item 2 Press OK key to confirm and the display shows PIN 3 Entrer the existing PIN code for the base by using numerical keys then press OK to confirm 4 If the old code is validated the displ...

Страница 52: ...will be repeated about every 5 minutes for about an hour with the alarm icon continuing to flash During the alarming press any key except HANG UP POWER OFF key to intermit alarming and will begin to ring after 5 minutes If the SNOOZE is set OFF the alarm will sound for 45 seconds once How to use the alarm Intermit alarm during the alarming you can switch it off by pressing any key of the handset o...

Страница 53: ...wn native translation 4 Press OK key to confirm your selection HANDSET NAME the operation will allow the user to change the handset name 1 Press OK key Using UP or DOWN key to select HS NAME 2 Press OK key and the display will show a flashing cursor on the name line 3 Key in the handset name if you make a mistake press R CLR key to correct Press key to confirm AUTO ANSWER the Handset can be set to...

Страница 54: ... UP or DOWN key 4 Press OK key to confirm the setting and return to the DATE TIME menu Note The date and time will be automatically set when the first caller ID message is received SELECT BASE This function allows the handset to choose to link any one of the bases the handset registered 1 Press OK key then using UP or DOWN key to choose SELECT BASE 2 Press OK key and the LCD displays BASE 1 3 Pres...

Страница 55: ...fully registered the PIN code screen will be displayed then enter the pin code LCD will display the base registered If the base is not found the handset will return to the previous registration state If the PIN code entered is invalid an error tone is sounded and the Handset will return to the previous registration state 4 2 5 Registration 5 OPERATION During pre dialing or one touch memory program...

Страница 56: ...s activated by pressing the INT key 1 In idle mode Press INT key once You will be prompted to select the number of the internal handset with which they wish to connect The destination handset will ring 2 Once the call is connected the display will be shown on both handsets 3 To end intercom mode either handset can hang up the call by pressing key 5 2 Programming Dialing from speed dial buttons 5 O...

Страница 57: ...t the key or accept the call The two internal handsets will be connected To complete the transfer of the call the initiating handset should be placed on the cradle and the external call will now be connected to the second handset 1 Answer the incoming call in the telephone 1 2 Then press INT key once in the telephone 1 3 The destination telephone 2 will ring 4 The telephone 2 needs to answer the c...

Страница 58: ...electronic products can cause interference with your phone Try installing your phone as far away from these types of electronic devices as possible wireless routers radios radio towers pager towers cell phones intercoms room monitors televisions personal computers kitchen appliances and other cordless phones I cannot get a dial tone Move the wireless handset closer to the telephone base You might ...

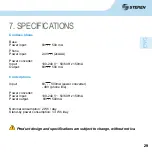
Страница 59: ... Hz 150mA Output 6V 500 mA Corded phone Input 6V 500mA power converter 48V phone line Power converter Power input 100 240 V 50 60 Hz 150mA Power output 6V 500mA Nominal consumption 2 Wh day Stand by power consumption 1 3 Wh day 7 SPECIFICATIONS Product design and specifications are subject to change without notice ...

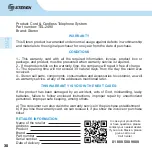
Страница 60: ...ty service at any of the addresses mentioned later THIS WARRANTY IS VOID IN THE NEXT CASES If the product has been damaged by an accident acts of God mishandling leaky batteries failure to follow enclosed instructions improper repair by unauthorized personnel improper safe keeping among others a The consumer can also claim the warranty service in the purchase establishment b If you lose the warran...

Страница 61: ...31 31 ...

Страница 62: ......

Отзывы: