-18-
ST1013 12" Jointer (Mfd. Since 3/16)
Assembly
To assemble jointer:
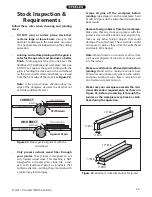
1. Align mounting holes on fence bracket and joint-
er, and fasten with M12-1.75 x 30 cap screws, flat
washers, and lock washers, as shown in Figure
12.
The fence is heavy. Seek assis-
tance when lifting it onto the
jointer stand.
Make sure the underside of the fence, the top of the
carriage, and top of the table have been thoroughly
cleaned of all the export grease before installing
the fence or the fence will not slide easily and will
get quickly gummed up when exposed to sawdust.
The fence has a keyway slot built into the underside
of it that fits over the key on the table. These keep
the fence perpendicular to the cutterhead during
adjustments.
Figure 12. Installing fence bracket.
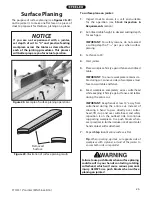
2. With the help of an assistant, lift the fence
assembly over the fence bracket, slip the sliding
bushing on the carriage into the slot on the
fence bracket, as shown in Figure 13, and make
sure the key and keyway slot fit snugly.
Figure 13. Installing fence assembly.
Bolt
Key
Slot
3. Secure bolt with 12mm flat washer and lock
nut.
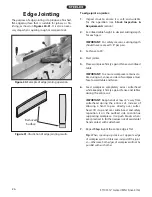
4. Remove both M10-1.5 x 25 cap screws and flat
washers securing pedestal to jointer base (see
Figure 14).
Figure 14. Location of pedestal mounting hardware.
Cap Screws
Содержание ST1013
Страница 32: ...30 ST1013 12 Jointer Mfd Since 3 16 Maintenance Notes DATE MAINTENTANCE PERFORMED...
Страница 53: ......


