background image

tooltip

tooltip

Installing the UniLink Elbow Block Hardware

9

Installation

2

STEP

Step One:

Ensure that the rail has a minimum of 3/4” of exposed track to allow
the

Elbow Block

mount to insert fully. Mount the

Elbow Block

with

the link adjustment screws facing out for accessibility.

Step Two:

Insert the

Elbow Block

mount into the seat rail and tighten the two

4mm (M8 thread) set screws.

1

STEP

Содержание UniLink Elbow Arm Pad Stop

Страница 1: ...UniLink Elbow Support Hardware Owner s Manual Upper Extremity Support tooltip tooltip...

Страница 2: ...of the devices discussed in the these instructions must be familiar with and understand all safety aspects of the devices mentioned In order for our products to be used successfully you must read and...

Страница 3: ...ion of product without written approval from Stealth Products LLC Any alteration or lack of serial number where applicable will automatically void all warranty Stealth Products LLC Is liable for repla...

Страница 4: ...on which if not avoided may result in minor to moderate injury and property damage WARNING Identifies a potential situation which if not avoided may result in severe injury death and property damage D...

Страница 5: ...ended Use 5 Features 5 Mounting 6 Preparations 6 Parts and Accessories Breakdown 6 Installation 6 11 Tools 6 Required Tools 6 Included Fasteners 7 Installation Plan 7 Optional Swing Away Hardware 7 As...

Страница 6: ...adjustment allow full surface contact with the user while accommodating upper extremity postural anomalies The hardware allows for multiple points of adjustment for a natural fit for the user By enco...

Страница 7: ...pads provide positioning and support with foam or gel material Tools Use the proper tools to install and adjust the Elbow Blocks to the desired position for the user Ensure all fasteners are adequate...

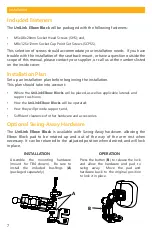
Страница 8: ...back mount or have a question outside the scope of this manual please contact your supplier or call us at the numbers listed on the inside cover Set up an installation plan before beginning the instal...

Страница 9: ...t ring over the 17mm ball ensuring that the ring is facing the correct direction so that the screw cap heads rest in the recesses Step Two Place the Elbow Block pad mount plate over the 17mm ball and...

Страница 10: ...ure that the rail has a minimum of 3 4 of exposed track to allow the Elbow Block mount to insert fully Mount the Elbow Block with the link adjustment screws facing out for accessibility Step Two Inser...

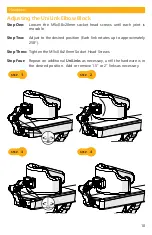
Страница 11: ...able Step Two Adjust to the desired position Each link rotates up to approximately 258 Step Three Tighten the M5x0 8x20mm Socket Head Screws Step Four Repeat on additional UniLinks as necessary until...

Страница 12: ...ir wheelchair These Arm Pad Stops are best used in combination with an Elbow Stop to prevent the arm from sliding off the armrest 3 STEP 2 STEP 1 STEP Step One Remove any hardware from the arm rest ra...

Страница 13: ...be adjusted to fit the client comfortably As a dealer explain and show the customer how you have executed the installation and explain the function Have the user test the position of the UniLink Elbow...

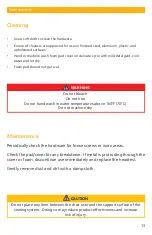
Страница 14: ...holstered surfaces Hand or machine wash foam pad cover on delicate cycle with mild detergent cool water and let dry Foam pad should not get wet Maintenance Periodically check the hardware for loose sc...

Страница 15: ...14 Notes...

Страница 16: ...cts LLC info stealthproducts com www stealthproducts com 800 965 9229 512 715 9995 104 John Kelly Drive Burnet TX 78611 P143D573 UL Elbow Block Owner s Manual pdf Revision Date Jul 9 2020 2020 Stealth...

Отзывы: